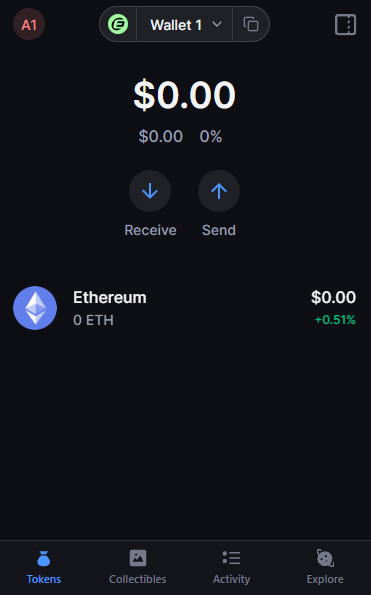

# Getting Started

## For New Eclipse Users Starting Out:

### [Set Up Your Eclipse Wallet](/readme/set-up-your-eclipse-wallet)

The first step is to create and configure your Eclipse wallet, your gateway to everything Eclipse.

### [Bridge Assets for Gas and Transactions](/readme/bridge-assets-for-gas-and-transactions)

Depending on your current blockchain experience, there are two main pathways (Ethereum or Solana) for bridging assets to Eclipse for gas.

### [Explore the Eclipse Ecosystem](/readme/explore-the-eclipse-ecosystem)

Once your wallet is set up and funded, you’re ready to explore! Browse and engage with various public Dapps built on Eclipse.

### [Engage with the Community on Discord](/readme/engage-with-the-community-on-discord)

Join the Eclipse community on Discord to connect with other Eclipse users, stay in the loop on new developments, events, exclusive opportunities, and discussions that shape the Eclipse ecosystem.


# 1. Set Up Your Eclipse Wallet

The first step is to create and configure your Eclipse wallet, your gateway to everything Eclipse. This wallet will allow you to interact seamlessly with all the decentralized applications (Dapps) within the ecosystem.

## Available Eclipse Wallets:

<table data-view="cards"><thead><tr><th></th><th></th><th></th><th></th><th data-hidden data-card-cover data-type="files"></th><th data-hidden data-card-target data-type="content-ref"></th></tr></thead><tbody><tr><td><strong>Backpack</strong></td><td></td><td></td><td></td><td><a href="/files/Eq0PUIQu0v48hofKYYJM">/files/Eq0PUIQu0v48hofKYYJM</a></td><td><a href="https://backpack.app/">https://backpack.app/</a></td></tr><tr><td><strong>Nightly</strong></td><td></td><td></td><td></td><td><a href="/files/5t5W8QsHwGrj3OaUm8us">/files/5t5W8QsHwGrj3OaUm8us</a></td><td><a href="https://nightly.app/">https://nightly.app/</a></td></tr><tr><td>OKX</td><td></td><td></td><td></td><td><a href="/files/EoKq47dIQNh0M3Vj5Wb0">/files/EoKq47dIQNh0M3Vj5Wb0</a></td><td><a href="https://www.okx.com/web3/wallet/eclipse">https://www.okx.com/web3/wallet/eclipse</a></td></tr><tr><td>Bitget Wallet</td><td></td><td></td><td></td><td><a href="/files/Lj1Uweq56bMzkoPCEru6">/files/Lj1Uweq56bMzkoPCEru6</a></td><td></td></tr><tr><td>ByBit Wallet</td><td></td><td></td><td></td><td><a href="/files/T3ancW7z3yAFKYnWEQqK">/files/T3ancW7z3yAFKYnWEQqK</a></td><td></td></tr><tr><td><strong>Salmon</strong></td><td></td><td></td><td></td><td><a href="/files/2H4ukNE2Jwg73HXNy8hh">/files/2H4ukNE2Jwg73HXNy8hh</a></td><td><a href="https://salmonwallet.io/">https://salmonwallet.io/</a></td></tr><tr><td>Token Pocket</td><td></td><td></td><td></td><td><a href="/files/AAkIv44HYkMunrm65K8t">/files/AAkIv44HYkMunrm65K8t</a></td><td><a href="https://help.tokenpocket.pro/en/wallet-operation/how-to-create-a-wallet/eclipse">https://help.tokenpocket.pro/en/wallet-operation/how-to-create-a-wallet/eclipse</a></td></tr></tbody></table>


# 2. Bridge Assets for Gas and Transactions

Depending on your current blockchain experience, there are two main pathways (Ethereum or Solana) for bridging assets to Eclipse for gas.

With our community evenly split between Ethereum and Solana, we are committed to delivering a smooth onboarding experience regardless of where you bridge from.

## **Existing Ethereum Users**:

You can bridge ETH from Ethereum to use as gas on Eclipse:

<table data-view="cards"><thead><tr><th></th><th></th><th></th><th data-hidden data-card-cover data-type="files"></th><th data-hidden data-card-target data-type="content-ref"></th></tr></thead><tbody><tr><td><strong>Eclipse Canonical Bridge</strong></td><td>Bridge ETH from Ethereum mainnet to Eclipse.</td><td></td><td><a href="/files/3nsB63Gr0sCleoKBqsvk">/files/3nsB63Gr0sCleoKBqsvk</a></td><td><a href="https://app.eclipse.xyz/bridge">https://app.eclipse.xyz/bridge</a></td></tr><tr><td>Relay Bridge</td><td>Bridge from Ethereum L2s to Eclipse</td><td></td><td><a href="/files/2eoOue04XlnCZDu2kild">/files/2eoOue04XlnCZDu2kild</a></td><td><a href="https://www.relay.link/bridge/eclipse">https://www.relay.link/bridge/eclipse</a></td></tr><tr><td><strong>Owlto Finance Bridge</strong>e</td><td>Bridge from Ethereum L2s to Eclipse.</td><td></td><td><a href="/files/hbWXrLqR0wxS1gEzeIBH">/files/hbWXrLqR0wxS1gEzeIBH</a></td><td><a href="https://owlto.finance/">https://owlto.finance/</a></td></tr><tr><td>Orbiter Finance Bridge</td><td>Bridge from Ethereum L2s to Eclipse.</td><td></td><td><a href="/files/Rbj77tO3oSZ2lqJ2qzjn">/files/Rbj77tO3oSZ2lqJ2qzjn</a></td><td><a href="https://www.orbiter.finance/">https://www.orbiter.finance/</a></td></tr><tr><td><strong>Gas.Zip Bridge</strong></td><td>Bridge ETH from Ethereum L2s to Eclipse.</td><td></td><td><a href="/files/DTMqXBnWIXgfGA8ocKQL">/files/DTMqXBnWIXgfGA8ocKQL</a></td><td><a href="https://www.gas.zip/">https://www.gas.zip/</a></td></tr><tr><td><strong>Mini Bridge</strong></td><td>Bridge from Ethereum L2s to Eclipse</td><td></td><td><a href="/files/QAFipBLlP3KqAjEhiY86">/files/QAFipBLlP3KqAjEhiY86</a></td><td><a href="https://minibridge.chaineye.tools/">https://minibridge.chaineye.tools/</a></td></tr></tbody></table>

## **Existing Solana Users**:

Introducing the Eclipse Gas Station: Swap SOL and USDC for ETH gas without needing to bridge from Ethereum mainnet.

{% stepper %}
{% step %}

#### Use Hyperlane to bridge SOL or USDC from Solana to Eclipse:

<table data-card-size="large" data-view="cards"><thead><tr><th></th><th></th><th></th><th data-hidden data-card-cover data-type="files"></th><th data-hidden data-card-target data-type="content-ref"></th></tr></thead><tbody><tr><td><strong>Hyperlane Nexus Bridge</strong></td><td>Bridge from Solana &#x26; Ethereum to Eclipse.</td><td></td><td><a href="/files/zx0yVWP3IbkhBc6qpa2Q">/files/zx0yVWP3IbkhBc6qpa2Q</a></td><td><a href="https://www.usenexus.org/">https://www.usenexus.org/</a></td></tr></tbody></table>
{% endstep %}

{% step %}

#### Visit the Eclipse Gas Station to acquire ETH on Eclipse for transaction fees using your bridged SOL or USDC:

{% embed url="<https://app.eclipse.xyz/gas-station>" %}
Eclipse Gas Station
{% endembed %}
{% endstep %}
{% endstepper %}


# 3. Explore the Eclipse Ecosystem

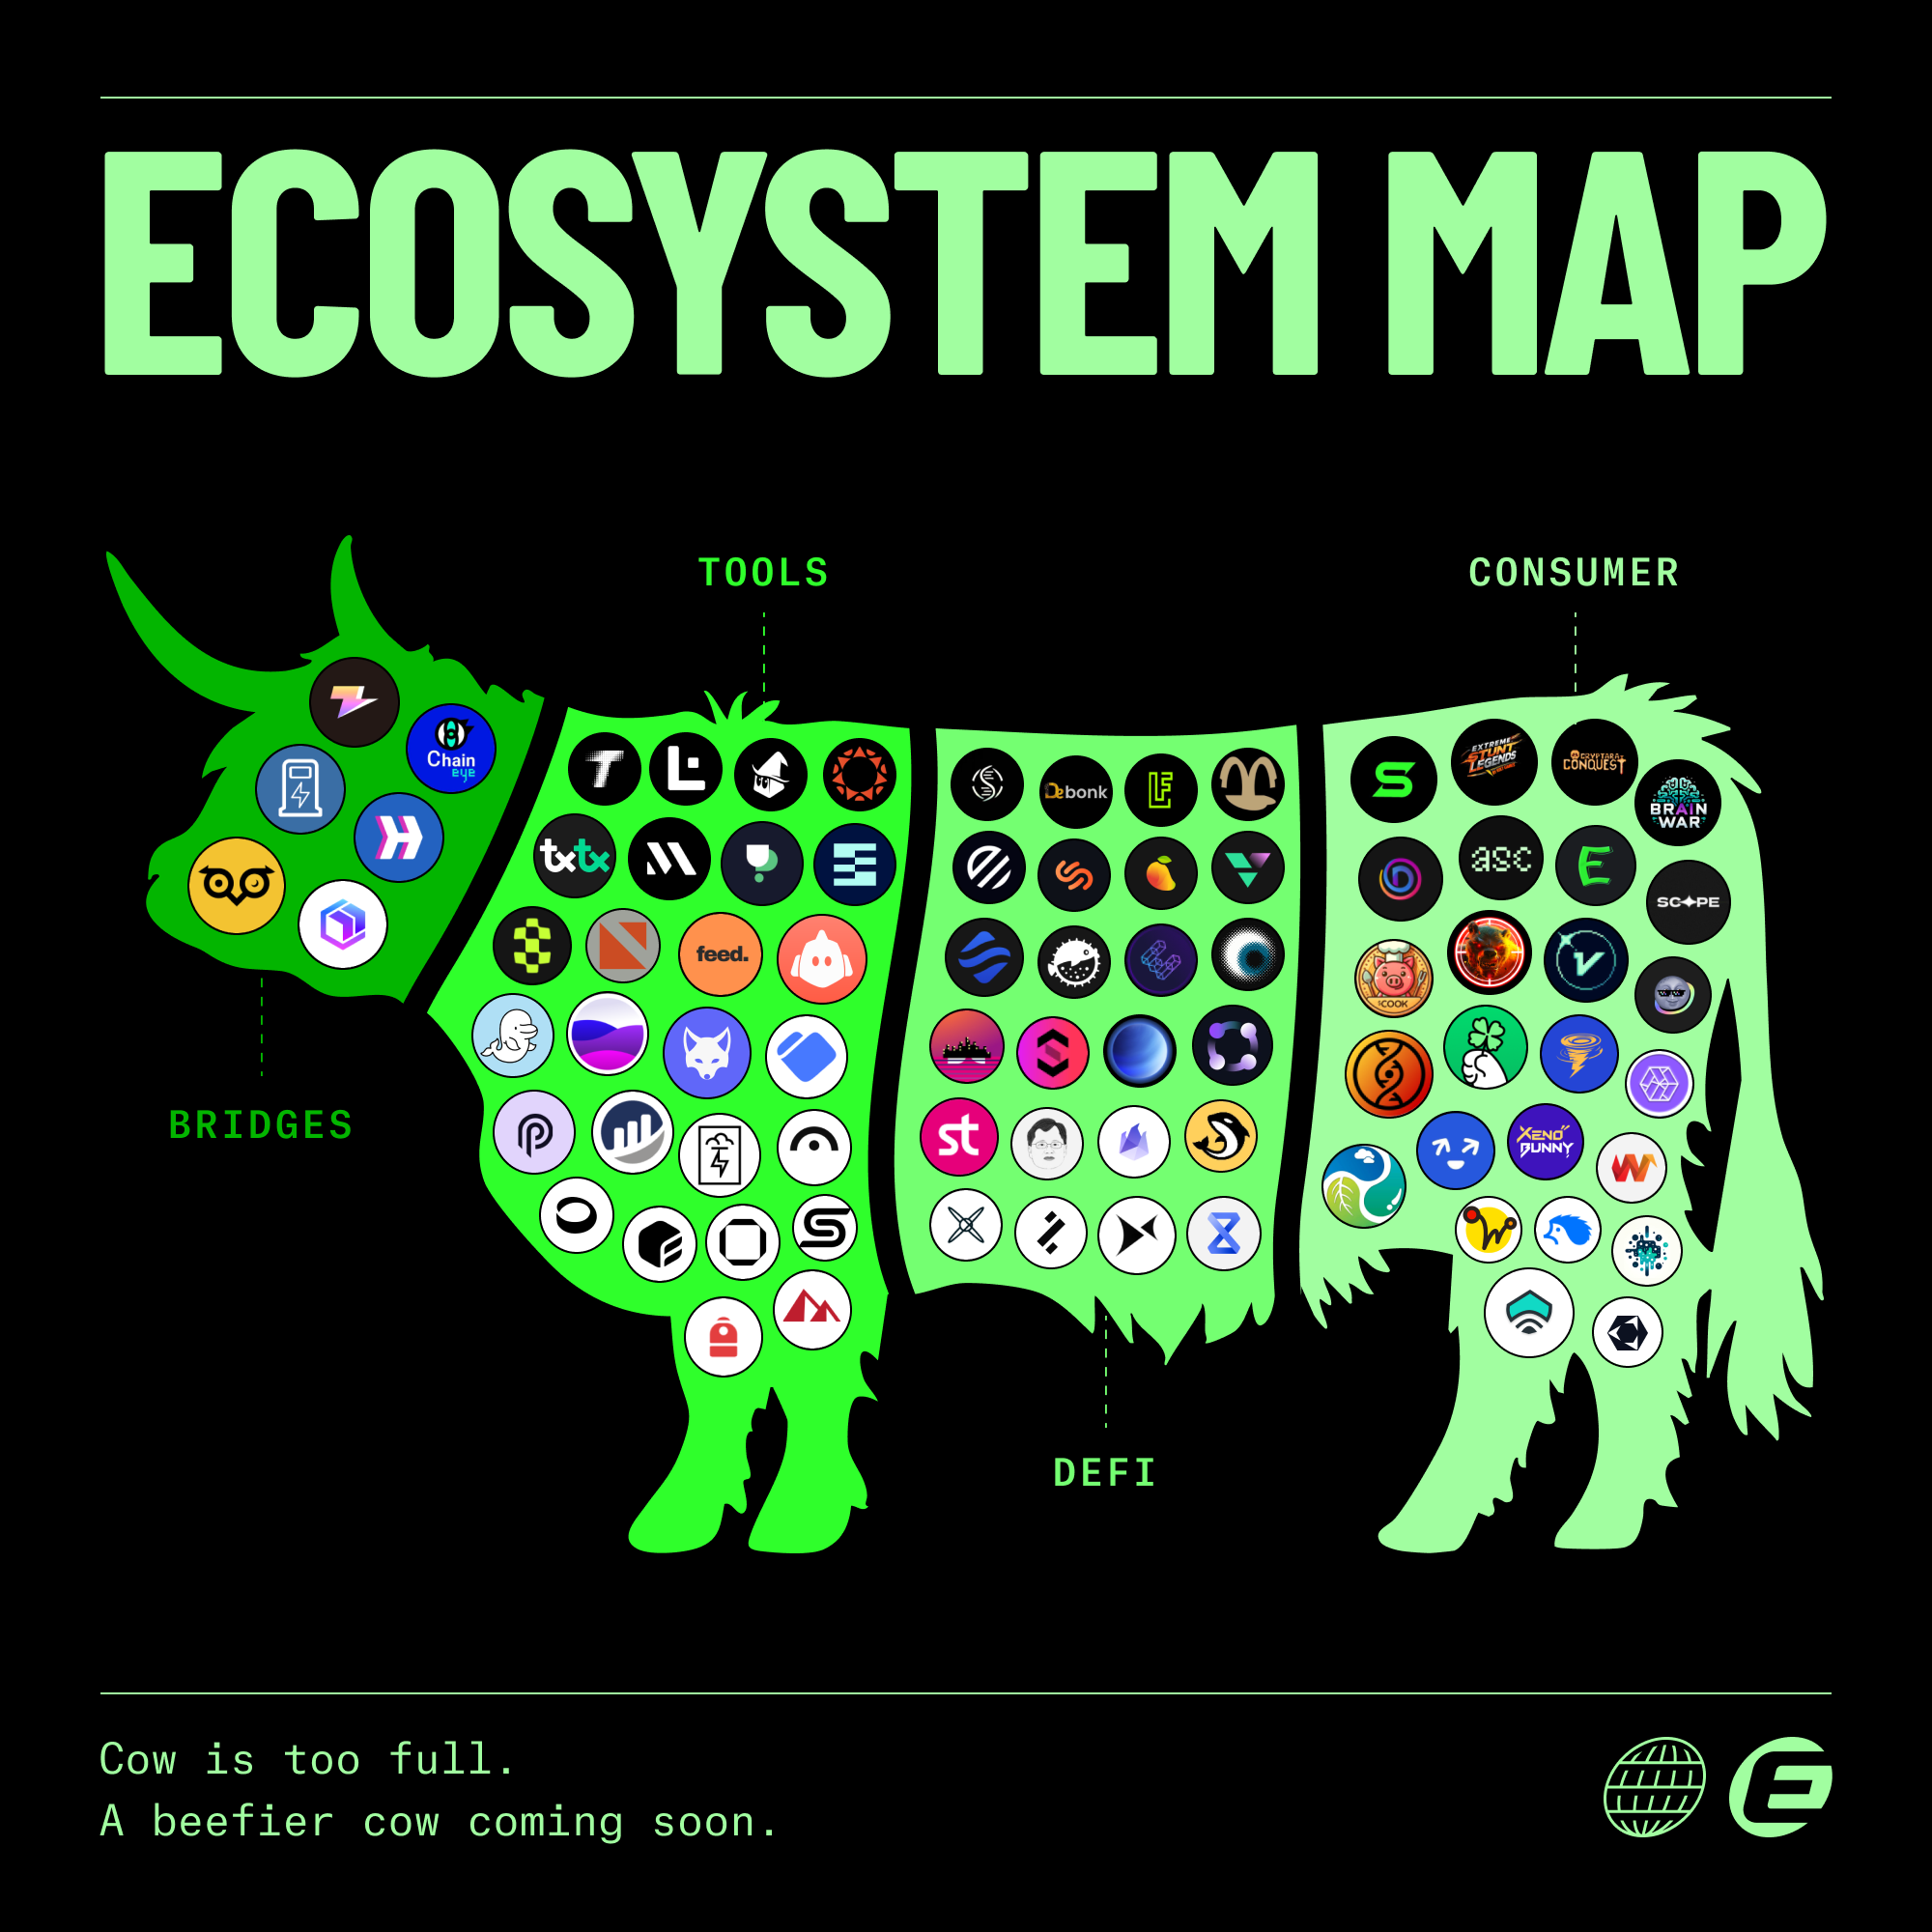
Once your wallet is set up and funded, you’re ready to explore! Browse and engage with various public Dapps built on Eclipse. Discover new projects, tools, and communities growing within the Eclipse ecosystem!

{% embed url="<https://www.eclipse.xyz/ecosystem>" %}
Eclipse Ecosystem Page
{% endembed %}

<figure><img src="/files/bM8rakpYdLMz4RYXBZyC" alt=""><figcaption></figcaption></figure>


# 4. Engage with the Community on Discord

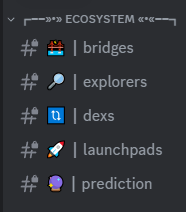
Join the Eclipse community on Discord to stay updated, connect with other Eclipse users, and access all relevant ecosystem links, Dapp channels, and updates in real time.&#x20;

<figure><img src="/files/lmMbtsNEtYRYJs2MTmZx" alt=""><figcaption><p>Eclipse Discord Channels with Dapps/Ecosystem Links</p></figcaption></figure>

Engaging with the community will help you stay in the loop on new developments, Dapps, events, exclusive opportunities, and discussions that shape the Eclipse ecosystem.

<table data-card-size="large" data-view="cards"><thead><tr><th></th><th></th><th></th><th data-hidden data-card-cover data-type="files"></th><th data-hidden data-card-target data-type="content-ref"></th></tr></thead><tbody><tr><td><strong>Join the Eclipse Discord</strong></td><td>We have an active developer community on discord that can support you.</td><td></td><td><a href="/files/BNPZIjTxLtyau1M9ZOBr">/files/BNPZIjTxLtyau1M9ZOBr</a></td><td><a href="https://discord.gg/eclipse-fnd">https://discord.gg/eclipse-fnd</a></td></tr><tr><td><strong>Eclipse Blog</strong></td><td>Check out the Eclipse Blog for more technical articles &#x26; updates.</td><td></td><td><a href="/files/g63dkII5QA370LCLHhmd">/files/g63dkII5QA370LCLHhmd</a></td><td><a href="https://www.eclipse.xyz/blog">https://www.eclipse.xyz/blog</a></td></tr></tbody></table>


# User Resources

List of available resources for users to enjoy a better user experience on Eclipse:

<details>

<summary>Eclipse App</summary>

Access the Eclipse Canonical Bridge, Eclipse Gas Station, tETH Minter, EclipseScan, and Eclipse Ecosystem page all from one application:

<https://app.eclipse.xyz/>

</details>

<details>

<summary>Eclipse Bridges</summary>

Official & 3rd party bridges supporting Eclipse:

* Official Eclipse Bridge: <https://bridge.eclipse.xyz/>
* tETH Mint/Redeem: <https://teth.eclipse.xyz/>
* Hyperlane Bridge: <https://www.usenexus.org/>
* Stride Bridge: <https://bridge.stride.zone/>
* Owlto Bridge: <https://owlto.finance/>
* Orbiter: <https://www.orbiter.finance/>
* Gas.zip: <https://www.gas.zip/>
* Mini Bridge: <https://minibridge.chaineye.tools/>

</details>

<details>

<summary>Eclipse Block Explorers</summary>

Official & 3rd Party explorers supporting Eclipse:

* [EclipseScan](https://eclipsescan.xyz/) — Official explorer
* [EclipseDev](https://docs.eclipse.xyz/developers/) — Deprecated / not actively maintained
* [Eclipse XRAY](https://www.eclipsexray.id/)&#x20;

</details>

<details>

<summary>Eclipse Status Page</summary>

This page monitors the uptime of key Eclipse infrastructure components, provides real-time updates, including active incidents, ongoing maintenance, scheduled maintenance, and a detailed history of past events.

* <https://status.eclipse.xyz/>

</details>

<details>

<summary>Eclipse Metrics</summary>

List of available dashboard measuring various eclipse metrics:

* "State of Eclipse" Dashboard: <https://flipsidecrypto.xyz/flipsideteam/state-of-eclipse-IbQKJw>
* Eclipse TVL Dashboard: <https://flipsidecrypto.xyz/hkey/eclipse-tvl-JZl_oI>
* Eclipse Network Bridging Insights: <https://flipsidecrypto.xyz/hbd1994/eclipse-network-bridging-insights-Vza-ad>

</details>

<details>

<summary>Backpack "Explore" Tab</summary>

Feel free to interact with the Dapps listed under the "Explore" tab within the Backpack Wallet. It provides quick access to Dapp links:

![](/files/Vy9wW0fHjKGYxJAEKJvM)

</details>

<details>

<summary>EclipseGPT Support</summary>

Our chatbot is here to assist you with any questions you have about Eclipse. Feel free to ask!

<https://eclipsegpt.vercel.app/>

</details>

<details>

<summary>Eclipse Feedback Boards</summary>

Find any issues or have feature suggestions? Check out our feedback site.

<https://eclipse.upvoty.com/>

</details>


# tETH

{% hint style="warning" %}
**tETH is being sunset. Users will only be able to redeem tETH** [**https://app.eclipse.xyz/mint-teth**](https://app.eclipse.xyz/mint-teth) **and will not be able to mint new tETH.**
{% endhint %}

## Turbo ETH (tETH)

Eclipse is launching a unified restaking token, tETH, in partnership with [Nucleus](https://twitter.com/nucleusearn). tETH combines the largest yield-generating protocols on Ethereum into one easy-to-use default yield token.&#x20;

{% embed url="<https://teth.eclipse.xyz/>" %}

## Overview

Users can now earn restaking rewards without the complexity of fragmented liquidity, time, and attention. Onchain users finally have an index LRT token that diversifies risk and maximizes reward exposure. This is just the beginning of our LRT hub, dedicated to simplifying the process of earning rewards for users and unifying liquidity across LRTs.&#x20;

The five LRTs that users can deposit to mint tETH are:

1. Wrapped ETH - WETH
2. EtherFi - weETH
3. Renzo Protocol - ezETH
4. Swell Network - rswETH
5. Dinero - apxETH
6. ~~Puffer Finance - pufETH~~ (temporarily discontinued)

## tETH Mechanisms

### **Minting and Bridging:**&#x20;

* Eligible LRT deposits mint tETH on Ethereum mainnet, then bridge to Eclipse via Hyperlane. tETH is an exchange-rate-bearing token, similar to Compound cTokens and Lido’s wstETH.
* *If you receive tETH on **Ethereum**, you can redeem it for **WETH** on Ethereum* [*here*](https://app.eclipse.xyz/mint-teth) *under the **Redeem** tab.*

{% hint style="danger" %}
Note:\
\- **Do not** swap tETH on a DEX on **Ethereum**, you will incur massive slippage.\
\- Redemptions are not instant and can take **up to** 7 days.
{% endhint %}

### Yield and Rewards:

* ETH-based yield increases the exchange rate over time (barring slashing events).
* Non-ETH rewards (e.g., AVS rewards) don’t impact the exchange rate; users claim these separately through a claim interface.
* Rewards are periodically mapped to holder addresses and remain claimable while holding the asset.

### Redemption Options \[COMING SOON]:

1. Standard Redemption: Redeem tETH for any LRT on Ethereum mainnet at full value.
2. Expedited Redemption: Solvers fill orders for quicker redemption on Ethereum mainnet or Eclipse.

### Exchange Rate Oracle:

* Tracks the tETH to ETH rate by querying underlying ETH balances of LRTs.
* Used during minting and redemption, initially managed by Nucleus, with plans for future decentralization.
* In case of an LRT price depeg, the oracle only tracks ETH balance, making tETH unaffected by market volatility.
* For slashing events, the oracle reflects the slashed ETH, with loss capped to the affected LRT’s exposure in the pool.


# tUSD

{% hint style="warning" %}
**tUSD is being sunset. Users will only be able to redeem tUSD** [**https://app.eclipse.xyz/mint-tusd**](https://app.eclipse.xyz/mint-tusd) **and will not be able to mint new tUSD.**
{% endhint %}

## Turbo USD (tUSD)

tUSD is a yield-bearing stablecoin on Eclipse that earns yield from short-term U.S. Treasury Bills. It aggregates returns from Centrifuge’s JTRSY, Superstate’s USTB, and M^0, offering users a stable, appreciating asset backed by real-world treasuries.

## Overview

Users can now earn U.S. Treasury Bill Yield on a stablecoin natively on Eclipse through tUSD.

tUSD is equally backed (33.3% each) by:

* Centrifuge's JTRSY: A tokenized fund investing in short-term U.S. Treasury Bills.
* Superstate's USTB: A fund focusing on short-duration U.S. Treasury Bills.
* M^0: Infrastructure that powers builders of safe, programmable, interoperable stablecoins with U.S. Treasury Bills as collateral.

{% hint style="success" %}
Contract Address: [27Kkn8PWJbKJsRZrxbsYDdedpUQKnJ5vNfserCxNEJ3R](https://eclipsescan.xyz/token/27Kkn8PWJbKJsRZrxbsYDdedpUQKnJ5vNfserCxNEJ3R)
{% endhint %}

## Minting and Redeeming

Users can mint the stablecoin by depositing USDC on Ethereum at [app.eclipse.xyz/mint-tusd](http://app.eclipse.xyz/mint-tusd)\
&#x20;or swapping from USDC on Eclipse at [amm.skatechain.org/swap](http://amm.skatechain.org/swap).

Similarly, users can redeem the stablecoin for USDC on Ethereum at [app.eclipse.xyz/mint-tusd](http://app.eclipse.xyz/mint-tusd) or swap instantaneously from tUSD to USDC on Eclipse at [amm.skatechain.org/swap](http://amm.skatechain.org/swap).

{% hint style="warning" %}
**Note**: it can take up to 7 days to redeem via [app.eclipse.xyz/mint-tusd](http://app.eclipse.xyz/mint-tusd)
{% endhint %}

### Yield

Yield is accrued over time from U.S. Treasury Bills.

The stablecoin operates on an exchange rate model, similar to Compound's cTokens, where its value appreciates over time based on the yields from the underlying U.S. Treasuries.


# $ES

The token has been deployed on Eclipse, Ethereum and Solana mainnet at the following addresses:

* Eclipse Mainnet: `GnBAskb2SQjrLgpTjtgatz4hEugUsYV7XrWU1idV3oqW`
* Ethereum Mainnet: `0x6055Dc6Ff1077eebe5e6D2BA1a1f53d7Ef8430dE`
* Solana Mainnet: `BqPqrrQuoQXFGGEAEMnPmDgZ6RWQCajWnY3V6Yp4DZWP`&#x20;

{% hint style="success" %}
Bridge $ES using <https://usenexus.org/>
{% endhint %}

CoinMarketCap: <https://coinmarketcap.com/currencies/eclipse-es/>\
CoinGecko: <https://www.coingecko.com/en/coins/eclipse-2><br>

## Legal and Regulatory Considerations

[MiCAR White Paper](https://docs.google.com/document/d/1H5SRXogE9uIrrZD4DMkKUlX_a8Gfov8s/edit?usp=sharing\&ouid=102378355315198553908\&rtpof=true\&sd=true)


# External Documentation

The following is a list of external user resources:

* [Celestia: Learn Modular](https://celestia.org/learn/)
* [Introduction to the EVM](https://ethereum.org/en/developers/docs/ethereum-stack/)
* [Install Solana Suite](https://docs.solanalabs.com/cli/install)
* [What are Solana Programs?](https://solana.com/docs/core/programs)
* [Pyth Network](https://docs.pyth.network/home)


# Disclosures

## Terms of Use

{% embed url="<https://www.eclipse.xyz/terms>" %}

## Privacy Policy

{% embed url="<https://www.eclipse.xyz/privacy-policy>" %}

## Cookie Notice

{% embed url="<https://www.eclipse.xyz/cookie-policy>" %}

## Responsible Disclosure

Our [bug bounty](broken://pages/5jijXXawPCPaeMFg19sN) is now listed on Immunefi. Start taking a look and wait for the launch to report vulnerabilities!

* Do not disclose vulnerabilities publicly or by executing them against a production network. If you do, not only will you be putting users at risk, but you will also forfeit your right to a reward.
* Do not disclose the vulnerability publicly, for example by filing a public ticket or Github issue.
* Do not test the vulnerability on a publicly available network, either the testnet or the mainnet.


# Getting Started

## What Should I Read?

* **For Developers Starting Out:**
  * [ ] Begin with the  [Quick Start](/developers/tutorials-and-guides/developer-guides/quick-start-hello-world) guide to walk through deploying a smart contract.
  * [ ] Proceed to set up your [wallet](/developers/wallet).
  * [ ] [Review the differences](/developers/differences-between-eclipse-and-solana) between Eclipse and Solana.
  * [ ] [Modify a Solana dApp](/developers/tutorials-and-guides/developer-guides/modifying-a-solana-dapp-to-support-eclipse-chomping-glass) to use Eclipse.
  * [ ] Explore the [**Eclipse Testnet**](/developers/tutorials-and-guides/developer-guides/quick-start-hello-world/testnet) by bridging using our [canonical bridge](/developers/bridges/eclipse-canonical-bridge).
  * [ ] Make sure to register any deployed programs into the [Eclipse Program Registry](/developers/eclipse-program-registry-guide).
  * [ ] Bridge to Eclipse mainnet using the [Eclipse Deposit CLI](/developers/bridges/eclipse-canonical-bridge) or the official mainnet bridge site:  <https://bridge.eclipse.xyz/>
* **For Those Interested in Eclipse's Architecture:**
  * [ ] Directly move to the sections detailing the **architecture of** [**Eclipse Mainnet**](/developers/eclipse-architecture/what-is-eclipse-mainnet) and the underlying design decisions.

## What If I Need More Help?

You can join our developer community on discord, check out more content on the Eclipse blog, provide feedback on our community boards, and check out our developer tutorial AMAs on YouTube.

<table data-view="cards"><thead><tr><th></th><th></th><th></th><th data-hidden data-card-cover data-type="files"></th><th data-hidden data-card-target data-type="content-ref"></th></tr></thead><tbody><tr><td><strong>Join the Eclipse Discord</strong></td><td>We have an active developer community on discord that can support you.</td><td></td><td><a href="/files/BNPZIjTxLtyau1M9ZOBr">/files/BNPZIjTxLtyau1M9ZOBr</a></td><td><a href="https://discord.gg/eclipse-fnd">https://discord.gg/eclipse-fnd</a></td></tr><tr><td><strong>Eclipse Blog</strong></td><td>Check out the Eclipse Blog for more technical articles &#x26; updates.</td><td></td><td><a href="/files/g63dkII5QA370LCLHhmd">/files/g63dkII5QA370LCLHhmd</a></td><td><a href="https://www.eclipse.xyz/blog">https://www.eclipse.xyz/blog</a></td></tr><tr><td><strong>Bug Bounty Program</strong></td><td>Review code, prevent hacks, and get paid!</td><td></td><td><a href="/files/tneaGgiQNpd469r4ndnc">/files/tneaGgiQNpd469r4ndnc</a></td><td><a href="https://immunefi.com/bug-bounty/eclipse/information/">https://immunefi.com/bug-bounty/eclipse/information/</a></td></tr><tr><td><strong>Eclipse Feedback Boards</strong></td><td>Find any issues or have feature suggestions? Check out our feedback site.</td><td></td><td><a href="/files/EZ2mM19ejRj10TAzKRMb">/files/EZ2mM19ejRj10TAzKRMb</a></td><td><a href="https://eclipse.upvoty.com/">https://eclipse.upvoty.com/</a></td></tr><tr><td><strong>Eclipse YouTube</strong></td><td>Check out our technical community AMAs if you need additional help as a developer.</td><td></td><td><a href="/files/dl2rKv2xenPurKzCRGzJ">/files/dl2rKv2xenPurKzCRGzJ</a></td><td><a href="https://www.youtube.com/@EclipseLaboratories">https://www.youtube.com/@EclipseLaboratories</a></td></tr></tbody></table>


# Wallet

{% hint style="info" %}
You will need a wallet that is compatible with Eclipse.
{% endhint %}

{% content-ref url="/pages/ifKBnbqmk0WeFIhEvEx3" %}
[Mainnet Wallets](/developers/wallet/mainnet-wallets)
{% endcontent-ref %}

{% content-ref url="/pages/XldfRoRMTm4YeNcPC5LF" %}
[Testnet & Devnet Wallets](/developers/wallet/testnet-and-devnet-wallets)
{% endcontent-ref %}


# Mainnet Wallets

<table data-view="cards"><thead><tr><th></th><th></th><th></th><th></th><th data-hidden data-card-cover data-type="files"></th><th data-hidden data-card-target data-type="content-ref"></th></tr></thead><tbody><tr><td><strong>Backpack</strong></td><td></td><td></td><td></td><td><a href="/files/Eq0PUIQu0v48hofKYYJM">/files/Eq0PUIQu0v48hofKYYJM</a></td><td><a href="https://backpack.app/">https://backpack.app/</a></td></tr><tr><td><strong>Nightly</strong></td><td></td><td></td><td></td><td><a href="/files/5t5W8QsHwGrj3OaUm8us">/files/5t5W8QsHwGrj3OaUm8us</a></td><td><a href="https://nightly.app/">https://nightly.app/</a></td></tr><tr><td>OKX</td><td></td><td></td><td></td><td><a href="/files/EoKq47dIQNh0M3Vj5Wb0">/files/EoKq47dIQNh0M3Vj5Wb0</a></td><td><a href="https://www.okx.com/web3/wallet/eclipse">https://www.okx.com/web3/wallet/eclipse</a></td></tr><tr><td>Bitget Wallet</td><td></td><td></td><td></td><td><a href="/files/Lj1Uweq56bMzkoPCEru6">/files/Lj1Uweq56bMzkoPCEru6</a></td><td></td></tr><tr><td>ByBit Wallet</td><td></td><td></td><td></td><td><a href="/files/T3ancW7z3yAFKYnWEQqK">/files/T3ancW7z3yAFKYnWEQqK</a></td><td></td></tr><tr><td>Token Pocket</td><td></td><td></td><td></td><td><a href="/files/AAkIv44HYkMunrm65K8t">/files/AAkIv44HYkMunrm65K8t</a></td><td><a href="https://help.tokenpocket.pro/en/wallet-operation/how-to-create-a-wallet/eclipse">https://help.tokenpocket.pro/en/wallet-operation/how-to-create-a-wallet/eclipse</a></td></tr><tr><td><strong>Salmon</strong></td><td></td><td></td><td></td><td><a href="/files/2H4ukNE2Jwg73HXNy8hh">/files/2H4ukNE2Jwg73HXNy8hh</a></td><td><a href="https://salmonwallet.io/">https://salmonwallet.io/</a></td></tr><tr><td></td><td></td><td></td><td></td><td></td><td></td></tr></tbody></table>

## Backpack Wallet

Backpack wallet is now supporting Eclipse Mainnet.

* You can download the Backpack wallet at: <https://backpack.app/>

### Creating a new wallet on backpack for Eclipse Mainnet

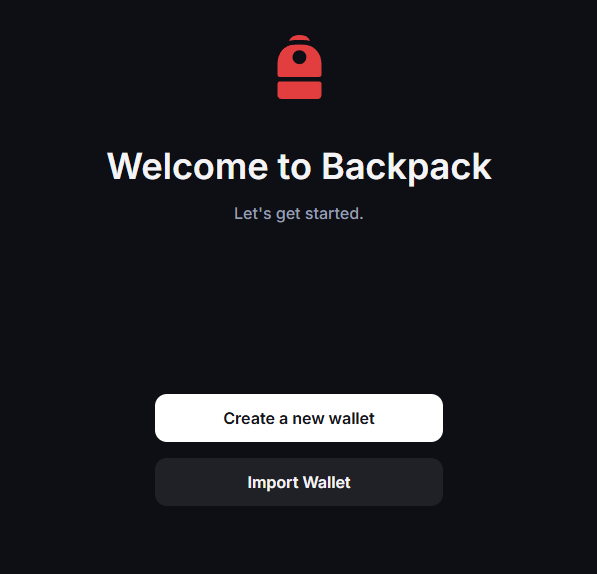
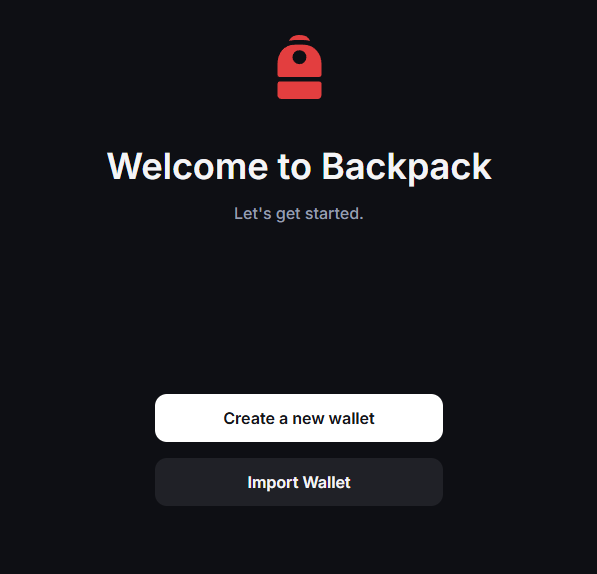
1. After adding the backpack wallet extension click on "**Create a new wallet**"

   <figure><img src="/files/2mBoNMRXXyIcv4vkEa4d" alt=""><figcaption></figcaption></figure>
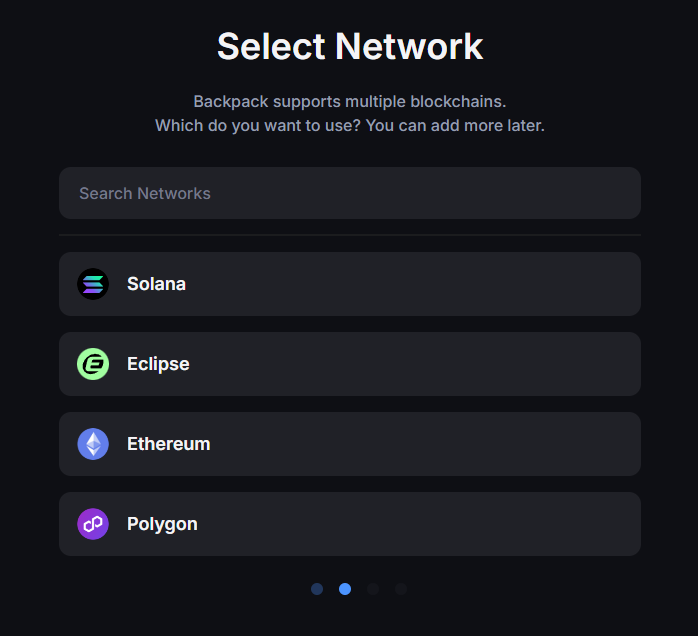
2. Select the "**Eclipse**" Network.

   <figure><img src="/files/XyhW7APEzMMgWoYit4RA" alt=""><figcaption></figcaption></figure>
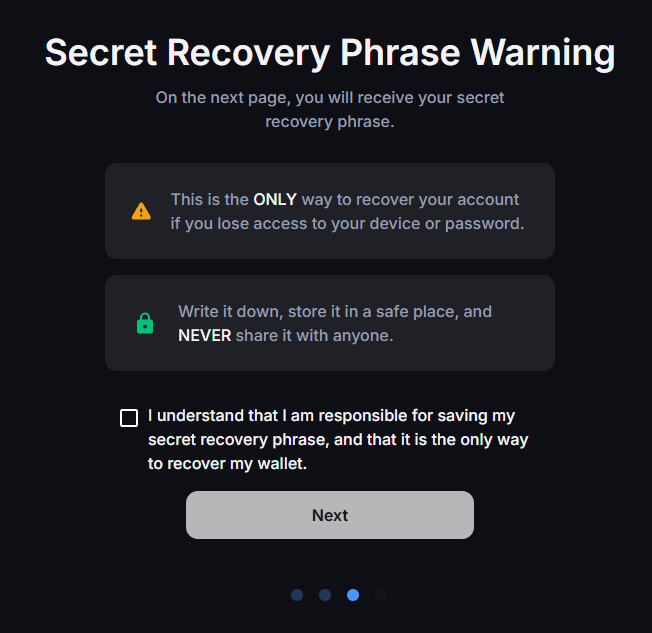
3. Complete the wallet creations steps within backpack.\
   &#x20;

   <figure><img src="/files/EVqCeFmOipj0ZLRHRYB9" alt=""><figcaption></figcaption></figure>
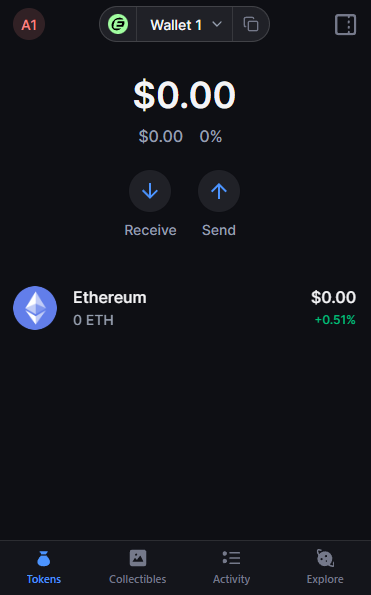
4. You are done creating a new wallet within backpack for Eclipse mainnet.<br>

   <figure><img src="/files/W1IIqCJEA1A1oaBXqoGF" alt=""><figcaption></figcaption></figure>

### Importing a new wallet on backpack for Eclipse Mainnet

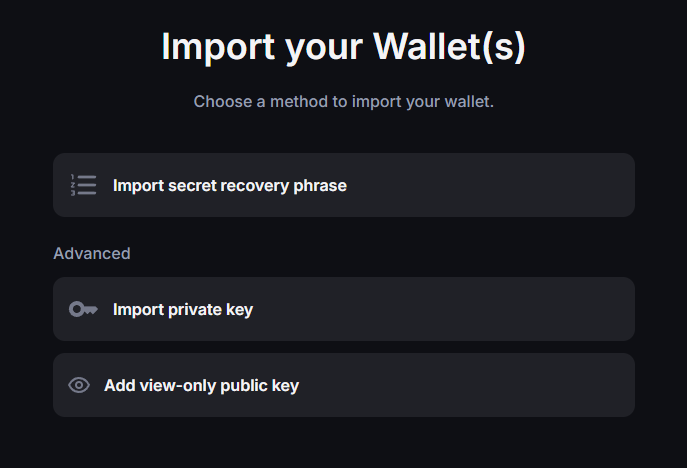
1. After adding the backpack wallet extension click on "**Import Wallet**"

   <figure><img src="/files/BCuyzNPf0rBHR241gWP0" alt=""><figcaption></figcaption></figure>
2. Select "**Eclipse**"<br>

   <figure><img src="/files/XyhW7APEzMMgWoYit4RA" alt=""><figcaption></figcaption></figure>
3. Complete the wallet import steps within backpack.<br>

   <figure><img src="/files/845J0r5vaRPBK6fmd9mH" alt=""><figcaption></figcaption></figure>
4. You are done importing your wallet within backpack to interact with Eclipse mainnet.<br>

   <figure><img src="/files/Ferm153bqOd1VqZf5FJJ" alt=""><figcaption></figcaption></figure>

### Adding the "Eclipse Mainnet" Network for current Backpack users

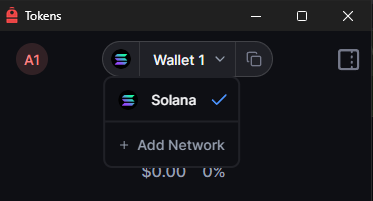
1. Click on "**Add Network**" found at the top of the wallet pop-up window after clicking on the logo of the current network you are connected to.

   <figure><img src="/files/TXoAycfAnSU7Zx9rPAmV" alt=""><figcaption></figcaption></figure>
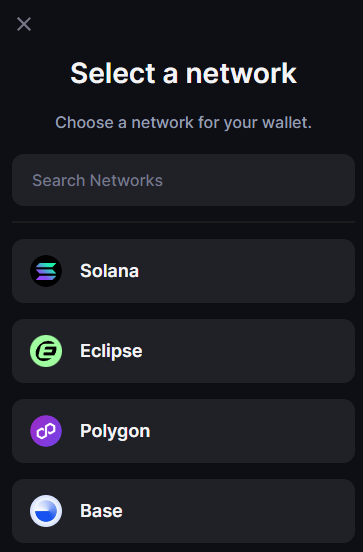
2. &#x20;Select "**Eclipse**"<br>

   <figure><img src="/files/GO6Vn7IXSQRb87ZCHtra" alt=""><figcaption></figcaption></figure>
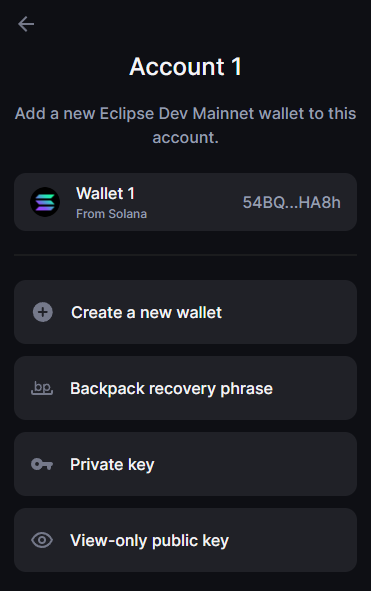
3. Select your existing SVM backpack wallet, create or import an existing wallet.

   <figure><img src="/files/2p36UWdsq7YEu8hkEjOl" alt=""><figcaption></figcaption></figure>
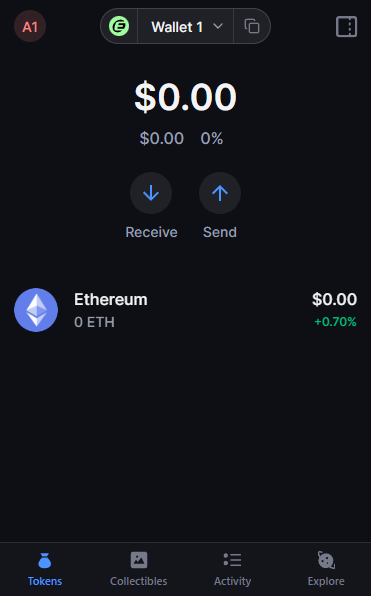
4. You are done adding the Eclipse Mainnet network in backpack.

   <figure><img src="/files/J7CcppdM1i1pt4iDLigC" alt=""><figcaption></figcaption></figure>

### MetaMask Snap Wallet \[Coming Soon]

Metamask Snap will soon be supporting Eclipse Mainent. Stay tuned on X and on the Eclipse discord for the official release date.


# Testnet & Devnet Wallets

{% hint style="info" %}
You will need a wallet that is compatible with Eclipse Testnet and Devnet.
{% endhint %}

## MetaMask Snaps&#x20;

### Installation

If you already have MetaMask installed, then installing the MetaMask Snap via a dApp that supports the Snap is trivial. The UI for the wallet adapter will guide you.

## Salmon Wallet

### Installation

In this walkthrough, we'll download Eclipse's fork of the Salmon wallet. This wallet is only to be used for devnet purposes until it is fully audited. These instructions work on Chrome or any Chromium-based browser like Brave or Opera.

1. Download **build-extension\_v0.4.2-alpha.zip** from the [GitHub repo](https://github.com/Eclipse-Laboratories-Inc/eclipse-wallet/releases/tag/v0.4.2-alpha)
2. Unzip the file
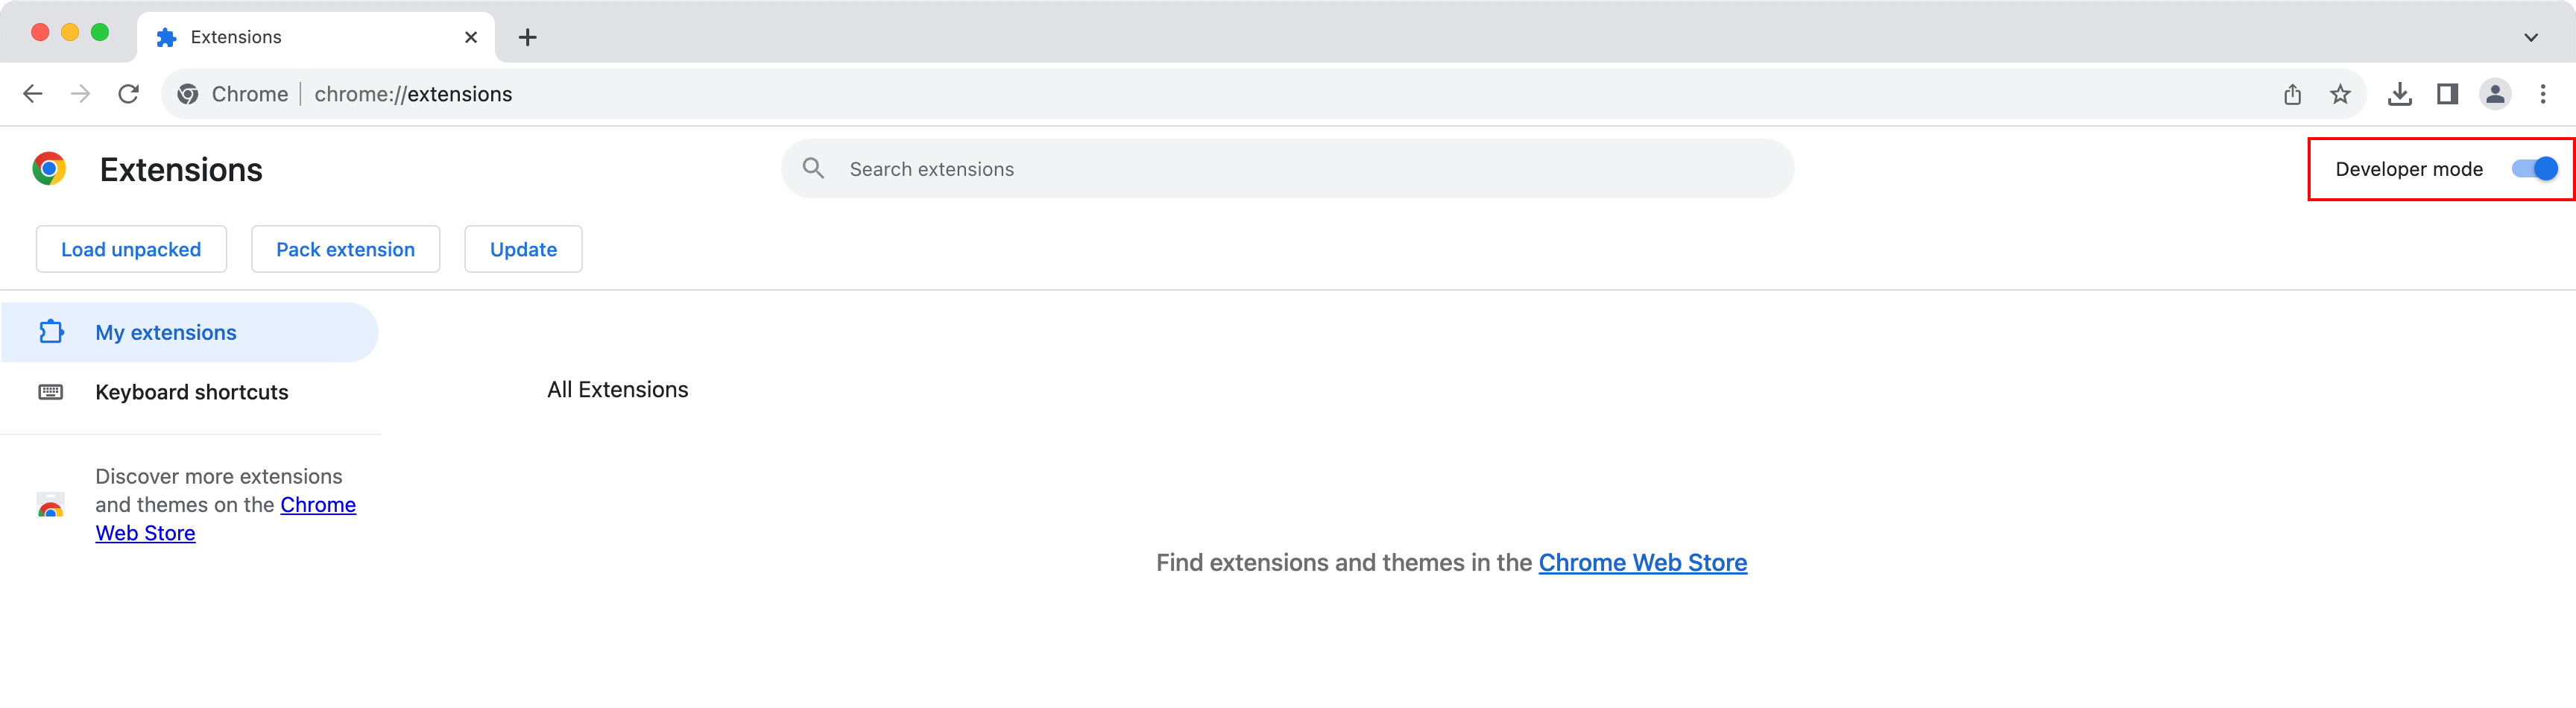
3. Type `chrome://extensions` in your browser search bar
4. Toggle on **Developer mode** in the top right corner of your browser
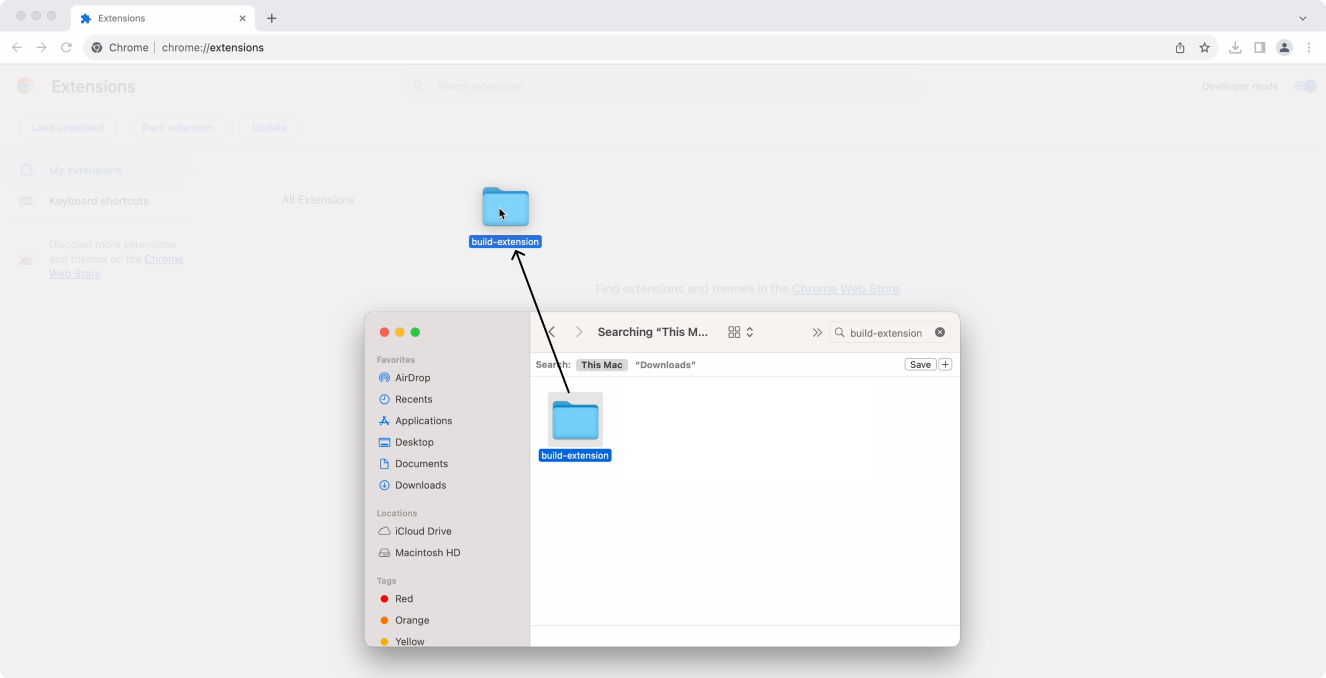
5. Drag and drop the unzipped/extracted folder (**build-extension\_v0.4.2**) to your browser
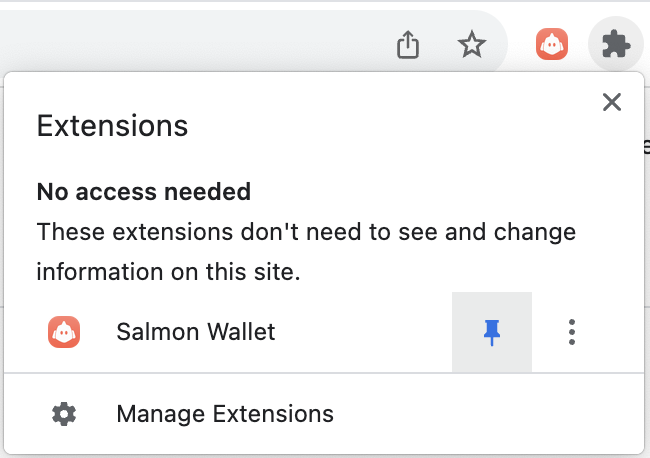
6. Pin the extension for easy access
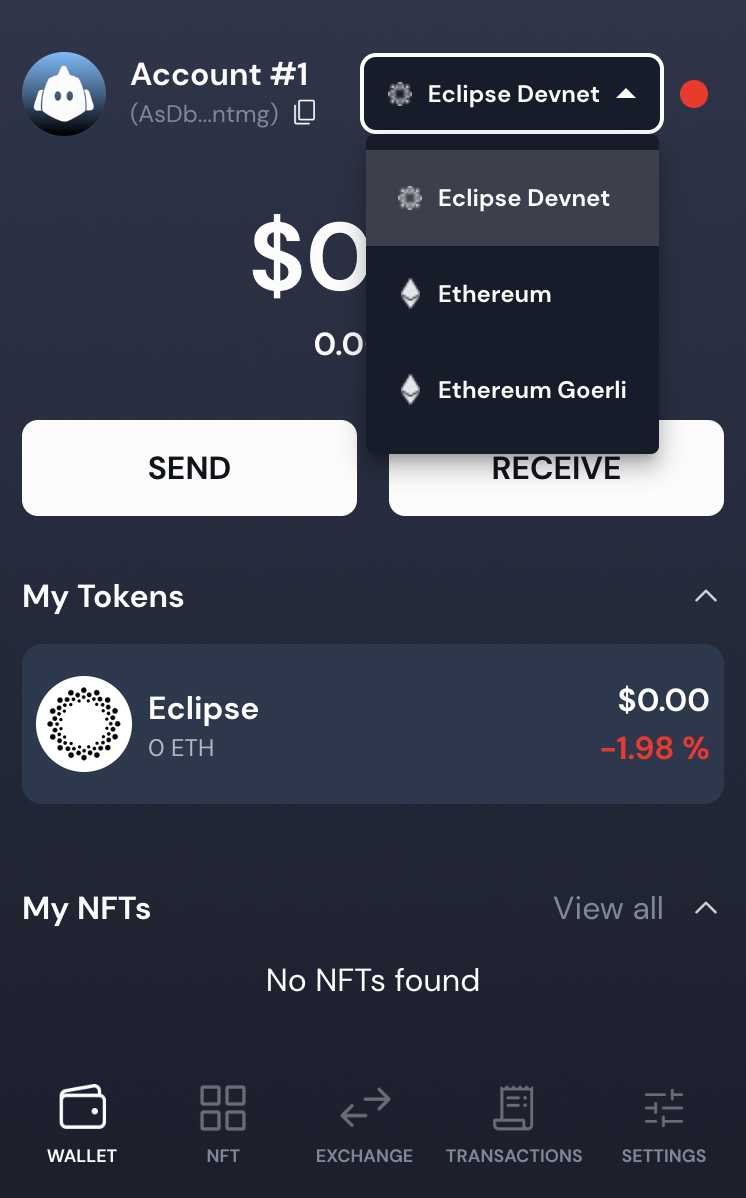
7. Configure the wallet by selecting **Eclipse Devnet** from the dropdown within Salmon Wallet

**Download the zip file**: The first step is to download the zip file which contains the Chrome extension for the wallet and unzip it. ​We've uploaded the zip file (build-extension\_v0.4.2.zip) to this [GitHub repo.](https://github.com/Eclipse-Laboratories-Inc/eclipse-wallet/releases/tag/v0.4.2-alpha)

**Enable developer mode:** Type `chrome://extensions` in the search bar. Enable developer mode in the top right corner of the broswer.

<figure><img src="/files/iW8VBref8iLfm5nvi8U4" alt=""><figcaption><p>Type chrome://extensions into the address bar and enable Developer Mode in the top right corner.</p></figcaption></figure>

**Install the extension**: Drag and drop the unzipped file to the browser. This will install the extension. Keep in mind that you can't move or delete the unzipped file once you've installed it, or it will break the extension.

<figure><img src="/files/hoM2eHEbVPqMRAiHzmhG" alt=""><figcaption><p>Drag the unzipped folder onto the chrome://extensions page.</p></figcaption></figure>

You can pin the wallet for easy access:

<figure><img src="/files/QA4i5iawa3zpse2LwyIS" alt="" width="325"><figcaption><p>Click the Extensions icon to open your list of extensions, then click the pin button next to Salmon Wallet.</p></figcaption></figure>

**Configure the wallet:** Change the network to Eclipse Devnet.

<figure><img src="/files/gGHnnLELhRKCSYAwuOUR" alt="" width="373"><figcaption><p>Select Eclipse Devnet in the dropdown within Salmon wallet.</p></figcaption></figure>

Your developer wallet for Eclipse is setup. You can request testnet tokens via the [faucet](/developers/developer-tooling/faucet).

### For additional information:

{% content-ref url="/pages/IX0EZPWIkcAnTKD4asqR" %}
[Adding Eclipse Wallet to dApp](/developers/wallet/testnet-and-devnet-wallets/adding-eclipse-wallet-to-dapp)
{% endcontent-ref %}

{% content-ref url="/pages/V1Kq7w6klkzTaSkfRGyo" %}
[Custom Wallets](/developers/wallet/testnet-and-devnet-wallets/custom-wallets)
{% endcontent-ref %}


# Adding Eclipse Wallet to dApp

{% hint style="info" %}
You will need a wallet that is compatible with Eclipse because the SVM RPC pulls a recent block hash from whichever RPC you're connected to.
{% endhint %}

## Adding MetaMask Snap To Your dApp

To support MetaMask, we recommend adding [Drift's MetaMask Snap](https://www.drift.trade/updates/connect-with-metamask) to your dApp by following their [instructions](https://www.npmjs.com/package/@drift-labs/snap-wallet-adapter). First, install the npm package: `npm install --save @drift-labs/snap-wallet-adapter`

Then in index.tsx:

```jsx
// Import the Drift wallet adapter
import { SnapWalletAdapter } from '@drift-labs/snap-wallet-adapter';
[...]
function Root() {
  return (
    <ConnectionProvider
      endpoint={!isDevelopment ? RPC_URL : `${RPC_URL}${RPC_TOKEN}`}
    >
      // Add the SnapWalletAdapter to the list of wallets
      <WalletProvider wallets={[new SnapWalletAdapter()]} autoConnect>
```

## Adding Salmon Wallet To Your dApp

The [Solana wallet provider](https://github.com/solana-labs/wallet-adapter) automatically identifies the Salmon wallet if it is installed for users, so your SVM dApp requires no additional changes to support Salmon.

## Custom Wallet Support for Solana Wallet Adapter

For a better user experience, customize the Solana wallet adapter to only show Eclipse-compatible wallets.

### Prerequisites[​](https://icarus131.github.io/devcookbook/docs/SolanaWalletAdapter#prerequisites) <a href="#prerequisites" id="prerequisites"></a>

As Solana wallet adapter is a JS/TS specific library, we need to initialize a project with a preferred framework. Let's create an example application using next:

```bash
npx create-next-app custom-wallet-adapter --ts
cd custom-wallet-adapter
```

Next, install the wallet adapter library:

```bash
npm install @solana/wallet-adapter-base @solana/web3.js @solana/wallet-adapter-react @solana/wallet-adapter-wallets
```

### Initializing Wallets[​](https://icarus131.github.io/devcookbook/docs/SolanaWalletAdapter#initializing-wallets) <a href="#initializing-wallets" id="initializing-wallets"></a>

Start by editing your `_app.tsx` file located inside the `src` folder or the `app` folder depending on how you have set up the next.js app. Include the required libraries in the `_app.tsx` file. Here you can use the adapter for Salmon wallet and MetaMask Snap:

```javascript
import "@/styles/globals.css";
import type { AppProps } from "next/app";
import head from "next/head";
import {
  ConnectionProvider,
  WalletProvider,
} from "@solana/wallet-adapter-react";
import { useMemo } from "react";
import { SalmonWalletAdapter } from "@solana/wallet-adapter-wallets";
import { SnapWalletAdapter } from "@drift-labs/snap-wallet-adapter";
import { clusterApiUrl } from "@solana/web3.js";
```

Now, initialize the allowed wallets in your `_app.tsx` file. You can set the network and add the Eclipse RPC:

```javascript
export default function App({ Component, pageProps }: AppProps) {
  const driftSnapWalletAdapter = new SnapWalletAdapter();

  const wallets = useMemo(
    () => [new SalmonWalletAdapter(), new SnapWalletAdapter()],
    [],
  );

  const endpoint = useMemo(() => clusterApiUrl(<network>), []);

  return (
    <div>
      <div className="hero min-h-screen bg-base-200">
        <div className="hero-content text-center">
            <ConnectionProvider endpoint={endpoint}>
              <WalletProvider wallets={wallets} autoConnect>
                <Component {...pageProps} />
              </WalletProvider>
            </ConnectionProvider>
        </div>
      </div>
    </div>
  );
}


```

You have used the `@solana/wallet-adapter-react` to set up the connection with Eclipse compatible wallets.&#x20;

### Filtering Wallets[​](https://icarus131.github.io/devcookbook/docs/SolanaWalletAdapter#filtering-wallets) <a href="#filtering-wallets" id="filtering-wallets"></a>

When a user has multiple wallets installed in their browser, each of the wallets will have a readyState value set to "Installed". This causes wallets incompatible with Eclipse to be autodetected. This can be fixed by whitelisting only the supported wallets. To do this, we must first create a new component. You can name this `wallets.tsx`.

Here is an array of supported wallets, which makes adding support for wallets more modular. Once you modify the `_app.tsx`, just add the Eclipse compatible wallet to the array.

```javascript
const EclipseWallets = () => {
  const { select, wallets, publicKey, disconnect } = useWallet();

  const supportedWalletNames = ["Salmon", "Connect by Drift"];

  const supportedWallets = wallets.filter(
    (wallet) =>
      supportedWalletNames.includes(wallet.adapter.name) &&
      (wallet.readyState === "Installed" ||
        wallet.adapter.name === "Connect by Drift"),
```

The last step is to map the supported wallets and render them as buttons. Since MetaMask Snap does not return a readyState value, you must add an exception for it so that it displays regardless of the readyState.

```javascript
 supportedWallets.map((wallet) => (
          <div key={wallet.adapter.name}>
            <button
              className="btn btn-outline btn-accent"
              key={wallet.adapter.name}
              onClick={() => select(wallet.adapter.name)}
            >
              <img
                src={wallet.adapter.icon}
                alt={wallet.adapter.name}
                width="24px"
                height="24px"
              ></img>
              {wallet.adapter.name === "Connect by Drift"
                ? "MetaMask"
                : wallet.adapter.name}
            </button>
            <div className="divider"></div>
          </div>
        ))
```

This will allow us to 1) restrict the user to only use Eclipse compatible wallets and 2) restrict the dApp to only detect supported wallets that are installed. Finally, you can export the component and add it to your `index.tsx` file.

Here is an example web application styled using DaisyUI:

<img src="https://icarus131.github.io/devcookbook/assets/images/walletadapter-83ffe06ea59029a230f8b28b6da75b94.png" alt="Example Application" width="563">


# Custom Wallets

{% hint style="info" %}
This section aims to help us enable custom wallet support for Solana Wallet Adapter.&#x20;
{% endhint %}

### What is the Solana wallet adapter[​](https://icarus131.github.io/devcookbook/docs/SolanaWalletAdapter#what-is-the-solana-wallet-adapter) <a href="#what-is-the-solana-wallet-adapter" id="what-is-the-solana-wallet-adapter"></a>

It is a collection of components for solana applications built with typescript or javascript to help interact with wallets on the client side.

### Eclipse Wallet[​](https://icarus131.github.io/devcookbook/docs/SolanaWalletAdapter#eclipse-wallet) <a href="#eclipse-wallet" id="eclipse-wallet"></a>

Eclipse maintains a fork of the Salmon wallet. This is the wallet that is recommended to be used on the devnet. Follow [this guide](https://docs.eclipse.builders/building-on-eclipse/developer-wallet-setup) to setup the Eclipse wallet. You can also use [Drift's MetaMask Snap](https://docs.eclipse.builders/building-on-eclipse/developer-wallet-setup#metamask-snaps).

### Writing support for a custom (Eclipse) wallet[​](https://icarus131.github.io/devcookbook/docs/SolanaWalletAdapter#writing-support-for-a-custom-eclipse-wallet) <a href="#writing-support-for-a-custom-eclipse-wallet" id="writing-support-for-a-custom-eclipse-wallet"></a>

#### Prerequisites[​](https://icarus131.github.io/devcookbook/docs/SolanaWalletAdapter#prerequisites) <a href="#prerequisites" id="prerequisites"></a>

As Solana wallet adapter is a JS/TS specific library, we need to initialize a project with a preferred framework. Let's create an example application using next:

```bash
npx create-next-app custom-wallet-adapter --ts
cd custom-wallet-adapter
```

After that, install the wallet adapter library.

```bash
npm install @solana/wallet-adapter-base @solana/web3.js @solana/wallet-adapter-react @solana/wallet-adapter-wallets
```

#### Initializing Wallets[​](https://icarus131.github.io/devcookbook/docs/SolanaWalletAdapter#initializing-wallets) <a href="#initializing-wallets" id="initializing-wallets"></a>

Edit `_app.tsx` file located inside the `src` folder or the `app` folder depending on how you have setup the next app. Here we are using the adapters for the supported wallets:

```tsx
import "@/styles/globals.css";
import type { AppProps } from "next/app";
import head from "next/head";
import {
  ConnectionProvider,
  WalletProvider,
} from "@solana/wallet-adapter-react";
import { useMemo } from "react";
import { SalmonWalletAdapter } from "@solana/wallet-adapter-wallets";
import { SnapWalletAdapter } from "@drift-labs/snap-wallet-adapter";
import { clusterApiUrl } from "@solana/web3.js";
```

Now, initialize the allowed wallets in our `_app.tsx` file. Here we can set the network and also add the Eclipse RPC:

```tsx
export default function App({ Component, pageProps }: AppProps) {
  const driftSnapWalletAdapter = new SnapWalletAdapter();

  const wallets = useMemo(
    () => [new SalmonWalletAdapter(), new SnapWalletAdapter()],
    [],
  );

  const endpoint = useMemo(() => clusterApiUrl(<network>), []);

  return (
    <div>
      <div className="hero min-h-screen bg-base-200">
        <div className="hero-content text-center">
            <ConnectionProvider endpoint={endpoint}>
              <WalletProvider wallets={wallets} autoConnect>
                <Component {...pageProps} />
              </WalletProvider>
            </ConnectionProvider>
        </div>
      </div>
    </div>
  );
}


```

We have successfully used the `@solana/wallet-adapter-react` to setup the connection and the wallet provider.

### Filtering Wallets[​](https://icarus131.github.io/devcookbook/docs/SolanaWalletAdapter#filtering-wallets) <a href="#filtering-wallets" id="filtering-wallets"></a>

When a user has multiple wallets installed on their browser, each of the wallets will have a readyState value set to "Installed". This causes certain unsupported wallets to be autodetected. This can be fixed by white-listing only the supported wallets.

To do this, we must first create a new component. You can name this `Wallets.tsx.`Here we have an array of supported wallets. This makes it adding support for wallets much more modular. To add a supported wallet, once we modify the `_app.tsx` we just have to add the wallet to the array.

```tsx
const EclipseWallets = () => {
  const { select, wallets, publicKey, disconnect } = useWallet();

  const supportedWalletNames = ["Salmon", "Connect by Drift"];

  const supportedWallets = wallets.filter(
    (wallet) =>
      supportedWalletNames.includes(wallet.adapter.name) &&
      (wallet.readyState === "Installed" ||
        wallet.adapter.name === "Connect by Drift"),
```

Now all that's left to do is to map the supported wallets and render them as buttons. As MetaMask Snaps do not return a readyState value, we must have an exception for it so that it displays regardless of the readyState.

```tsx
 supportedWallets.map((wallet) => (
          <div key={wallet.adapter.name}>
            <button
              className="btn btn-outline btn-accent"
              key={wallet.adapter.name}
              onClick={() => select(wallet.adapter.name)}
            >
              <img
                src={wallet.adapter.icon}
                alt={wallet.adapter.name}
                width="24px"
                height="24px"
              ></img>
              {wallet.adapter.name === "Connect by Drift"
                ? "MetaMask"
                : wallet.adapter.name}
            </button>
            <div className="divider"></div>
          </div>
        ))
```

This will allow us to restrict the user to only be able to use Eclipse compatible wallets and also have the application detect only the supported wallets that are installed. Finally we can export the component and add it to our `index.tsx` file. Here is an example web application styled using DaisyUI:

<div data-full-width="true"><img src="https://icarus131.github.io/devcookbook/assets/images/walletadapter-83ffe06ea59029a230f8b28b6da75b94.png" alt="Example Application"></div>


# Eclipse Global Wallet

The Eclipse Global Wallet is a plug-and-play wallet integration powered by Dynamic, designed to provide a **self-custodial**, **cross-app** login experience for users across the Eclipse ecosystem. It follows the [Solana Wallet Standard](https://github.com/solana-labs/wallet-standard), ensuring compatibility with any SVM-native wallet adapter.

> 📦 NPM: [@eclipse-laboratories-inc/eclipse-global-wallet](https://www.npmjs.com/package/@eclipse-laboratories-inc/eclipse-global-wallet)

***

#### ✅ Installation

```bash
npm i @eclipse-laboratories-inc/eclipse-global-wallet
# or
yarn add @eclipse-laboratories-inc/eclipse-global-wallet
# or
pnpm add @eclipse-laboratories-inc/eclipse-global-wallet
```

***

#### ⚡ Quick Start

Import the registration module **once** during application startup. This makes the wallet discoverable to all wallet-standard compatible libraries (e.g. `@solana/wallet-adapter`).

**React (Vite)**

```ts
// src/main.tsx
import "@eclipse-laboratories-inc/eclipse-global-wallet/solana";

import React from "react";
import ReactDOM from "react-dom/client";
import App from "./App";

ReactDOM.createRoot(document.getElementById("root")!).render(<App />);
```

**Next.js (App Router or Pages)**

```tsx
// app/providers.tsx or pages/_app.tsx
"use client";
import "@eclipse-laboratories-inc/eclipse-global-wallet/solana";

export default function Providers({ children }: { children: React.ReactNode }) {
  return <>{children}</>;
}
```

***

#### 🔌 Add to Wallet Adapter Stack

If you're using `@solana/wallet-adapter`, simply register the wallet like so:

```ts
import { WalletProvider } from "@solana/wallet-adapter-react";
import { getEclipseWallet } from "@eclipse-laboratories-inc/eclipse-global-wallet/solana";

const wallets = [getEclipseWallet()];

<WalletProvider wallets={wallets} autoConnect>
  <YourApp />
</WalletProvider>;
```

***

#### 🌐 Use Eclipse RPC

When using `@solana/web3.js`, point to an Eclipse RPC endpoint:

```ts
import { Connection } from "@solana/web3.js";

const connection = new Connection("https://testnet.dev2.eclipsenetwork.xyz", "confirmed");
```

***

#### 🛠 Troubleshooting

* Ensure the package is installed:

  ```bash
  npm ls @eclipse-laboratories-inc/eclipse-global-wallet
  ```
* Update to the latest version:

  ```bash
  npm i @eclipse-laboratories-inc/eclipse-global-wallet@latest
  ```
* Double-check that you're importing the wallet registration file (`/solana`) at the top level of your app.
* Ensure you're using `wallet-standard` compatible libraries. If not, you'll need to manually wire the wallet into your stack using `getEclipseWallet()`.

***

#### 🔒 Security Notes

* All keys are generated client-side and remain in the user’s control.
* The wallet is powered by Dynamic, which supports passkey-based MFA and secure auth flows.
* No private keys are ever transmitted or stored server-side.

***

#### 📚 References

* [Solana Wallet Standard](https://github.com/solana-labs/wallet-standard)
* [Eclipse RPC Docs](https://docs.eclipse.xyz/developers/rpc-and-block-explorers)
* [NPM Package](https://www.npmjs.com/package/@eclipse-laboratories-inc/eclipse-global-wallet)
* [GitHub Repo](https://github.com/Eclipse-Laboratories-Inc/Eclipse-Global-Wallet)


# RPC & Block Explorers

{% hint style="info" %}
Submit your deployment address to this [form](https://forms.gle/yJfFABQDPmpvgzAf7). We will provide engineering support and prioritize specific infrastructure needs.
{% endhint %}

## Eclipse Mainnet

<table><thead><tr><th width="199">Network Name</th><th>Eclipse Mainnet</th></tr></thead><tbody><tr><td>Description</td><td>Eclipse Mainnet with real economic value.</td></tr><tr><td>RPC</td><td><p>Free (good for testing but do not autoscale and are rate-limited):</p><ul><li><p><code>https://mainnetbeta-rpc.eclipse.xyz</code></p><ul><li>Rate limit: 3 reqs/s</li><li>Exceeding the rate limit can lead to a temporary IP ban</li></ul></li></ul><p>Private (recommended):</p><ul><li><a href="https://docs.google.com/forms/d/e/1FAIpQLSdrpgSCa4PSOWFKH8elf4UBptCHKbWN0BL0NxFLV_z_K2DF-g/viewform">Triton</a> (shared and dedicated tiers available)</li><li><a href="https://blockpi.io/chain/eclipse">BlockPI</a> (shared and dedicated tiers available)</li><li><a href="#rpc-requirements">Run your own node</a></li></ul></td></tr><tr><td>Block Explorers</td><td><ul><li><a href="https://eclipsescan.xyz/">EclipseScan</a></li><li><a href="https://explorer.eclipse.xyz/">Eclipse Dev Explorer</a></li><li><a href="https://www.eclipsexray.id/">Eclipse XRAY</a></li></ul></td></tr><tr><td>Celestia Namespace</td><td><ul><li><a href="https://celenium.io/namespace/00000000000000000000000000000000000000000065636c69707365?tab=Blobs">Celenium</a></li></ul></td></tr></tbody></table>

## Eclipse Testnet

<table><thead><tr><th width="199">Network Name</th><th>Eclipse Testnet</th></tr></thead><tbody><tr><td>Description</td><td>Realistic to Mainnet but with no real economic value.</td></tr><tr><td>RPC</td><td><code>https://testnet.dev2.eclipsenetwork.xyz</code></td></tr><tr><td>Block Explorers</td><td><ul><li><a href="https://eclipsescan.xyz/?cluster=testnet">EclipseScan Testnet</a></li><li><a href="https://explorer.dev.eclipsenetwork.xyz/?cluster=testnet">Eclipse Explorer Testnet</a></li><li><a href="https://solscan.io/?cluster=custom&#x26;customUrl=https%3A%2F%2Ftestnet.dev2.eclipsenetwork.xyz">Solscan Testnet</a></li></ul></td></tr><tr><td>Celestia Namespace</td><td><ul><li><a href="https://mocha-4.celenium.io/namespace/0000000000000000000000000000000000000000000065636c74330a?tab=Blobs">Celenium</a></li></ul></td></tr></tbody></table>

## Eclipse Devnet2

<table><thead><tr><th width="200">Network Name</th><th>Eclipse Devnet2 (Devnet1 is being deprecated)</th></tr></thead><tbody><tr><td>Description</td><td>Simulates developer experience.</td></tr><tr><td>RPC</td><td><code>https://staging-rpc.dev2.eclipsenetwork.xyz</code><br><code>https://staging-rpc-eu.dev2.eclipsenetwork.xyz</code></td></tr><tr><td>Block Explorers</td><td><ul><li><a href="https://eclipsescan.xyz/?cluster=devnet">EclipseScan Devnet</a></li><li><a href="https://explorer.dev.eclipsenetwork.xyz/">Eclipse Explorer Devnet</a></li><li><a href="https://solscan.io/?cluster=custom&#x26;customUrl=https%3A%2F%2Fstaging-rpc.dev2.eclipsenetwork.xyz">Solscan Devnet</a></li></ul></td></tr></tbody></table>

## RPC Requirements

* CPU
  * 12 cores / 24 threads, or more
  * 2.8GHz base clock speed, or faster
* RAM
  * 256GB or more
* Disk
  * Ledger: 2TB or larger. SSD suggested
  * Accounts: 500G or larger. SSD suggested

For instructions on how to run mainnetbeta RPC node, follow this [document](https://eclipsebuilders.notion.site/How-to-run-mainnetbeta-RPC-node-19eb6f80e8d34b54838b03995d3f9865).


# Dragon's Mouth gRPC Subscriptions

Streaming Account Updates for Backend Applications

Dragon's Mouth is Triton's Geyser-fed gRPC interface that supports streaming:

* Account Writes
* Transactions
* Entries
* Block notifications
* Slot notifications

It also supports unary operations:

* getLatestBlockhash
* getBlockHeight
* getSlot
* isValidBlockhash

{% hint style="info" %}
You can find the official Triton docs: <https://docs.triton.one/>
{% endhint %}

## Protocol files <a href="#protocol-files" id="protocol-files"></a>

You can find the latest version of protobuf files in:

* Github: <https://github.com/rpcpool/yellowstone-grpc/tree/master/yellowstone-grpc-proto/proto>
* Rust Crate: <https://crates.io/crates/yellowstone-grpc-proto>

## NodeJS/Typescript Client

You can include NodeJS Yellowstone gRPC client as a dependency by running the following command:

```
npm install --save @triton-one/yellowstone-grpc

# or, for yarn:

yarn add @triton-one/yellowstone-grpc
```

A sample Typescript/Nodejs client is available at <https://github.com/rpcpool/yellowstone-grpc/tree/master/examples/typescript>.

### Initializing the client

Once you have installed the client dependency, you can initialize it as follows:

```typescript
import Client from "@triton-one/yellowstone-grpc";

const client = new Client("https://api.rpcpool.com:443", "<insert your token here>");

// now you can call the client methods, e.g.:

const version = await client.getVersion(); // gets the version information
console.log(version);
```

Please note that the client is asynchronous, so it is expected that all calls are executed inside an async block or async function.

### Subscription Streams

You can get updates and send requests through the *subscription stream*. You can create it by calling the `client.subscribe()` method:

```typescript
import { SubscribeRequest } from "@triton-one/yellowstone-grpc";

// Create a subscription stream.
const stream = client.subscribe();

// Collecting all incoming events.
stream.on("data", (data) => {
  console.log("data", data);
});

// Create a subscription request.
const request: SubscribeRequest = {
  // you can use the standard JSON request format here.
  // the following documentation describes available requests and filters.
  ...
};

// Sending a subscription request.
await new Promise<void>((resolve, reject) => {
  stream.write(request, (err) => {
    if (err === null || err === undefined) {
      resolve();
    } else {
      reject(err);
    }
  });
}).catch((reason) => {
  console.error(reason);
  throw reason;
});
```

## grpcurl Client

`grpcurl` is a good client for testing. You will also need the following two Protobuf proto files to describe the protocol:

Once you have these two downloaded, you can access Triton's staging environment with your token (contact Triton customer support for a token) to run gRPC requests:

```
./grpcurl \
  -proto geyser.proto \
  -d '{"slots": { "slots": { } }, "accounts": { "usdc": { "account": ["9wFFyRfZBsuAha4YcuxcXLKwMxJR43S7fPfQLusDBzvT"] } }, "transactions": {}, "blocks": {}, "blocks_meta": {}}' \
  -H "x-token: <token>" \
  api.rpcpool.com:443 \
  geyser.Geyser/Subscribe
```

## Rust Client

A sample Rust client is available at <https://github.com/rpcpool/yellowstone-grpc/tree/master/examples/rust>.

## Goland Client

A sample Golang client is available at <https://github.com/rpcpool/yellowstone-grpc/tree/master/examples/golang>.

## Examples of Subscription Requests

<details>

<summary>Subscribe to an account</summary>

{% code title="NodeJS" overflow="wrap" %}

```typescript
import { CommitmentLevel } from "@triton-one/yellowstone-grpc";

const request = {
  "slots": {
    "slots": {}
  },
  "accounts": {
    "wsol/usdc": {
      "account": ["8BnEgHoWFysVcuFFX7QztDmzuH8r5ZFvyP3sYwn1XTh6"]
    }
  },
  "transactions": {},
  "blocks": {},
  "blocksMeta": {},
  "accountsDataSlice": [],
  "commitment": CommitmentLevel.CONFIRMED
};
```

{% endcode %}

{% code title="gRPC" overflow="wrap" %}

```
{"slots": { "slots": {} }, "accounts": { "wsol/usdc": { "account": ["8BnEgHoWFysVcuFFX7QztDmzuH8r5ZFvyP3sYwn1XTh6"] } }, "transactions": {}, "blocks": {}, "blocks_meta": {}, "accounts_data_slice": [], "commitment": 1}
```

{% endcode %}

</details>

<details>

<summary>Subscribe to an account with <code>account_data_slice</code></summary>

{% code title="NodeJS" overflow="wrap" %}

```typescript
import { CommitmentLevel } from "@triton-one/yellowstone-grpc";

const request = {
  "slots": {},
  "accounts": {
    "usdc": {
      "owner": ["TokenkegQfeZyiNwAJbNbGKPFXCWuBvf9Ss623VQ5DA"],
      "filters": [{
          "tokenAccountState": true
      }, {
          "memcmp": {
              "offset": 0,
              "data": {
                  "base58": "EPjFWdd5AufqSSqeM2qN1xzybapC8G4wEGGkZwyTDt1v"
              }
          }
      }]
    }
  },
  "transactions": {},
  "blocks": {},
  "blocksMeta": {},
  "entry": {},
  "commitment": CommitmentLevel.CONFIRMED
  "accountsDataSlice": [{ "offset": 32, "length": 40 }],
};
```

{% endcode %}

{% code title="gRPC" overflow="wrap" %}

```
{
    "accounts": {
        "usdc": {
            "owner": ["TokenkegQfeZyiNwAJbNbGKPFXCWuBvf9Ss623VQ5DA"],
            "filters": [{
                "token_account_state": true
            }, {
                "memcmp": {
                    "offset": 0,
                    "data": {
                        "base58": "EPjFWdd5AufqSSqeM2qN1xzybapC8G4wEGGkZwyTDt1v"
                    }
                }
            }]
        }
    },
    "accounts_data_slice": [{ "offset": 32, "length": 40 }]
}
```

{% endcode %}

</details>

<details>

<summary>Subscribe to a program</summary>

{% code title="NodeJS" overflow="wrap" %}

```typescript
import { CommitmentLevel } from "@triton-one/yellowstone-grpc";

const request = {
  "slots": {
    "slots": {}
  },
  "accounts": {
    "solend": {
      "owner": ["So1endDq2YkqhipRh3WViPa8hdiSpxWy6z3Z6tMCpAo"]
    }
  },
  "transactions": {},
  "blocks": {},
  "blocksMeta": {},
  "accountsDataSlice": [],
  "commitment": CommitmentLevel.PROCESSED
}
```

{% endcode %}

{% code title="gRPC" overflow="wrap" %}

```
{"slots": { "slots": {} }, "accounts": { "solend": {  "owner": ["So1endDq2YkqhipRh3WViPa8hdiSpxWy6z3Z6tMCpAo"] } }, "transactions": {}, "blocks": {}, "blocks_meta": {}, "accounts_data_slice": [], "commitment": 0}
```

{% endcode %}

</details>

<details>

<summary>Subscribe to multiple programs</summary>

{% code title="NodeJS" overflow="wrap" %}

```typescript
import { CommitmentLevel } from "@triton-one/yellowstone-grpc";

const request = {
  "slots": {
    "slots": {}
  },
  "accounts": {
    "programs": {
      "owner": [
        "So1endDq2YkqhipRh3WViPa8hdiSpxWy6z3Z6tMCpAo",
        "9xQeWvG816bUx9EPjHmaT23yvVM2ZWbrrpZb9PusVFin"
      ]
    }
  },
  "transactions": {},
  "blocks": {},
  "blocksMeta": {},
  "accountsDataSlice": []
};
```

{% endcode %}

{% code title="gRPC" overflow="wrap" %}

```
{"slots": { "slots": {} }, "accounts": { "programs": {  "owner": [ "So1endDq2YkqhipRh3WViPa8hdiSpxWy6z3Z6tMCpAo", "9xQeWvG816bUx9EPjHmaT23yvVM2ZWbrrpZb9PusVFin"] } }, "transactions": {}, "blocks": {}, "blocks_meta": {}, "accounts_data_slice": []}
```

{% endcode %}

</details>

<details>

<summary>Subscribe to all finalized non-vote and non-failed transactions</summary>

{% code title="NodeJS" overflow="wrap" %}

```typescript
import { CommitmentLevel } from "@triton-one/yellowstone-grpc";

const request = {
  "slots": {
    "slots": {}
  },
  "accounts": {},
  "transactions": {
    "alltxs": {
      "vote": false,
      "failed": false
    }
  },
  "blocks": {},
  "blocksMeta": {},
  "accountsDataSlice": [],
  "commitment": CommitmentLevel.FINALIZED
};
```

{% endcode %}

{% code title="gRPC" overflow="wrap" %}

```
{"slots": { "slots": {} }, "accounts": {}, "transactions": { "alltxs": { "vote": false, "failed": false }}, "blocks": {}, "blocks_meta": {}, "accounts_data_slice": [], "commitment": 2}
```

{% endcode %}

</details>

<details>

<summary>Subscribe to non-vote transactions mentioning an account</summary>

{% code title="NodeJS" overflow="wrap" %}

```typescript
const request = {
  "slots": {
    "slots": {}
  },
  "accounts": {},
  "transactions": {
    "serum": {
      "vote": false,
      "accountInclude": [
        "9xQeWvG816bUx9EPjHmaT23yvVM2ZWbrrpZb9PusVFin"
      ]
    }
  },
  "blocks": {},
  "blocksMeta": {},
  "accountsDataSlice": []
};
```

{% endcode %}

{% code title="gRPC" overflow="wrap" %}

```
{"slots": { "slots": {} }, "accounts": {}, "transactions": { "serum": { "vote": false, "account_include": [ "9xQeWvG816bUx9EPjHmaT23yvVM2ZWbrrpZb9PusVFin" ]}}, "blocks": {}, "blocks_meta": {}, "accounts_data_slice": []}
```

{% endcode %}

</details>

<details>

<summary>Subscribe to transactions excluding accounts</summary>

{% code title="NodeJS" overflow="wrap" %}

```typescript
const request = {
  "slots": {
    "slots": {}
  },
  "accounts": {},
  "transactions": {
    "serum": {
      "accountExclude": [
        "9xQeWvG816bUx9EPjHmaT23yvVM2ZWbrrpZb9PusVFin",
        "TokenkegQfeZyiNwAJbNbGKPFXCWuBvf9Ss623VQ5DA"
      ]
    }
  },
  "blocks": {},
  "blocksMeta": {},
  "accountsDataSlice": []
};
```

{% endcode %}

{% code title="gRPC" overflow="wrap" %}

```
{"slots": { "slots": {} }, "accounts": {}, "transactions": { "serum": { "account_exclude": [ "9xQeWvG816bUx9EPjHmaT23yvVM2ZWbrrpZb9PusVFin", "TokenkegQfeZyiNwAJbNbGKPFXCWuBvf9Ss623VQ5DA" ]}}, "blocks": {}, "blocks_meta": {}, "accounts_data_slice": []}
```

{% endcode %}

</details>

<details>

<summary>Subscribe to transactions mentioning accounts &#x26; excluding certain accounts</summary>

{% code title="NodeJS" overflow="wrap" %}

```typescript
const request = {
  "slots": {
    "slots": {}
  },
  "accounts": {},
  "transactions": {
    "serum": {
      "accountInclude": [
        "9xQeWvG816bUx9EPjHmaT23yvVM2ZWbrrpZb9PusVFin"
      ],
      "accountExclude": [
        "9wFFyRfZBsuAha4YcuxcXLKwMxJR43S7fPfQLusDBzvT"
      ]
    }
  },
  "blocks": {},
  "blocksMeta": {},
  "accountsDataSlice": []
};
```

{% endcode %}

{% code title="gRPC" overflow="wrap" %}

```
{"slots": { "slots": {} }, "accounts": {}, "transactions": { "serum": { "account_include": [ "9xQeWvG816bUx9EPjHmaT23yvVM2ZWbrrpZb9PusVFin" ], "account_exclude": [ "9wFFyRfZBsuAha4YcuxcXLKwMxJR43S7fPfQLusDBzvT" ] }}, "blocks": {}, "blocks_meta": {}, "accounts_data_slice": []}
```

{% endcode %}

</details>

<details>

<summary>Subscribe to a transaction signature</summary>

{% code title="NodeJS" overflow="wrap" %}

```typescript
const request = {
  "slots": {},
  "accounts": {},
  "transactions": {
    "sign": {
      "signature": "5rp2hL9b6kexex11Mugfs3vfU9GhieKruj4CkFFSnu52WLxiGn4VcLLwsB62XURhMmT1j4CZiXT6FFtYbXsLq2Zs"
    }
  },
  "blocks": {},
  "blocksMeta": {},
  "accountsDataSlice": []
};
```

{% endcode %}

{% code title="gRPC" overflow="wrap" %}

```
{"slots": {}, "accounts": {}, "transactions": { "sign": { "signature": "5rp2hL9b6kexex11Mugfs3vfU9GhieKruj4CkFFSnu52WLxiGn4VcLLwsB62XURhMmT1j4CZiXT6FFtYbXsLq2Zs"}}, "blocks": {}, "blocks_meta": {}, "accounts_data_slice": []}
```

{% endcode %}

</details>

<details>

<summary>Subscribe to slots</summary>

{% code title="NodeJS" overflow="wrap" %}

```typescript
const request = {
  "slots": {
    "incoming_slots": {}
  },
  "accounts": {},
  "transactions": {},
  "blocks": {},
  "blocksMeta": {},
  "accountsDataSlice": []
};
```

{% endcode %}

{% code title="gRPC" overflow="wrap" %}

```
{"slots": { "incoming_slots": {} }, "accounts": {}, "transactions": {}, "blocks": {}, "blocks_meta": {}, "accounts_data_slice": []}
```

{% endcode %}

</details>

<details>

<summary>Subscribe to blocks</summary>

{% code title="NodeJS" overflow="wrap" %}

```typescript
const request = {
  "slots": {},
  "accounts": {},
  "transactions": {},
  "blocks": {
    "blocks": {}
  },
  "blocksMeta": {},
  "accountsDataSlice": []
};
```

{% endcode %}

{% code title="gRPC" overflow="wrap" %}

```
{"slots": {}, "accounts": { }, "transactions": {}, "blocks": { "blocks": {} }, "blocks_meta": {}, "accounts_data_slice": []}
```

{% endcode %}

</details>

<details>

<summary>Subscribe to block metadata</summary>

{% code title="NodeJS" overflow="wrap" %}

```typescript
const request = {
  "slots": {},
  "accounts": {},
  "transactions": {},
  "blocks": {},
  "blocksMeta": {
    "blockmetadata": {}
  },
  "accountsDataSlice": []
};
```

{% endcode %}

{% code title="gRPC" overflow="wrap" %}

```
{"slots": {}, "accounts": {}, "transactions": {}, "blocks": {}, "blocks_meta": { "blockmetadata": {} }, "accounts_data_slice": []}
```

{% endcode %}

</details>

<details>

<summary>Unsubscribing</summary>

{% code title="NodeJS" overflow="wrap" %}

```typescript
const request = {
  "slots": {},
  "accounts": {},
  "transactions": {},
  "blocks": {},
  "blocksMeta": {},
  "accountsDataSlice": []
};
```

{% endcode %}

{% code title="gRPC" overflow="wrap" %}

```
{"slots": {}, "accounts": {}, "transactions": {}, "blocks": {}, "blocks_meta": {}}
```

{% endcode %}

</details>

## Managing commitment levels <a href="#managing-commitment-levels" id="managing-commitment-levels"></a>

The gRPC streams happen by default on the processed commitment level.

Triton also supports specifying confirmed and finalized commitment levels. In these cases, Dragon's Mouth will buffer the incoming updates for you and release them once the updates have become confirmed or finalized.

For maximum performance, however, it is recommended to use handling commitment levels client side.

To specify commitment level in your Dragon's Mouth gRPC calls provide the following values:

```
enum CommitmentLevel {
  PROCESSED = 0;
  CONFIRMED = 1;
  FINALIZED = 2;
}
```

### Benefits of working at processed <a href="#benefits-of-working-at-processed" id="benefits-of-working-at-processed"></a>

The benefit of working on processed is that you can process transactions as soon as they arrive, but only commit to them once you know whether they are confirmed or finalized. This means that you can get faster response times in your UI by doing a lot of the processing work at a lower commitment level and then be able to surface the changes as soon as you see that the event is committed.

### How to manage \`confirmed\` and \`finalized\` <a href="#how-to-manage-confirmed-and-finalized" id="how-to-manage-confirmed-and-finalized"></a>

To manage confirmed and finalized you need to buffer events by slot. Each event (transaction or account write) will have a slot attached to it. You store these events in a buffer ordered by slot.

You then also make sure you subscribe to [slot notifications](https://docs.triton.one/project-yellowstone/dragons-mouth-grpc-subscriptions#subscribe-to-slots). This will give you information about when a slot is confirmed or finalized. Depending on the commitment level you are interested in, you should release your buffer when you receive the slot notification for a particular slot at a particular commitment level.

You will receive all the transaction notifications or account write notifications for the slot **before** you receive the "confirmed" and "finalized" notification for that slot.

### The special thing about finalized <a href="#the-special-thing-about-finalized" id="the-special-thing-about-finalized"></a>

Unfortunately, due to a quirk in the way that Geyser works on SVM not every slot finalized notification is issued. This means that you need some special processing if you want to handle finalized correctly.

The special handling is the following: whenever you see a `finalized` slot notification, you need to check the parents and grand parents (and great-grandparents and so on) of that slot and mark those as finalized too even if you didn't receive a notification for them.


# Bridges

<table data-view="cards"><thead><tr><th></th><th></th><th></th><th data-hidden data-card-cover data-type="files"></th><th data-hidden data-card-target data-type="content-ref"></th></tr></thead><tbody><tr><td><strong>Eclipse Canonical Bridge</strong></td><td>Bridge ETH from Ethereum mainnet to Eclipse.</td><td></td><td><a href="/files/3nsB63Gr0sCleoKBqsvk">/files/3nsB63Gr0sCleoKBqsvk</a></td><td><a href="https://app.eclipse.xyz/bridge">https://app.eclipse.xyz/bridge</a></td></tr><tr><td><strong>Hyperlane Nexus Bridge</strong></td><td>Bridge from Solana &#x26; Ethereum to Eclipse.</td><td></td><td><a href="/files/zx0yVWP3IbkhBc6qpa2Q">/files/zx0yVWP3IbkhBc6qpa2Q</a></td><td><a href="https://www.usenexus.org/">https://www.usenexus.org/</a></td></tr><tr><td><strong>Relay Bridge</strong></td><td>Bridge from Ethereum L2s to Eclipse.</td><td></td><td><a href="/files/yBlvvO2OQgMhQhAOPlsB">/files/yBlvvO2OQgMhQhAOPlsB</a></td><td><a href="https://relay.link/bridge/eclipse?toCurrency=11111111111111111111111111111111">https://relay.link/bridge/eclipse?toCurrency=11111111111111111111111111111111</a></td></tr><tr><td>LayerSwap</td><td>Deposit directly from CEXs fast and cheap!</td><td></td><td><a href="/files/rMlnL1rt2h2AwG45Js5B">/files/rMlnL1rt2h2AwG45Js5B</a></td><td></td></tr><tr><td><strong>Gas.Zip Bridge</strong></td><td>Bridge ETH from Ethereum L2s to Eclipse.</td><td></td><td><a href="/files/DTMqXBnWIXgfGA8ocKQL">/files/DTMqXBnWIXgfGA8ocKQL</a></td><td><a href="https://www.gas.zip/">https://www.gas.zip/</a></td></tr><tr><td><strong>Retro Bridge</strong></td><td>Bridge and swap cross-chain from anywhere to Eclipse.</td><td></td><td><a href="/files/Pc1l1XZhvYkh2Q0rKLQU">/files/Pc1l1XZhvYkh2Q0rKLQU</a></td><td></td></tr><tr><td><strong>Owlto Finance Bridg</strong>e</td><td>Bridge from Ethereum L2s to Eclipse.</td><td></td><td><a href="/files/hbWXrLqR0wxS1gEzeIBH">/files/hbWXrLqR0wxS1gEzeIBH</a></td><td><a href="https://owlto.finance/?to=Eclipse">https://owlto.finance/?to=Eclipse</a></td></tr><tr><td><strong>Orbiter Finance Bridge</strong></td><td>Bridge from Ethereum L2s to Eclipse.</td><td></td><td><a href="/files/Rbj77tO3oSZ2lqJ2qzjn">/files/Rbj77tO3oSZ2lqJ2qzjn</a></td><td><a href="https://www.orbiter.finance/?source=Ethereum&#x26;dest=Eclipse&#x26;token=ETH">https://www.orbiter.finance/?source=Ethereum&#x26;dest=Eclipse&#x26;token=ETH</a></td></tr><tr><td><strong>Mini Bridge</strong></td><td>Bridge from Ethereum L2s to Eclipse.</td><td></td><td><a href="/files/QAFipBLlP3KqAjEhiY86">/files/QAFipBLlP3KqAjEhiY86</a></td><td><a href="https://minibridge.chaineye.tools/?dst=eclipse&#x26;mode=swap">https://minibridge.chaineye.tools/?dst=eclipse&#x26;mode=swap</a></td></tr><tr><td><strong>Stride Hyperlane Bridge</strong></td><td>Bridge TIA and stTIA from Stride to Eclipse.</td><td></td><td><a href="/files/b4kqzdyearYMpyZBSU7R">/files/b4kqzdyearYMpyZBSU7R</a></td><td><a href="https://bridge.stride.zone/">https://bridge.stride.zone/</a></td></tr></tbody></table>

## Eclipse Bridge Details

{% content-ref url="/pages/GexSivI2NDKjd8S4Diin" %}
[Eclipse Canonical Bridge](/developers/bridges/eclipse-canonical-bridge)
{% endcontent-ref %}

{% content-ref url="/pages/mUFS0ji8ygjwIEfpURaq" %}
[Hyperlane](/developers/bridges/hyperlane)
{% endcontent-ref %}


# Eclipse Canonical Bridge

Our enshrined canonical bridge is live for Eclipse Mainnet & Testnet. Withdrawals from the Eclipse Bridge are currently disabled. \
\
You can bridge using the official bridge site at: <https://bridge.eclipse.xyz/>&#x20;

{% embed url="<https://app.eclipse.xyz/bridge>" %}

Our canonical bridge deployed directly to Ethereum is the primary way to bring assets to Eclipse Mainnet. You are able to bridge ETH and eventually other assets via our bridge. ETH is the native token for Eclipse Mainnet. We do not have any other native token for Eclipse Mainnet.&#x20;

{% embed url="<https://youtu.be/3mbvnr9TGgE>" %}
Eclipse Bridge Walkthrough
{% endembed %}

***

## Eclipse Deposit CLI

This CLI tool allows end users to deposit Ether from Ethereum Mainnet or the Sepolia test network into the Eclipse rollup, which utilizes the Solana Virtual Machine (SVM).

This Eclipse Deposit CLI allows end users to deposit Ether from:

* Ethereum Mainnet into Eclipse Mainnet&#x20;
* Sepolia Testnet to the Eclipse Testnet

***

## Prerequisites

### 1. Yarn

Yarn is required for installation. For Mac users, Yarn can be installed via Homebrew using `brew install yarn`. Alternatively, if npm is available, use `npm install -g yarn`.

### 2. Ethereum Wallet

An Ethereum wallet such as [Backpack](https://backpack.app/) or Metamask is needed.

For Metamask:

1. Choose the account you wish to use and copy its address.
2. Visit the [Sepolia faucet](https://sepoliafaucet.com/) to airdrop tokens to yourself, if using Sepolia.
3. Navigate to 'account details' in MetaMask and select 'reveal private key'. Store this key in a secure file.

### 3. Solana CLI

The Solana CLI tools are necessary for generating a deposit address on the rollup.

To generate a wallet for deposits:

1. Install the Solana CLI tools.
2. To generate a wallet:
   * Execute `solana-keygen new --no-outfile` or `solana-keygen new --outfile my-wallet.json`.
3. Copy the public key from the output, which should resemble `6g8wB6cJbodeYaEb5aD9QYqhdxiS8igfcHpz36oHY7p8`.

***

## Installation (via npm)

* COMING SOON

## Installation (via GitHub)

1. Clone this repository:

   ```
   git clone https://github.com/Eclipse-Laboratories-Inc/eclipse-deposit.git
   cd eclipse-deposit
   ```
2. Install the necessary dependencies:

   ```
   yarn install
   ```

***

## Create a Deposit

1. Run the CLI tool with the necessary options:

   ```
   node bin/cli.js -k <path_to_private_key> -d <solana_destination_address> -a <amount_in_ether> --mainnet|--sepolia 
   ```

   \
   For example:<br>

   **Mainnet Deposit:**

   ```
   node bin/cli.js -k private-key.txt -d 6g8wB6cJbodeYaEb5aD9QYqhdxiS8igfcHpz36oHY7p8 -a 0.002 --mainnet
   ```

   \
   **Sepolia Testnet Deposit:**

   ```
   node bin/cli.js -k private-key.txt -d 6g8wB6cJbodeYaEb5aD9QYqhdxiS8igfcHpz36oHY7p8 -a 0.002 --sepolia
   ```

   * The `-k, --key-file` option specifies the path to the Ethereum private key file.
   * The `-d, --destination` option specifies the Solana destination address on the rollup (base58 encoded).
   * The `-a, --amount` option specifies the amount of Ether to deposit.
   * Use `--mainnet` or `--sepolia` to select the network. The tool will use different contract addresses depending on the network.
   * The `-r, --rpc-url` option is optional and allows overriding the default JSON RPC URL.

{% hint style="warning" %}
Deposits will finalize and be processed in about 2-3 minutes.
{% endhint %}

***

## Security Note

Keep your Ethereum private key secure. Do not share it publicly or expose it in untrusted environments.


# Hyperlane

Hyperlane is now live on Eclipse, connecting it to Ethereum and Solana. This enables Eclipse to interoperate with two of the largest ecosystems in crypto, and it allows users to bridge assets from these two chains into a bustling ecosystem. You can bridge using the Hyperlane Nexus Bridge:

{% embed url="<https://www.usenexus.org/>" %}
Hyperlane Nexus Bridge
{% endembed %}

Key Takeaways

1. Eclipse is now connected to Ethereum and Solana through Hyperlane. The Hyperlane Eclipse bridge will enable USDC, SOL, and WIF to be bridged between Eclipse, Ethereum, and Solana.
2. More assets will be supported through Hyperlane, including Eclipse’s Unified Restaking Token, [tETH](https://twitter.com/EclipseFND/status/1833143806478471448).
3. Hyperlane will enable Eclipse to build an ecosystem that sits at the intersection of Ethereum and Solana assets.&#x20;

<figure><img src="/files/TrIfFktLcRfHccOvIRc3" alt=""><figcaption></figcaption></figure>

Through Hyperlane, users can now bridge the following assets between the following chains at launch.

1. USDC - Ethereum <> Eclipse
2. SOL - Solana <> Eclipse
3. USDC - Solana <> Eclipse
4. WIF - Solana <> Eclipse.&#x20;

More assets will be supported in the future.

***

## Hyperlane Dev Docs

* You can find the official Hyperlane docs here: <https://docs.hyperlane.xyz/>
* Warp Routes: <https://github.com/hyperlane-xyz/hyperlane-registry/tree/main/deployments/warp_routes>

## Deploy an SVM Warp Route <a href="#mailbox-contract" id="mailbox-contract"></a>

You can deploy a Warp Route for an asset of your choice, between two SVM chains with an existing Hyperlane core deployment. Currently, supported SVM chains are Eclipse and Solana, but you can find an up-to-date list [here](https://github.com/hyperlane-xyz/hyperlane-monorepo/tree/main/rust/sealevel/environments/mainnet3) (all chain directory names with a `core` subdirectory).

### Warp Route Types[​](https://docs.hyperlane.xyz/docs/guides/deploy-svm-warp-route#warp-route-types) <a href="#warp-route-types" id="warp-route-types"></a>

The type of token used determines the Warp Route type, so it's important to understand the different Warp Route contracts available:

* [Native](https://docs.hyperlane.xyz/docs/protocol/warp-routes/warp-routes-types#native-token-warp-routes): Handles the transfer of native gas tokens (e.g. SOL on Solana, ETH on Eclipse).
* [Collateral](https://docs.hyperlane.xyz/docs/protocol/warp-routes/warp-routes-types#collateral-backed-erc20-warp-routes): Handles the transfer of existing [Token-2022](https://spl.solana.com/token-2022) or [Token](https://spl.solana.com/token) tokens (the ERC20 equivalent on SVM).
* [Synthetic](https://docs.hyperlane.xyz/docs/protocol/warp-routes/warp-routes-types#synthetic-erc20-warp-routes): Handles synthetic tokens that are minted and burned as transfers occur through the Warp Route, to represent tokens from their origin chain. The tooling in this guide deploys a new Token-2022 token in this case, whose authority is set to the deployer key.

Here are the common Warp Route setups (you can find more details [here](https://docs.hyperlane.xyz/docs/protocol/warp-routes/warp-routes-example-usage)):

* Native to Synthetic: Lock Native tokens on the origin chain to mint Synthetic ones on the destination. When transferring back, the Synthetic is burned. An example of this is a SOL Warp Route between Solana and Eclipse.
* Collateral to Synthetic: Lock Collateral tokens on the origin chain to mint Synthetic ones on the destination. When transferring back, the Synthetic is burned. An example of this is a USDC Warp Route between Solana and Eclipse.
* Other: Native to Native (such as ETH between Optimism and Arbitrum), as well as Collateral to Collateral, are also possible if the token already exists on both origin and destination chains. Rebalancing liquidity is an important consideration in this case.

### Before You Start[​](https://docs.hyperlane.xyz/docs/guides/deploy-svm-warp-route#before-you-start) <a href="#before-you-start" id="before-you-start"></a>

Deploying a Warp Route requires there to be a core Hyperlane deployment that is connected (i.e. actively relayed and secured) to the rest of the Hyperlane ecosystem. The core Hyperlane deployments used in this guide are Solana ([core artifacts](https://github.com/hyperlane-xyz/hyperlane-monorepo/blob/main/rust/sealevel/environments/mainnet3/solanamainnet/core/program-ids.json)) and Eclipse ([core artifacts](https://github.com/hyperlane-xyz/hyperlane-monorepo/blob/main/rust/sealevel/environments/mainnet3/eclipsemainnet/core/program-ids.json)). You may need to refer to these core artifacts throughout the guide.

### Deploy a Sealevel Warp Route[​](https://docs.hyperlane.xyz/docs/guides/deploy-svm-warp-route#deploy-a-sealevel-warp-route) <a href="#deploy-a-sealevel-warp-route" id="deploy-a-sealevel-warp-route"></a>

1. Install `solana-cli 1.14.20` to build the Warp Route programs. Note that you **must** use this version, otherwise deployment may fail.<br>

   ```
   sh -c "$(curl -sSfL https://release.solana.com/v1.14.20/install)"
   ```
2. Build the Warp Route programs on your machine

   * Clone [hyperlane-monorepo](https://github.com/hyperlane-xyz/hyperlane-monorepo)
   * Go to `./hyperlane-monorepo/rust/sealevel/programs/`<br>

   ```
   # starting in rust/sealevel/programs/
   cd hyperlane-sealevel-token
   cargo build-sbf
   cd ../hyperlane-sealevel-token-collateral
   cargo build-sbf
   cd ../hyperlane-sealevel-token-native
   cargo build-sbf
   ```
3. To deploy the contracts, install `solana-cli 1.18.18`. Note that you **must** use this version, otherwise deployment may fail.\ <br>

   <pre><code><strong>sh -c "$(curl -sSfL https://release.solana.com/v1.18.18/install)"
   </strong></code></pre>
4. In the monorepo, in `rust/sealevel/environments/mainnet3/warp-routes`, create a new directory with the name you want your Warp Route deployment to have. For example, the existing SOL Warp Route between Solana and Eclipse lives in `rust/sealevel/environments/mainnet3/warp-routes/eclipsesol`.<br>
5. If your warp route creates a synthetic token, you can open a PR to the `hyperlane-registry` with metadata to associate with this token (example PR [here](https://github.com/hyperlane-xyz/hyperlane-registry/pull/142)). The `hyperlane-registry` also gives your Warp Route visibility within the Hyperlane ecosystem.<br>
6. Configure the parameters of your Warp Route in a JSON file named `token-config.json`, based on the `serde_json` serialization of the [TokenConfig](https://github.com/hyperlane-xyz/hyperlane-monorepo/blob/a5afd20f3ae69ccb3289d845d44b99dbdcde2c62/rust/sealevel/client/src/warp_route.rs#L114) Rust struct. The value to set for the `interchainGasPaymaster`, can be found in the [core deployment artifacts](https://docs.hyperlane.xyz/docs/guides/deploy-svm-warp-route#before-you-start).<br>
   * The example below shows a testnet Native to Synthetic Warp Route that transfers SOL from Solana and mints synthetic SOL on Eclipse. You can also check [this configuration](https://github.com/hyperlane-xyz/hyperlane-monorepo/blob/a5afd20f3ae69ccb3289d845d44b99dbdcde2c62/rust/sealevel/environments/mainnet3/warp-routes/eclipsesol/token-config.json) of a production SOL Warp Route.

     ```
     {
     "solanatestnet": {
         "type": "native",
         "decimals": 9,
         "interchainGasPaymaster": "<from core program addresses, choose the overhead igp>"
     },
     "eclipsetestnet": {
         "type": "synthetic",
         "decimals": 9,
         "name": "Solana (testnet)",
         "symbol": "SOL",
         "uri": "<permalink to the metadata.json file you merged into hyperlane-registry>"
         "interchainGasPaymaster": "<from core program addresses, choose the overhead igp>"
     }
     }
     ```
7. Create a Solana private key file. This key pays for the deployment and will be the owner of the deployed programs. An existing funded key can be used if you'd like.

   ```
   solana-keygen new --outfile ./warp-route-deployer-key.json
   ```
8. Fund the new key on both networks the Warp Route is being deployed to. The public key should be the same across SVM networks, but do double check with the wallets recommended by each chain, by loading the private key into them.
   * The funding should be enough to cover rent for all accounts related to the Warp Route, pay for transaction fees, and fund the [ATA](https://www.alchemy.com/overviews/associated-token-account) payer accounts (more on this below). For reference, the observed rent from one Hyperlane Warp Route account is `2.35 SOL` on Solana and `0.025 ETH` on Eclipse, so it's a good idea to fund the key with at least `5 SOL` / `0.05 ETH`.
   * To read the public key you just created:

     ```
     solana-keygen pubkey ./warp-route-deployer-key.json
     ```
9. Deploy the warp route with `warp-route deploy`

   info

   Note that since our goal was to make this tooling accessible to developers as soon as possible, it's not as reliable as we would hope. Please get in touch through a [GitHub issue](https://github.com/hyperlane-xyz/hyperlane-monorepo/issues) or via the `developers` channel on [Discord](https://discord.gg/2BYk6kV7) if you run into issues.

   * Overview of CLI flags:
     * `--warp-route-name` - should match the directory name picked for the Warp Route earlier
     * `--environment` - keep as `mainnet3`
     * `--environments-dir ../environments` - keep as `../environments`
     * `--built-so-dir` - keep as `../../target/deploy`, as it points to the compilation output directory of Warp Route programs
     * `--token-config-file` - point this to the `token-config.json` file created earlier
     * `--chain-config-file` - keep as `../environments/mainnet3/chain-config.json`, as this file has been pre-populated with chain settings for all Hyperlane-supported chains
     * `--ata-payer-funding-amount` - this flag specifies by how much to fund the Warp Route [ATA](https://www.alchemy.com/overviews/associated-token-account) payer accounts on both chains the deployment happens on. It's expressed in the lowest currency denomination, which means that it's interpreted as Lamports on Solana and Gwei on Eclipse (since it uses ETH as its native currency). In the command below, the value `10000000` works out to `0.001` ETH and `0.001` SOL, which is enough for an initial deployment. ATA payers can always be topped up later, so it’s fine to pick a small value. For reference, every Warp Route transfer costs the ATA payer `0.000000001 SOL` (on Solana) and `0.000021 ETH` (on Eclipse) on the destination chain.
   * The script is unlikely to work from the first try due to network congestion and program size, but the script should be idempotent and skip contracts that were already deployed / initialized. Errors like `Error: 11 write transactions failed` or `Error: Custom: Invalid blockhash` can always be retried by re-running the command. If retriable errors persist, consider increasing the compute unit price [here](https://github.com/hyperlane-xyz/hyperlane-monorepo/blob/44e0ff0733baf0da4d2b0304915f5f6cce92ffc7/rust/sealevel/client/src/cmd_utils.rs#L76).
     * For other error types, you may need to close the buffers and programs of your deployer key and redeploy everything from scratch. To display buffers and programs and close them one by one, follow the commands below. Closing programs also helps recover their rent deposit.

       ```
       solana program show --programs --keypair ./warp-route-deployer-key.json --url <CHAIN_RPC_URL>

       solana program show --buffers --keypair ./warp-route-deployer-key.json --url <CHAIN_RPC_URL>

       # You'll need to add the `--bypass-warning` flag when closing program accounts (as opposed to closing buffers)
       solana program close <YOUR_PROGRAM_ADDRESS> --url <CHAIN_RPC_URL>
       ```
   * To increase the odds of the deployment succeeding faster, you can set a private RPC url in the `--chain-config-file` passed to the script. (e.g. in `solanamainnet.rpcUrls.http`)
   * If deploying a synthetic, the command below will create a new token mint and use the metadata token extension to set the token name, symbol, and metadata json using the fields in the `--token-config-file` file
   * Run `warp-route deploy`

     ```
     # run from `rust/sealevel/client`
     cargo run -- -k ./warp-route-deployer-key.json warp-route deploy --warp-route-name eclipsesol --environment mainnet3 --environments-dir ../environments --built-so-dir ../../target/deploy --token-config-file ../environments/mainnet3/warp-routes/eclipsesol/token-config.json  --chain-config-file ../environments/mainnet3/chain-config.json --ata-payer-funding-amount 10000000
     ```

### Interacting with the Warp Route[​](https://docs.hyperlane.xyz/docs/guides/deploy-svm-warp-route#interacting-with-the-warp-route) <a href="#interacting-with-the-warp-route" id="interacting-with-the-warp-route"></a>

1. Let’s query one of the Warp Route programs, getting the program ID from the auto-generated `program-ids.json` in the directory you created above (where `token-config.json` also lives). This command prints the Mint Account, Mint Authority, and ATA payer account.

   ```
   # run from `rust/sealevel/client`
   cargo run -- -k ./warp-route-deployer-key.json -u <CHAIN_RPC_URL> token query --program-id <base58 address from program-ids.json> synthetic
   ```

   * if deploying a synthetic token, query the Mint Authority account to check out the metadata

     ```
     solana account <MINT_AUTHORITY> --url <CHAIN_RPC_URL>
     ```
2. Try transferring tokens!

   * You'll need the domain ID of the chain you're sending to, which you can find in the chain's `metadata.yaml` entry from the [hyperlane-registry](https://github.com/hyperlane-xyz/hyperlane-registry/tree/main/chains).

   ```
   # run from `rust/sealevel/client`
   cargo run -- -u <ORIGIN_CHAIN_RPC_URL> -k ./warp-route-deployer-key.json token transfer-remote ./warp-route-deployer-key.json <AMOUNT_IN_LOWEST_DENOM> <DESTINATION_CHAIN_DOMAIN_ID> <RECIPIENT_ADDRESS> <WARP_TOKEN_TYPE_ON_ORIGIN_CHAIN: native|synthetic|collateral> --program-id <origin chain base58 address from program-ids.json>
   ```
3. Look for the balance of the recipient on the destination chain, by querying the Mint Account address

   ```
   spl-token balance --owner ./warp-route-deployer-key.json -u <DESTINATION_CHAIN_RPC_URL> <MINT_ACCOUNT_ADDRESS>
   ```

   * The final parameter here is the SPL token ID. So if this is a synthetic warp route you want to check the balance of, you need to use the Mint address from a prior query you made a few steps ago.
   * You can also check out the last tx made to the recipient account in the explorer
4. This guide has made heavy use of the `hyperlane-sealevel-client` CLI from `hyperlane-monorepo`. You may find its various commands useful for configuring the Warp Route, making state queries, sending transfers, and more. Check out the other utilities it provides, in particular those under the `token` subcommand.

   ```
   # run from `rust/sealevel/client`
   cargo run -- --help
   ```

## Mailbox Contract[​](https://icarus131.github.io/devcookbook/docs/Hyperlane#mailbox-contract) <a href="#mailbox-contract" id="mailbox-contract"></a>

Eclipse and [Hyperlane](https://www.hyperlane.xyz/) partnered to bring Hyperlane's Permissionless Interoperability solution to Solana Virtual Machine (SVM) based blockchains. The Eclipse team worked with Hyperlane to deploy their mailbox contracts for the SVM.

The mailbox contract facilitates interchain operations. To develop smart contracts for the bridge, you must interact with this contract. If you would like to test a user interface against the active mailbox deployment.

Assuming you have already set up Rust, Solana CLI, and switched to the Eclipse Devnet using our RPC, let's proceed to writing the smart contract.

### Interacting with the mailbox contract[​](https://icarus131.github.io/devcookbook/docs/Hyperlane#interacting-with-the-mailbox-contract) <a href="#interacting-with-the-mailbox-contract" id="interacting-with-the-mailbox-contract"></a>

For Hyperlane to deliver a message to our smart contract, we need to implement a handle function. This function will be called by the mailbox.

## Writing the Smart Contract[​](https://icarus131.github.io/devcookbook/docs/Hyperlane#writing-the-smart-contract) <a href="#writing-the-smart-contract" id="writing-the-smart-contract"></a>

### **Parsing Instruction Data**[**​**](https://icarus131.github.io/devcookbook/docs/Hyperlane#parsing-instruction-data)

Send the instruction data and set up the send message function:

```rust
fn process_instruction(
    program_id: &Pubkey,
    accounts: &[AccountInfo],
    instruction_data: &[u8],
) -> ProgramResult {
    match instruction_data.get(0) {
        Some(&0) => {
            let accounts_iter = &mut accounts.iter();
            let sender_account = next_account_info(accounts_iter)?;
            let recipient_account = next_account_info(accounts_iter)?;
            let message_data = &instruction_data[1..];
```

Now, call the send message function:

```rust
            mailbox::instruction::send_message(
                program_id,
                sender_account,
                recipient_account,
                message_data,
            )?;
        }
```

Here you can call the receive message function. This goes inside the main match block:

```rust
    Some(&1) => {
      let accounts_iter = &mut accounts.iter();
      let recipient_account = next_account_info(accounts_iter)?;
      mailbox::instruction::receive_message(program_id, recipient_account)?;
    }
    _ => return Err(solana_program::program_error::ProgramError::InvalidInstructionData),
```

### Hyperlane CLI[​](https://icarus131.github.io/devcookbook/docs/Hyperlane#hyperlane-cli) <a href="#hyperlane-cli" id="hyperlane-cli"></a>

You can use the Hyperlane CLI to get a better understanding of how the deployments work and how to interact with them. The CLI can also be used to test sending and receiving messages.


# Oracles

This section provides an in-depth look at the currently available oracles on Eclipse.  Understanding the unique features and functionalities of these oracles will help users and developers make informed choices best suited to their needs. Whether you are looking to integrate real-world data into your applications or require robust security features, this overview covers all the essential information about the oracles operational on Eclipse.

List of available oracles:

{% content-ref url="/pages/tybuR1MapjU5eQyqaChH" %}
[Pyth Network](/developers/oracles/pyth-network)
{% endcontent-ref %}

{% content-ref url="/pages/rs8uWgmylCc0qPUSxQ9G" %}
[Switchboard](/developers/oracles/switchboard)
{% endcontent-ref %}


# Pyth Network

Pyth Network is an oracle protocol that connects the owners of market data to applications on multiple blockchains.

Pyth Network offers several products for developers:

* [Price Feeds](https://docs.pyth.network/price-feeds) provide real-time prices for 400+ assets on 40+ blockchain ecosystems, including Solana, many EVM chains, Aptos, Sui, NEAR, and several Cosmos chains.
* [Benchmarks](https://docs.pyth.network/benchmarks) provides historical Pyth prices for both on- and off-chain use.

### Pull Oracle

The Pyth pull oracle consists of two different programs. The receiver program is deployed at the following addresses:

<table><thead><tr><th width="192">Network</th><th>Program address</th></tr></thead><tbody><tr><td>Eclipse Mainnet</td><td><a href="https://explorer.eclipse.xyz/address/rec5EKMGg6MxZYaMdyBfgwp4d5rB9T1VQH5pJv5LtFJ">rec5EKMGg6MxZYaMdyBfgwp4d5rB9T1VQH5pJv5LtFJ</a></td></tr><tr><td>Eclipse Testnet</td><td><a href="https://explorer.eclipse.xyz/address/rec5EKMGg6MxZYaMdyBfgwp4d5rB9T1VQH5pJv5LtFJ?cluster=testnet">rec5EKMGg6MxZYaMdyBfgwp4d5rB9T1VQH5pJv5LtFJ</a></td></tr></tbody></table>

The price feed program is deployed at the following addresses:

<table><thead><tr><th width="199">Network</th><th>Program address</th></tr></thead><tbody><tr><td>Eclipse Mainnet</td><td><a href="https://explorer.eclipse.xyz/address/pythWSnswVUd12oZpeFP8e9CVaEqJg25g1Vtc2biRsT">pythWSnswVUd12oZpeFP8e9CVaEqJg25g1Vtc2biRsT</a></td></tr><tr><td>Eclipse Testnet</td><td><a href="https://explorer.eclipse.xyz/address/pythWSnswVUd12oZpeFP8e9CVaEqJg25g1Vtc2biRsT?cluster=testnet">pythWSnswVUd12oZpeFP8e9CVaEqJg25g1Vtc2biRsT</a></td></tr></tbody></table>

{% hint style="info" %}
For more info on Pyth Network, check out the [official docs](https://docs.pyth.network/home).
{% endhint %}


# Switchboard

[Switchboard On-Demand](https://docs.switchboard.xyz/docs) is designed to be a cost optimized, low latency and high security data solution for blockchain applications.

Switchboard on Eclipse works the same way as it does on Solana, except you'll have to pass in an extra parameter and there are a few gotchas. For full documentation, visit [Switchboard](https://docs.switchboard.xyz/docs/switchboard/readme/links-and-technical-documentation/eclipse).

### Program ID <a href="#program-id" id="program-id"></a>

<table><thead><tr><th width="192">Network</th><th>Program address</th></tr></thead><tbody><tr><td>Eclipse Mainnet</td><td><code>SBondMDrcV3K4kxZR1HNVT7osZxAHVHgYXL5Ze1oMUv</code></td></tr><tr><td>Eclipse Devnet</td><td><code>SBondMDrcV3K4kxZR1HNVT7osZxAHVHgYXL5Ze1oMUv</code></td></tr></tbody></table>

#### Getting Started <a href="#getting-started" id="getting-started"></a>

Start from [Integrating On-Chain (SVM)](https://docs.switchboard.xyz/docs/switchboard/readme/links-and-technical-documentation/integrating-on-chain-svm). You can add the network and the chain settings in the params for `fetchUpdateIx`. This will route the requests to the correct Switchboard oracles and map the data back to the target chain (Eclipse).

Copy

```
const provider = ...

// Initialize the program state account
const idl = (await anchor.Program.fetchIdl(new PublicKey("SBondMDrcV3K4kxZR1HNVT7osZxAHVHgYXL5Ze1oMUv"), provider))!;
const program = new anchor.Program(idl, provider);

// Get the Pull Feed - (pass in the feed pubkey)
const pullFeed = new PullFeed(program, new PublicKey(...));

// Get the update for the pull feed
const [pullIx, responses, _, luts] = await pullFeed.fetchUpdateIx({ 
      crossbarClient: crossbar,
      chain: "eclipse",
      network: "mainnet",
});
```

{% hint style="info" %}
For more info on Switchboard, check out the [official docs](https://docs.switchboard.xyz/docs).
{% endhint %}


# NFTs

Deploying NFTs on Eclipse unlocks a world of possibilities. To streamline this process, a comprehensive suite of developer tools is available, empowering creators to build, deploy, and manage their NFT projects with ease:

{% content-ref url="/pages/FQp1nyRkHLnQ1si5hSTa" %}
[Metaplex](/developers/nfts/metaplex)
{% endcontent-ref %}

{% content-ref url="/pages/EJoCCqzTUNMvQ6MOsWkX" %}
[Nifty Asset](/developers/nfts/nifty-asset)
{% endcontent-ref %}

{% content-ref url="/pages/NinaBcz6PahzzkDcG1zr" %}
[Libreplex (Token-2022)](/developers/nfts/libreplex-token-2022)
{% endcontent-ref %}


# Metaplex

## Intro

The Metaplex Protocol is a decentralized protocol at the center of Solana and the SVM ecosystem, designed to facilitate the creation, sale, and management of digital assets. It is the preferred platform for digital asset creation and management on Eclipse, offering tools and standards for developers, creators and businesses to build decentralized applications. Known for powering digital assets including NFTs, fungible tokens, RWAs, gaming assets, DePIN assets and more, Metaplex is one of the most widely used blockchain protocols and developer platforms, with over 550 million assets minted across 55 million unique wallets.

## Metaplex Core

Metaplex Core is the protocol powering the next generation of digital assets on Eclipse. It’s already been adopted by all major dApps and protocols for creating the next wave of NFTs. Metaplex Core offers all of the functionality of the previous Token Metadata standard and more, all while improving efficiency and cost by an order of magnitude.

Core supports the creation of Token Metadata features such as Editions and Royalties enforcement, while also enabling new functionality through its novel Plugin system. The Plugin system creates a common interface that allows additional features to be added to an asset dynamically, even going so far as to allow third party integrations installed directly to NFTs. Popular plugins include Royalty, Attributes, Autograph, and more!

The Core protocol utilizes a single account design that allows it to achieve the smallest onchain footprint, reducing the overall rent cost to the smallest possible amount. This compact, single account also allows the protocol to abstract away many of the complexities of SVM by utilizing its advanced Plugin system, allowing users to have all of the flexibility of a custom protocol without having to develop a new program.

<details>

<summary><strong>More information and details on developing with Metaplex Core can be found below:</strong></summary>

Official Metaplex Core Documentation:\
<https://developers.metaplex.com/core>\
<https://www.npmjs.com/package/@metaplex-foundation/mpl-core>\
<https://docs.rs/mpl-core/latest/mpl_core/>

</details>

***

## Metaplex Token Metadata

The Token Metadata protocol by Metaplex is the de facto standard for NFTs and Fungible Tokens on Solana and across all SVMs. It offers the widest level of support by SVM dApps and protocols. It is built on the SPL-Token and SPL-Token-2022 token programs. The Token Metadata program supports a wide array of Token Standards depending on the requirements of the creator.

### Non-Fungible Tokens

Token Metadata offers a basic standard for supporting non-fungible digital assets, allowing users to create onchain art, PFPs, or other singular assets. It supports common functionality such as delegation, sales, owned escrow (e.g. ERC-6551 equivalent) and more.

### Programmable Non-Fungible Tokens

All of the same functionality of Non-Fungible Tokens with additional programmability and royalty enforcement. Programmable NFTs support attaching a ruleset to an NFT that can prevent the asset from being sold or delegated to malicious platforms, marketplaces that don’t support royalties, and more.

### Fungible Tokens

Metadata can easily be attached to SPL-Tokens using the Token Metadata program to make Fungible or Semi-Fungible tokens. The Token Metadata program attaches a Metadata account to fungible assets in a way that’s recognized and readable across dApps and protocols.

### Editions

Token Metadata also includes the ability to print editions, commonly used for 1/1 or prints of artwork. The protocol utilizes a Master Edition NFT that can have derivative artworks printed off as numbered edition copies.

<details>

<summary><strong>More information and details on developing with Token Metadata can be found below:</strong></summary>

[https://developers.metaplex.com/token-metadata\
https://www.npmjs.com/package/@metaplex-foundation/mpl-token-metadata\
https://docs.rs/mpl-token-metadata/latest/mpl\_token\_metadata/<br>](<https://developers.metaplex.com/token-metadata&#xA;https://www.npmjs.com/package/@metaplex-foundation/mpl-token-metadata&#xA;https://docs.rs/mpl-token-metadata/latest/mpl_token_metadata/&#xA;>)

</details>

***

## Metaplex Candy Machine

The Metaplex Candy Machine protocol is the simplest way to deploy and launch NFT collections on the SVM. It works by deploying a lazy-minting protocol that stores the asset data for an entire collection and allows minters to mint assets from the collection. Candy Machine supports a wide array of “Guards” which offer a range of conditions that must first be met in order to mint an asset from the collection.

Popular Guards include Sol Payment, which represents the sale price; Token Gate, which can be used to gate the collection to an allowlist token mint; Token Payment, which allows payment in a custom token of the creator’s choosing; Start Date, which establishes the start time of the sale. Candy Machine currently supports over 20 guards with more being added regularly!

<details>

<summary><strong>More information and details on launching with Candy Machine can be found below:</strong></summary>

Token Metadata Launches: ​​<https://developers.metaplex.com/candy-machine>

Metaplex Core Launches: <https://developers.metaplex.com/core-candy-machine>

</details>

***

## Metaplex Bubblegum

The Bubblegum program by Metaplex utilizes Metaplex state compression to mint cNFTs in a compressed format. This allows for unprecedented cost efficiency while still providing all of the benefits that come with SVM digital assets: Aura, Metaplex SDKs, Metaplex support, etc.

The cNFT standard is based on the Metaplex Token Metadata NFT standard and contains similar fields on each asset. Compressed NFTs are aggregated in a Merkle tree stored on chain which enables assets to be aggregated and stored as a single Merkle root hash, minimizing the amount of rent required for storage. Detailed asset data can be easily obtained from Metaplex Aura.

<details>

<summary><strong>More information and details on developing with Bubblegum can be found below:</strong></summary>

[https://developers.metaplex.com/bubblegum\
https://www.npmjs.com/package/@metaplex-foundation/mpl-bubblegum\
https://docs.rs/mpl-bubblegum/latest/mpl\_bubblegum/<br>](<https://developers.metaplex.com/bubblegum&#xA;https://www.npmjs.com/package/@metaplex-foundation/mpl-bubblegum&#xA;https://docs.rs/mpl-bubblegum/latest/mpl_bubblegum/&#xA;>)

</details>

***

## MPL-404

MPL-404 is a hybrid model for digital assets, web3 games, and onchain communities. At the core of the model is a swap program (mpl-hybrid) that trades a fixed number of fungible assets for a non-fungible asset and vice versa. The swap is a dual escrow system, ensuring that all available non-fungible assets are backed by escrowed fungibles and vice versa.

Swaps allow for instant asset liquidity for NFTs and personalization and rarity gamification for tokens. The program is used by both memecoins and existing NFT communities for digital asset swapping and unique features such as metadata reroll and randomization.

<details>

<summary><strong>More information and details on developing with MPL-404 can be found below:</strong></summary>

[https://developers.metaplex.com/mpl-hybrid\
https://www.npmjs.com/package/@metaplex-foundation/mpl-hybrid\
https://docs.rs/mpl-hybrid/latest/mpl\_hybrid/<br>](<https://developers.metaplex.com/mpl-hybrid&#xA;https://www.npmjs.com/package/@metaplex-foundation/mpl-hybrid&#xA;https://docs.rs/mpl-hybrid/latest/mpl_hybrid/&#xA;>)

</details>

***

## Metaplex Core - JavaScript Client&#x20;

Metaplex provides a JavaScript library that can be used to interact with Core Assets. Thanks to the [Umi framework](https://github.com/metaplex-foundation/umi), it ships without many opinionated dependencies thus providing a lightweight library that can be used in any JavaScript project.

To get started you'll need to install the Umi Framework and the Core JavaScript Library.

### Umi Installation

To use Umi you need to install Umi and all the external plugins you'll want to use. Alternatively, if you don't need a specific plugin, you can install the default bundle that includes a set of plugins that's suitable for most use cases.

{% hint style="info" %}
**Note**: since the default bundle relies on web3.js for some of the interfaces you'll need to install that package as well.
{% endhint %}

#### Required Packages:

The following are the required packages that must be installed to use Umi:

```javascript
npm i @metaplex-foundation/umi
```

```javascript
npm i @metaplex-foundation/umi-bundle-defaults
```

```javascript
npm i @solana/web3.js
```

#### For library authors: <a href="#for-library-authors" id="for-library-authors"></a>

Library authors, that want to use Umi's interfaces to drastically reduce their dependencies, will only need to install the main Umi library. It is highly recommended to install it as a peer dependency to ensure the end-user does not end up with multiple versions of the Umi library using the following command:

```javascript
npm i @metaplex-foundation/umi --save-peer
```

#### For testing: <a href="#for-testing" id="for-testing"></a>

Also note that Umi comes with a testing bundle that can help both end-users and library authors to test their code. For instance, it includes a `MockStorage` implementation used for both the `UploaderInterface` and the `DownloaderInterface` so you can reliably test your code without having to rely on a real storage provider.

```javascript
npm i @metaplex-foundation/umi
```

```
npm i @metaplex-foundation/umi-bundle-tests
```

### Core JavaScript Library Installation

You can install the mpl-core library with the following command:

```
npm install @metaplex-foundation/mpl-core
```

### Initialization

Next, we will import both libraries and create an `Umi` instance for Eclipse Mainnet:

```javascript
import { createUmi } from '@metaplex-foundation/umi-bundle-defaults'
import { mplCore } from '@metaplex-foundation/mpl-core'

// Use the RPC endpoint of your choice.
const umi = createUmi('https://mainnetbeta-rpc.eclipse.xyz').use(mplCore())
```

Then instruct Umi which wallet to use. You can **create a new wallet** for testing, **import an existing wallet** from the filesystem, or **use a walletAdapter** for web-based dApps.

#### From a New Wallet:

```javascript
import { createUmi } from '@metaplex-foundation/umi-bundle-defaults'
import { generateSigner, signerIdentity } from '@metaplex-foundation/umi'

const umi = createUmi('https://mainnetbeta-rpc.eclipse.xyz')

// Generate a new keypair signer.
const signer = generateSigner(umi)

// Tell Umi to use the new signer.
umi.use(signerIdentity(signer))
```

#### From an Existing Wallet saved using a File System:

```javascript
import * as fs from "fs";
import * as path from "path";
import { createUmi } from '@metaplex-foundation/umi-bundle-defaults'
import { createSignerFromKeypair, signerIdentity } from '@metaplex-foundation/umi'

const umi = createUmi('https://mainnetbeta-rpc.eclipse.xyz')

// Use fs to navigate the filesystem till you reach
// the wallet you wish to use via relative pathing.
const walletFile = fs.readFileSync(
  path.join(__dirname, './keypair.json')
)

// Usually Keypairs are saved as Uint8Array, so you  
// need to transform it into a usable keypair.  
let keypair = umi.eddsa.createKeypairFromSecretKey(new Uint8Array(walletFile));

// Before Umi can use this Keypair you need to generate 
// a Signer type with it.  
const signer = createSignerFromKeypair(umi, keypair);

// Tell Umi to use the new signer.
umi.use(signerIdentity(walletFile))
```

#### From an Existing Wallet saved using Solana Wallet Adapter:

```javascript
import { createUmi } from '@metaplex-foundation/umi-bundle-defaults'
import { walletAdapterIdentity } from '@metaplex-foundation/umi-signer-wallet-adapters'
import { useWallet } from '@solana/wallet-adapter-react'

const wallet = useWallet()

const umi = createUmi('https://mainnetbeta-rpc.eclipse.xyz')

// Register Wallet Adapter to Umi
umi.use(walletAdapterIdentity(wallet))
```

{% hint style="info" %}
**Note**: The `walletAdapter` section provides only the code needed to connect it to Umi, assuming you've already installed and set up the `walletAdapter`. For a comprehensive guide, refer to this [guide](https://github.com/anza-xyz/wallet-adapter/blob/master/APP.md)

\
The **Umi** interface stores two instances of **Signer**: The **identity** using the app and the **payer** paying for transaction and storage fees. By default, the `signerIdentity` method will also update the **payer** attribute since, in most cases, the identity is also the payer.

If you want to learn more, go to the [Umi Context Interfaces Paragraph](https://developers.metaplex.com/umi/interfaces#the-context-interface)
{% endhint %}

### Creating Assets

You can now interact with Core Assets and Core Collections by using [the various functions provided by the library](https://mpl-core.typedoc.metaplex.com/) and passing your `Umi` instance to them. Here's an example of creating an Asset:

```javascript
const result = createV1(umi, {
  asset: asset,
  name: 'My Nft',
  uri: 'https://example.com/my-nft',
}).sendAndConfirm(umi)
```

### Fetch a Single Asset

To fetch the data of your newly created asset you can use:

```javascript
import { fetchAssetV1 } from '@metaplex-foundation/mpl-core'

const asset = await fetchAssetV1(umi, asset.publicKey)

console.log(asset)
```

***

## Metaplex Core - Rust

If you are a Rust developer, you can also use a Rust client SDK to interact with the Token Metadata program. Metaplex provides a dedicated Rust client crate, which is a lightweight crate with minimal dependencies.

To get started, you'll need to add the `mpl-token-metadata` dependency to your project. From a terminal on the root folder of your project:

```rust
cargo add mpl-token-metadata
```

### Structure

The client SDK is divided into several modules:

* `accounts`: structs representing the accounts of the program
* `errors`: enum representing program errors
* `instructions`: structs to facilitate the creation of instructions from client (off-chain) and programs (onchain), and instruction arguments
* `types`: structs representing types used by the program

A good starting point to explore is the `instructions` module, which contains helpers to create instructions to interact with Token Metadata. These are designed to be flexible and easy-to-use. If an instruction requires additional types, these will be referenced from the `types` module. If you want to deserialize the content of a Token Metadata account, the `accounts` module has a struct representing each account with helpers methods to deserialize their content.

### Instruction Builders <a href="#instruction-builders" id="instruction-builders"></a>

One of the main features of the client SDK is to facilitate the creation of instructions. There are two *types* of instruction builders depending on whether you are writing off-chain or onchain code, and both support passing accounts by name and optional positional accounts.

#### Client (off-chain) <a href="#client-off-chain" id="client-off-chain"></a>

These are intended to be used by off-chain client code. Each instruction is represented by a struct, where its fields are the `Pubkey`s of the required accounts.

`CreateV1` instruction code:

```rust
pub struct CreateV1 {
    /// Unallocated metadata account with address as pda
    /// of ['metadata', program id, mint id]
    pub metadata: Pubkey,

    /// Unallocated edition account with address as pda
    /// of ['metadata', program id, mint, 'edition']
    pub master_edition: Option<Pubkey>,

    /// Mint of token asset
    pub mint: (Pubkey, bool),

    /// Mint authority
    pub authority: Pubkey,

    /// Payer
    pub payer: Pubkey,

    /// Update authority for the metadata account
    pub update_authority: (Pubkey, bool),

    /// System program
    pub system_program: Pubkey,

    /// Instructions sysvar account
    pub sysvar_instructions: Pubkey,

    /// SPL Token program
    pub spl_token_program: Pubkey,
}
```

After filling in the instruction account fields, you can use the `instruction(...)` method to generate the corresponding `Instruction`:

```rust
// instruction args
let args = CreateV1InstructionArgs {
    name: String::from("My pNFT"),
    symbol: String::from("MY"),
    uri: String::from("https://my.pnft"),
    seller_fee_basis_points: 500,
    primary_sale_happened: false,
    is_mutable: true,
    token_standard: TokenStandard::ProgrammableNonFungible,
    collection: None,
    uses: None,
    collection_details: None,
    creators: None,
    rule_set: None,
    decimals: Some(0),
    print_supply: Some(PrintSupply::Zero),
};

// instruction accounts
let create_ix = CreateV1 {
    metadata,
    master_edition: Some(master_edition),
    mint: (mint_pubkey, true),
    authority: payer_pubkey,
    payer: payer_pubkey,
    update_authority: (payer_pubkey, true),
    system_program: system_program::ID,
    sysvar_instructions: solana_program::sysvar::instructions::ID,
    spl_token_program: spl_token::ID,
};

// creates the instruction
let create_ix = create_ix.instruction(args);
```

At this point, `create_ix` is an `Instruction` ready to be added to a transaction and sent for processing.

In the example above, you probably noticed that even when we do not need to provide a value for an optional argument, we still need to specify `None`. To facilitate the creation of instructions even further, you can use the `*Builder` *companion* struct.

Creating an `Instruction` using `CreateV1Builder`:

```rust
let create_ix = CreateV1Builder::new()
    .metadata(metadata)
    .master_edition(Some(master_edition))
    .mint(mint_pubkey, true)
    .authority(payer_pubkey)
    .payer(payer_pubkey)
    .update_authority(payer_pubkey, true)
    .is_mutable(true)
    .primary_sale_happened(false)
    .name(String::from("My pNFT"))
    .uri(String::from("https://my.pnft"))
    .seller_fee_basis_points(500)
    .token_standard(TokenStandard::ProgrammableNonFungible)
    .print_supply(PrintSupply::Zero)
    .instruction();
```

The end result is the same `create_ix` instruction to be added to a transaction and sent for processing.

#### Cross Program Invocation (onchain):

When you are writing a program that needs to interact with Token Metadata, you can use the onchain Cross Program Invocation (CPI) builder. They work similarly to off-chain builders, with the main difference being that they expect `AccountInfo` references instead of `Pubkey`.&#x20;

`TransferV1Cpi` instruction struct:

```rust
pub struct TransferV1Cpi<'a> {
    /// The program to invoke.
    pub __program: &'a AccountInfo<'a>,

    /// Token account
    pub token: &'a AccountInfo<'a>,

    /// Token account owner
    pub token_owner: &'a AccountInfo<'a>,

    /// Destination token account
    pub destination_token: &'a AccountInfo<'a>,

    /// Destination token account owner
    pub destination_owner: &'a AccountInfo<'a>,

    /// Mint of token asset
    pub mint: &'a AccountInfo<'a>,

    /// Metadata (pda of ['metadata', program id, mint id])
    pub metadata: &'a AccountInfo<'a>,

    /// Edition of token asset
    pub edition: Option<&'a AccountInfo<'a>>,

    /// Owner token record account
    pub token_record: Option<&'a AccountInfo<'a>>,

    /// Destination token record account
    pub destination_token_record: Option<&'a AccountInfo<'a>>,

    /// Transfer authority (token owner or delegate)
    pub authority: &'a AccountInfo<'a>,

    /// Payer
    pub payer: &'a AccountInfo<'a>,

    /// System Program
    pub system_program: &'a AccountInfo<'a>,

    /// Instructions sysvar account
    pub sysvar_instructions: &'a AccountInfo<'a>,

    /// SPL Token Program
    pub spl_token_program: &'a AccountInfo<'a>,

    /// SPL Associated Token Account program
    pub spl_ata_program: &'a AccountInfo<'a>,

    /// Token Authorization Rules Program
    pub authorization_rules_program: Option<&'a AccountInfo<'a>>,

    /// Token Authorization Rules account
    pub authorization_rules: Option<&'a AccountInfo<'a>>,

    /// The arguments for the instruction.
    pub __args: TransferV1InstructionArgs,
}
```

The instruction struct requires three different pieces of information: (1) the program to CPI into it – `__program` field; (2) a variable list of accounts represented by references to `AccountInfo`; (3) the instruction args – `__args` field. To simplify the creation of the struct, there is a `new(...)` factory method. After filling in the program, instruction accounts and argument fields, you can use the `invoke()` or `invoke_signed(...)` method to perform the CPI.

Invoking the `TransferV1Cpi` instruction:

```rust
// creates the instruction
let cpi_transfer = TransferV1Cpi::new(
    metadata_program_info,
    TransferV1CpiAccounts {
        token: owner_token_info,
        token_owner: owner_info,
        destination_token: destination_token_info,
        destination_owner: destination_info,
        mint: mint_info,
        metadata: metadata_info,
        authority: vault_info,
        payer: payer_info,
        system_program: system_program_info,
        sysvar_instructions: sysvar_instructions_info,
        spl_token_program: spl_token_program_info,
        spl_ata_program: spl_ata_program_info,
        edition: edition_info,
        token_record: None,
        destination_token_record: None,
        authorization_rules: None,
        authorization_rules_program: None,
    },
    TransferV1InstructionArgs {
        amount,
        authorization_data: None,
    },
);

// performs the CPI
cpi_transfer.invoke_signed(&[&signer_seeds])
```

You have probably noticed (again) that for every optional account/argument that we do not pass a value, we still need to set it to `None`. Similarly to the off-chain instructions, CPI instructions have a *companion* `*Builder` struct.

Invoking the `TransferV1Cpi` instruction using `TransferV1CpiBuilder`:

```rust
// creates the instruction
let cpi_transfer = TransferV1CpiBuilder::new(metadata_program_info)
    .token(owner_token_info)
    .token_owner(owner_info)
    .destination_token(destination_token_info)
    .destination_owner(destination_info)
    .mint(mint_info)
    .metadata(metadata_info)
    .edition(edition_info)
    .authority(vault_info)
    .payer(payer_info)
    .system_program(system_program_info)
    .sysvar_instructions(sysvar_instructions_info)
    .spl_token_program(spl_token_program_info)
    .spl_ata_program(spl_ata_program_info)
    .amount(amount);

// performs the CPI
cpi_transfer.invoke_signed(&[&signer_seeds])
```

### PDA Helpers

Another set of useful helpers of the SDK are the PDA lookups. Account types representing PDAs (e.g., `Metadata`) have associated functions to find/create PDA `Pubkey`.

Implementation of `find_pda` and `create_pda` helper methods:

```rust
impl Metadata {
    pub fn find_pda(mint: Pubkey) -> (Pubkey, u8) {
        Pubkey::find_program_address(
            &[
                "metadata".as_bytes(),
                crate::MPL_TOKEN_METADATA_ID.as_ref(),
                mint.as_ref(),
            ],
            &crate::MPL_TOKEN_METADATA_ID,
        )
    }

    pub fn create_pda(
        mint: Pubkey,
        bump: u8,
    ) -> Result<Pubkey, PubkeyError> {
        Pubkey::create_program_address(
            &[
                "metadata".as_bytes(),
                crate::MPL_TOKEN_METADATA_ID.as_ref(),
                mint.as_ref(),
                &[bump],
            ],
            &crate::MPL_TOKEN_METADATA_ID,
        )
    }
}
```

The `find_pda` method is usually used on off-chain clients:

```rust
let (metadata_pubkey, _) = Metadata::find_pda(mint);
```

The `create_pda` method is recommended to be used onchain, since it can save compute units in comparison to `find_pda`, but it does require storing the `bump` used to generate the PDA derivation:

```rust
let metadata_pubkey = Metadata::create_pda(mint, bump)?;
```

***

## Metaplex Candy Machine

The Metaplex Candy Machine protocol is the simplest way to deploy and launch NFT collections on the SVM. It works by deploying a lazy-minting protocol that stores the asset data for an entire collection and allows minters to mint assets from the collection. Candy Machine supports a wide array of “Guards” which offer a range of conditions that must first be met in order to mint an asset from the collection.

Popular Guards include **Payment**, which represents the sale price; Token Gate, which can be used to gate the collection to an allowlist token mint; Token Payment, which allows payment in a custom token of the creator’s choosing; Start Date, which establishes the start time of the sale. Candy Machine currently supports over 20 guards with more being added regularly.

{% hint style="info" %}
Official Candy Machine documentation: <https://developers.metaplex.com/candy-machine>
{% endhint %}

### Candy Machine - Javascript

Metaplex provides a JavaScript library that can be used to interact with Candy Machines. Thanks to the Umi framework, it ships without many opinionated dependencies and, thus, provides a lightweight library that can be used in any JavaScript project.

To get started, you'll need to install the Umi framework and the Candy Machine JavaScript library:

```javascript
npm install \
  @metaplex-foundation/umi \
  @metaplex-foundation/umi-bundle-defaults \
  @solana/web3.js \
  @metaplex-foundation/mpl-candy-machine
```

Next, you may create your `Umi` instance and install the `mplCandyMachine` plugin:

```javascript
import { createUmi } from '@metaplex-foundation/umi-bundle-defaults'
import { mplCandyMachine } from '@metaplex-foundation/mpl-candy-machine'

// Use the RPC endpoint of your choice.
const umi = createUmi('https://mainnetbeta-rpc.eclipse.xyz').use(mplCandyMachine())
```

Then you want to tell Umi which wallet to use. Please see the previous [section](#initialization).

That's it, you can now interact with NFTs by using [the various functions provided by the library](https://mpl-candy-machine.typedoc.metaplex.com/) and passing your `Umi` instance to them. Here's an example of fetching a candy machine account and its associated candy guard account.

```javascript
import { publicKey } from '@metaplex-foundation/umi'
import {
  fetchCandyMachine,
  fetchCandyGuard,
} from '@metaplex-foundation/mpl-candy-machine'

const candyMachinePublicKey = publicKey('...')
const candyMachine = await fetchCandyMachine(umi, candyMachinePublicKey)
const candyGuard = await fetchCandyGuard(umi, candyMachine.mintAuthority)
```

### Candy Machine - Rust

If you are a Rust developer, you can also use a Rust crate to interact with the Candy Machine program. Since the program is written in Rust, this crate contains all the program's logic, including helper methods that prepare instructions for us.

This can be helpful if you are developing a Rust client or if you want to make [CPI calls](https://solanacookbook.com/references/programs.html#how-to-do-cross-program-invocation) to the Candy Machine program within your program.

Since candy machines are composed of two programs, you will need to install two libraries.

* **Candy Machine Core**
  * [GitHub Repository](https://github.com/metaplex-foundation/mpl-candy-machine/tree/main/programs/candy-machine-core)
  * [Crate Page](https://crates.io/crates/mpl-candy-machine-core)
  * [API References](https://docs.rs/mpl-candy-machine-core/0.1.0/mpl_candy_machine_core/)
* **Candy Guard**
  * [GitHub Repository](https://github.com/metaplex-foundation/mpl-candy-machine/tree/main/programs/candy-guard)
  * [Crate Page](https://crates.io/crates/mpl-candy-guard)
  * [API References](https://docs.rs/mpl-candy-guard/0.1.0/mpl_candy_guard/)

### Candy Machine - Sugar

To get started, first check that you have Sugar installed on your system:

```
sugar --version
```

The command above should print the Sugar version – e.g., `sugar-cli 2.5.0`.

By default, Sugar uses the keypair and RPC settings from `solana-cli`. You can check your current settings by running:

```
solana config get
```

And you can set different settings by running:

```
solana config set --url <rpc url> --keypair <path to keypair file>
```

{% hint style="info" %}
Sugar does not require `solana-cli` to be installed on the system. Every command in Sugar accept the flags `-k` (keypair) and `-r` (RPC) to configure the values to use.
{% endhint %}

#### Preparing Your Files

Create a folder for your project and within it, create a folder named `assets` to store your json metadata and image file pairs with the naming convention `0.json`, `0.png`, `1.json`, `1.png`, and so on. The metadata extension is `.json` and the image files can be `.png`, `.gif`, `.jpg` and `.jpeg`. Additionally, you will need `collection.json` and `collection.png` files containing the information for your collection NFT.

Your project directory will then look like:

<figure><img src="/files/ySZ8aPEIO7dPIGV0rB8U" alt=""><figcaption></figcaption></figure>

#### Running Sugar

Within your project directory, use the `launch` command to start an interactive process of creating your config file and deploying a Candy Machine to Solana:

```
sugar launch
```

At the end of the execution of the launch command, a Candy Machine will be deployed onchain. You can use the `mint` command to mint an NFT:

```
sugar mint
```

When all NFTs have been minted, you can close your Candy Machine and reclaim the account rent:

```
sugar withdraw
```

{% hint style="info" %}
The `withdraw` command will close the Candy Machine even if it is not empty, so use it with caution.
{% endhint %}

***

## Metaplex Core Candy Machine

The Metaplex Protocol **Candy Machine** is the leading minting and distribution program for fair NFT collection launches on SVM chains. With the introduction of the `Metaplex Core Protocol` simplifying the NFT process, it was only fitting for a Core edition of the Candy Machine to come to the masses. Much like its name suggests, you can think of a Candy Machine as a temporary structure which is first loaded by creators and then unloaded by buyers. It allows creators to bring their digital assets onchain in a secure and customisable way.

{% hint style="info" %}
Official Core Candy Machine documentation: <https://developers.metaplex.com/core-candy-machine>
{% endhint %}

### Core Candy Machine - Javascript

Metaplex provides a JavaScript library that can be used to interact with the Core Candy Machine program. Thanks to the Umi framework, it ships without many opinionated dependencies and, thus, provides a lightweight library that can be used in any JavaScript project.

To get started, you'll need to install the Umi framework and the Core Candy Machine JavaScript library:

```javascript
npm install \
  @metaplex-foundation/umi \
  @metaplex-foundation/umi-bundle-defaults \
  @metaplex-foundation/mpl-core-candy-machine
```

Next, you may create your `Umi` instance and install the `mplCore` plugin like so:

```javascript
import { createUmi } from '@metaplex-foundation/umi-bundle-defaults'
import { 
  mplCandyMachine as mplCoreCandyMachine 
} from "@metaplex-foundation/mpl-core-candy-machine";

// Use the RPC endpoint of your choice.
const umi = createUmi('https://mainnetbeta-rpc.eclipse.xyz').use(mplCoreCandyMachine())
```

Then you want to tell Umi which wallet to use. Please see the previous [section](#initialization).

That's it, you can now start interacting with the `Core Candy Machine` program.

### Core Candy Machine - Rust

Metaplex provides a Rust library that can be used to interact with the Core Candy Machine program on both a client and program level.

To get started, you'll need to [install the Core Candy Machine Crate](https://crates.io/crates/mpl-core-candy-machine-core/).

```
cargo add mpl-core-candy-machine-core
```

{% hint style="info" %}
**Helpful Links:**

* [Rust Crate](https://crates.io/crates/mpl-core-candy-machine-core/)
* [GitHub Repository](https://github.com/metaplex-foundation/mpl-core-candy-machine)
* [API References](https://docs.rs/mpl-core-candy-machine-core/)
  {% endhint %}


# Nifty Asset

Nifty Asset is a fully-featured digital asset standard for the SVM. It is lightweight and efficient, designed to offer a small footprint (compute units consumption) and be highly flexible. The main features of the standard are:

* Single account to represent a digital asset.
* Flexible on-chain representation: store as much or as little data using optional extensions.
* Efficient zero-copy de-/serialization to minimize compute units utilization.
* Full-featured standard, including royalty enforcement, delegates, lock/unlock, inscriptions and groups (collections).
* Rust and JavaScript client SDKs.

Extensions can be combined to create a wide variety of non-fungible assets, from simple assets with links to off-chain data to fully on-chain assets. In addition to extensions, Nifty Asset follows the [⎘Proxy Pattern](https://nifty-oss.org/blog/proxy-pattern) to provide developers a program interface to customize every aspect of the protocol – and it enables that without requiring direct changes to the program. The advantage of that is that developers have full flexibility to extend its behavior in an non-opiniated way. The only requirement is to implement the [⎘program interface](https://crates.io/crates/nifty-asset-interface).

{% hint style="info" %}
The complete Nifty Asset documentation is available at: <https://nifty-oss.org/docs/category/nifty-asset>
{% endhint %}

***

## Nifty CLI

### Install from Source[​](https://nifty-oss.org/docs/quickstart/cli#install-from-source) <a href="#install-from-source" id="install-from-source"></a>

Requires [Rust to be installed](https://www.rust-lang.org/learn/get-started):

```
curl --proto '=https' --tlsv1.2 -sSf https://sh.rustup.rs | sh
```

Now you can install with `pnpm` from the root directory of the `nifty-asset` repository:

```
pnpm clients:cli:install
```

With Rust's `cargo`:

```
cd clients/cli
cargo install --path .
```

Directly from crates.io:

```
cargo install nifty-cli
```

To see all the available commands and usage suggestions run:

```
nifty --help
```

```
Usage: nifty [OPTIONS] <COMMAND>

Commands:
  burn      Burn an asset
  mint      Create an asset with extensions
  create    Create a basic asset without extensions
  decode    Get an asset account's data and decode it
  approve   Set a delegate on an asset with specific roles
  lock      Lock an asset, preventing any actions to be performed on it
  revoke    Revoke a delegate from an asset
  transfer  Transfer an asset to a new owner
  unlock    Unlock an asset, allowing actions to be performed on it
  help      Print this message or the help of the given subcommand(s)

Options:
  -k, --keypair-path <KEYPAIR_PATH>  Path to the keypair file
  -r, --rpc-url <RPC_URL>            RPC URL for the Solana cluster
  -h, --help                         Print help
  -V, --version                      Print version
```

To see the help for a specific command, run the command with the `--help` option, e.g.:

```
nifty create --help
```

```
Create a basic asset without extensions

Usage: nifty create [OPTIONS] --name <NAME>

Options:
  -k, --keypair-path <KEYPAIR_PATH>
          Path to the keypair file
  -n, --name <NAME>
          The name of the asset
  -a, --asset-keypair-path <ASSET_KEYPAIR_PATH>
          Path to the mint keypair file
  -r, --rpc-url <RPC_URL>
          RPC URL for the SVM cluster
      --immutable
          Create the asset as immutable
  -o, --owner <OWNER>
          Owner of the created asset, defaults to authority pubkey
  -h, --help
          Print help
```

We install the Solana CLI which we use to set and configure both a default keypair and RPC node URL:

```
sh -c "$(curl -sSfL https://release.solana.com/v1.16.25/install)"
```

Now we can set the default keypair and Eclipse RPC node URL:

```
solana config set --url https://mainnetbeta-rpc.eclipse.xyz
solana-keygen new
```

Nifty will use these values by default, but you can also pass them as options to the commands.

***

## JavaScript Client

The Nifty Asset JS Client is a JavaScript client that provides a set of methods for interacting with the Nifty Asset program on the Solana Virtual Machine. This guide will help you get started with the Nifty Asset JS Client and show you how to use it with the Umi framework.

### Requirements[​](https://nifty-oss.org/docs/quickstart/javascript#requirements) <a href="#requirements" id="requirements"></a>

* [Node.js](https://nodejs.org/) version 18 or higher
* [NPM](https://www.npmjs.com/) or other package manager (e.g., Yarn, PNPM)
* [TypeScript](https://www.typescriptlang.org/) version 4.0 or higher installed
* [Solana CLI](https://docs.solanalabs.com/cli) installed (for local development)

### Umi[​](https://nifty-oss.org/docs/quickstart/javascript#umi) <a href="#umi" id="umi"></a>

The Nifty Asset JS Client is built to work with the Umi framework. [Umi](https://github.com/metaplex-foundation/umi) is a lightweight JavaScript framework that is used to build Solana clients. Umi was built and is maintained by the Metaplex Foundation. The Nifty Asset JS Client is an Umi plugin that provides a set of methods for interacting with the Nifty Asset program.

#### Required Dependencies[​](https://nifty-oss.org/docs/quickstart/javascript#required-dependencies) <a href="#required-dependencies" id="required-dependencies"></a>

To get started you will need to install the following libraries:

* `@metaplex-foundation/umi`: The core Umi framework [npmjs.com](https://www.npmjs.com/package/@metaplex-foundation/umi)
* `@metaplex-foundation/umi-bundle-defaults`: Default plug-ins bundle for Umi [npmjs.com](https://www.npmjs.com/package/@metaplex-foundation/umi-bundle-defaults)
* `@nifty-oss/asset`: The Nifty Asset JS Client [npmjs.com](https://www.npmjs.com/package/@nifty-oss/asset)

Add these dependencies to your project by running the following command:

```
npm install \
  @metaplex-foundation/umi \
  @metaplex-foundation/umi-bundle-defaults \
  @nifty-oss/asset
```

#### Umi Configuration[​](https://nifty-oss.org/docs/quickstart/javascript#umi-configuration) <a href="#umi-configuration" id="umi-configuration"></a>

To use the Nifty Asset JS Client, you will need to configure Umi to use the network of your choice (e.g., Eclipse Mainnet, Devnet, Testnet, or Local) and the Nifty Asset plugin. Create an instance of *Umi* with the `createUmi` method, and pass in the network URL:

```
import { createUmi } from '@metaplex-foundation/umi-bundle-defaults';

const umi = createUmi('https://mainnetbeta-rpc.eclipse.xyz');
```

To configure Umi on other networks, simply replace the URL in the `createUmi` method with the RPC endpoint of your choice.

### RPC Endpoints

Nifty Asset is available on the following Eclipse networks:

| Network         | URL                                                                                         |
| --------------- | ------------------------------------------------------------------------------------------- |
| Eclipse Mainnet | [https://mainnetbeta-rpc.eclipse.xyz](https://mainnetbeta-rpc.eclipse.xyz/)                 |
| Eclipse Testnet | [https://testnet.dev2.eclipsenetwork.xyz](https://testnet.dev2.eclipsenetwork.xyz/)         |
| Eclipse Devnet  | [https://staging-rpc.dev2.eclipsenetwork.xyz](https://staging-rpc.dev2.eclipsenetwork.xyz/) |

Replace the URL in your `createUmi` method with the network of your choice.

***

## Use Nifty Asset JS Client[​](https://nifty-oss.org/docs/quickstart/javascript#use-nifty-asset-js-client) <a href="#use-nifty-asset-js-client" id="use-nifty-asset-js-client"></a>

To use the Nifty Asset JS Client, you will need to import the client and add it to your Umi instance using the `.use()` this this:

```
import { createUmi } from '@metaplex-foundation/umi-bundle-defaults';
import { niftyAsset } from '@nifty-oss/asset';

const umi = createUmi('https://mainnetbeta-rpc.eclipse.xyz').use(niftyAsset());
```

The `.use()` method registers the Nifty Asset plugin with the Umi instance, enabling access to the Nifty Asset methods.

You are all set and ready to start using the Nifty Asset JS Client with Umi. We will use this same structure throughout the documentation to demonstrate how to use the Nifty Asset JS Client with Umi, so take a moment to familiarize yourself with this setup. If you have any questions, please reach out to the Nifty Asset team on [Discord](https://discord.gg/uTMaCT7x9D).


# Libreplex (Token-2022)

## Token-2022[​](https://icarus131.github.io/devcookbook/docs/NFTsOnEclipse#token-2022) <a href="#token-2022" id="token-2022"></a>

Eclipse supports Token-2022 functionalities and extensions. Its compatibility with the original Token Program ensures seamless integration into Eclipse's framework, facilitating token management within decentralized applications. Token-2022's features, such as opt-in extensions and fees-free metadata storage, enhance Eclipse's ability to create and manage NFTs efficiently.

## Libreplex[​](https://icarus131.github.io/devcookbook/docs/NFTsOnEclipse#metaplex-and-libreplex) <a href="#metaplex-and-libreplex" id="metaplex-and-libreplex"></a>

Libreplex is a decentralized platform for NFTs on SVM that utilizes Token-2022. Creators and developers can leverage Libreplex for creating, managing, and trading NFTs. It provides a set of tools and services for developers to build and integrate NFTs into their applications and platforms. Some of the key features of Libreplex include:

* Open Source: Libreplex is an open-source project that allows developers to contribute and extend its functionality.
* Fees-free metadata storage: Libreplex aims to enforce predictability and transparency by offering a fees-free metadata storage solution.
* Distributed Deployment Keys: Libreplex uses a distributed deployment key system to ensure that no single entity has control over the platform.
* Community-driven Metadata Protocol: Libreplex is designed to be community-driven, allowing users to participate in the governance and evolution of the platform. This means no single entity can make fundamental changes to the ecosystem.

### Developing with Libreplex[​](https://icarus131.github.io/devcookbook/docs/NFTsOnEclipse#developing-with-libreplex) <a href="#developing-with-libreplex" id="developing-with-libreplex"></a>

* [Libreplex Developer Docs](https://libreplex.github.io/libreplex-program-library/)


# Developer Tooling

{% hint style="info" %}
Submit your deployment address to this [form](https://forms.gle/yJfFABQDPmpvgzAf7). We will provide engineering support and prioritize specific infrastructure needs.
{% endhint %}

Eclipse Mainnet works with all the standard Solana tooling. This guide provides a comprehensive list of tools and resources available for developers working with Eclipse Mainnet.

## Programming Languages

* [Rust](https://www.rust-lang.org/): Solana smart contracts, known as "programs," are primarily written in Rust due to its focus on performance, safety, and concurrency.
* [Python](https://seahorse-lang.org): Seahorse lets you write Solana programs in Python. Developers gain Python's ease-of-use, while still having the same safety guarantees of every Rust program on the SVM chain.

## Integrated Development Environments (IDEs) and Editors

* [Visual Studio Code](https://code.visualstudio.com/): A popular open-source code editor with extensions for Rust development, such as the [Rust Analyzer](https://marketplace.visualstudio.com/items?itemName=matklad.rust-analyzer) or the [official Rust extension](https://marketplace.visualstudio.com/items?itemName=rust-lang.rust).

## Frameworks and Libraries

* [Anchor](https://github.com/project-serum/anchor): A popular Rust framework for Solana that simplifies the development and testing of smart contracts by providing intuitive API and language constructs.
* [Solana Program Library (SPL)](https://spl.solana.com/): A collection of on-chain programs (smart contracts) and off-chain client libraries that serve as building blocks for dApp development on Solana.

## Testnets and Devnets

* [Eclipse Testnet](/developers/rpc-and-block-explorers): This is a network which should not support real economic value.
* [Eclipse Devnet](/developers/rpc-and-block-explorers): This network simulates the developer experience on Eclipse.
* [Solana Testnet](https://docs.solana.com/clusters): This is the official Solana L1 devnet and testnet.

## Testing and Debugging

* [Solana's built-in Rust testing](https://docs.solana.com/developing/on-chain-programs/testing): Solana supports Rust's built-in testing framework, enabling developers to write unit tests for their smart contracts.
* [Solana Explorer](https://explorer.solana.com/): A block explorer for the a network, which allows developers to monitor transactions, accounts, and program execution on the testnets and mainnet.

## Wallets and dApp Interaction

* [Eclipse Wallet](https://github.com/Eclipse-Laboratories-Inc/eclipse-wallet): This is a fork of the open-source Salmon wallet which is compatible with Eclipse.
* [Backpack](https://github.com/coral-xyz/backpack): Next-generation wallet for Solana and Ethereum chains, currently in beta.
* [MetaMask Snaps](https://www.drift.trade/updates/connect-with-metamask): Drift has developed a MetaMask Snap compatible with Eclipse.
* [Solflare](https://solflare.com/): A widely-used browser extension for SVM that allows users to interact with dApps, manage NFTs, and swap tokens.

## RPC Providers

* [Triton One](https://triton.one/): The fastest, most reliable RPC solution for Solana.
* [BlockPI](https://blockpi.io/chain/solana): The most cost-effective and high-performance multi-chain RPC provider.


# Faucet

{% hint style="info" %}
Submit your deployment address to this [form](https://forms.gle/yJfFABQDPmpvgzAf7). We will provide engineering support and prioritize specific infrastructure needs.
{% endhint %}

## Eclipse Testnet

### **Getting Sepolia ETH Tokens**

As a user, you can use Sepolia ETH to explore the Eclipse testnet and dApps deployed on the network. Sepolia ETH is not meant to be traded, and is only used to test applications. Sepolia ETH can be claimed from a number of faucets: Alchemy, QuickNode, and Infura.&#x20;

Here are instructions on how to claim Sepolia ETH on [Alchemy Sepolia ETH Faucet](https://sepoliafaucet.com/).&#x20;

1. Create an Alchemy account to request Sepolia ETH.
2. Visit the Alchemy Sepolia faucet and log in with your Alchemy account.
3. Enter your wallet in the provided box, complete the CAPTCHA verification, and click "Send Me ETH".

## Eclipse Devnet

### Requesting Devnet Tokens

You can request devnet tokens using this [faucet UI](https://eclipse-faucet-ui.vercel.app/).

To get devnet tokens programmatically, simply run this curl command in the terminal and replace `YOUR_SOLANA_VM_ACCOUNT` with the address of the wallet that you want to import tokens into.

{% code overflow="wrap" %}

```bash
curl https://staging-rpc.dev2.eclipsenetwork.xyz -X POST -H "Content-Type: application/json" -d '{"jsonrpc":"2.0","id":1, "method":"requestAirdrop", "params":["YOUR_SOLANA_VM_ACCOUNT", 1000000000]}'
```

{% endcode %}

The request is in "lamports," and you must request at least 1 SOL = 1000000000 lamports.

You can alternatively use the Solana CLI to airdrop yourself tokens:

```bash
solana config set --url https://staging-rpc.dev2.eclipsenetwork.xyz
solana airdrop 0.2
```

### Verifying Your Account Balance

{% code overflow="wrap" %}

```bash
curl https://staging-rpc.dev2.eclipsenetwork.xyz -X POST -H "Content-Type: application/json" -d ' {"jsonrpc":"2.0","id":1, "method":"getBalance", "params":["YOUR_SOLANA_VM_ACCOUNT"]}'
```

{% endcode %}

If you've just airdropped yourself some tokens, it might take a moment to show up.

### SPL Token Faucet

For generating custom tokens, you can use our [SPL Token Faucet](https://eclipse-dummy-token-faucet.vercel.app/) frontend.

You can also use the SPL Token CLI directly. You can reference the Solana docs on the [Token program](https://spl.solana.com/token), or you can follow the steps below to create a dummy fungible token:

### Creating An SPL Token

Make sure your Solana CLI is configured to Eclipse Devnet and [airdrop yourself](#requesting-devnet-tokens) some tokens. Next, install the SPL token CLI:&#x20;

```
cargo install spl-token-cli
```

You can see all commands for this tool with `spl-token --help`.

Create the SPL token:

```bash
spl-token create-token
```

{% code title="Output" %}

```
Creating token 7RFaNSSdVD9Q2aYJf1XNCTz7xKfgN19fAPAsAqzaorqr under program TokenkegQfeZyiNwAJbNbGKPFXCWuBvf9Ss623VQ5DA

Address:  7RFaNSSdVD9Q2aYJf1XNCTz7xKfgN19fAPAsAqzaorqr
Decimals:  9

Signature: 2a13fRfFHbbBdpF9QSecqAGjSZ4BBWoPKTSurcoXAL2RW5ZchAzbcY1pgqfDLzfGhDvSFd88egof4FTPtrAr72sv
```

{% endcode %}

Take note of the token address, which happens to be `7RFaNSSdVD9Q2aYJf1XNCTz7xKfgN19fAPAsAqzaorqr` in this case.

### Create A Balance For Your SPL Token

Create an empty account to hold a balance of your newly created token:

```bash
spl-token create-account 7RFaNSSdVD9Q2aYJf1XNCTz7xKfgN19fAPAsAqzaorqr
```

{% code title="Output" %}

```
Creating account 4dYFmw8ytJmYDmZLvFnobT4CKC7Z5q1W5b9byEuVVap7

Signature: 25EsivN9f75yJNhrSrnM9TuPGHFx9tpyYwUhUomY5kydZpfvjcShJWCsUB5uk7hkP9QeTr6JpJtQV1DPjDjYtAjR
```

{% endcode %}

Mint tokens into the newly-created account:

```bash
spl-token mint 7RFaNSSdVD9Q2aYJf1XNCTz7xKfgN19fAPAsAqzaorqr 10000
```

{% code title="Output" %}

```
Minting 10000 tokens
  Token: 7RFaNSSdVD9Q2aYJf1XNCTz7xKfgN19fAPAsAqzaorqr
  Recipient: 4dYFmw8ytJmYDmZLvFnobT4CKC7Z5q1W5b9byEuVVap7

Signature: 3aVqfVgmZu333YxwJg7xieKkmebdw9NpPvmsCJgao3eQTDwQNmWYD3KBppp5g6Tbw6cN7pjQonN61Z2d2CFazzqp
```

{% endcode %}

See all of the tokens that you own:

```bash
spl-token accounts
```

{% code title="Output" %}

```
Token                                         Balance
-----------------------------------------------------
7RFaNSSdVD9Q2aYJf1XNCTz7xKfgN19fAPAsAqzaorqr  10000
```

{% endcode %}

### Transferring SPL Tokens

Transferring tokens to another account:

```bash
spl-token transfer 7RFaNSSdVD9Q2aYJf1XNCTz7xKfgN19fAPAsAqzaorqr 50 qp6oBVgpxfQDMP1GKzxgzDxKqEuZnuC8gZo5PK1qrdh
```

If it's the receiver's first time ever receiving tokens, then you'll get an error like this:

{% code title="Output" %}

```
Error: "Error: Recipient's associated token account does not exist. Add `--fund-recipient` to fund their account"
```

{% endcode %}

To fix it, you'll have to be the one to "fund" the recipient token account by adding the `--fund-recipient` flag:

```bash
spl-token transfer --fund-recipient AQoKYV7tYpTrFZN6P5oUufbQKAUr9mNYGe1TTJC9wajM 50 vines1vzrYbzLMRdu58
```

{% code title="Output" %}

```
Transfer 50 tokens
  Sender: 4dYFmw8ytJmYDmZLvFnobT4CKC7Z5q1W5b9byEuVVap7
  Recipient: qp6oBVgpxfQDMP1GKzxgzDxKqEuZnuC8gZo5PK1qrdh
  Recipient associated token account: 7G9XHxAjgXhkKnTmcb8Z24ssSgiXYNnTp8KqRuQVCi9D
  Funding recipient: 7G9XHxAjgXhkKnTmcb8Z24ssSgiXYNnTp8KqRuQVCi9D

Signature: 25cb1D1pxN3Sh3cqFhJSP2hmD6jAMRDxeg9jrvp3SH6GNpkY6Z4viEs7FFsHwVH5528xUZB8xCT5F1uVrXpcTBcN
```

{% endcode %}


# Benchmarking

To test the performance of Eclipse Testnet, you can run our benchmarking script. The following test benchmarks AMM swaps to assess the TPS of Eclipse Testnet.

## Prerequisites[​](https://icarus131.github.io/devcookbook/docs/Benchmarking#pre-requisites) <a href="#pre-requisites" id="pre-requisites"></a>

* [node.js](https://nodejs.org/en/download/)
* [git](https://git-scm.com/downloads)

Once you have the above installed, clone the benchmarking repository:

```bash
git clone https://github.com/Eclipse-Laboratories-Inc/eclipse-benchmarking/
```

## Running Benchmarking Test[​](https://icarus131.github.io/devcookbook/docs/Benchmarking#running-the-benchmarking-tests) <a href="#running-the-benchmarking-tests" id="running-the-benchmarking-tests"></a>

Navigate to the `token_swap` folder after cloning the repository. Install ts-node by running the following command:

```bash
npm i -g ts-node
```

{% hint style="warning" %}
You might have to give super user or admin permissions to install globally or use the `-g` flag.
{% endhint %}

To install the dependencies, run the following command:

```bash
npm i
```

Make sure to run this command inside the `token_swap` folder. The final step is to run the benchmarking tests using the following command:

```bash
ts-node spam.ts
```

This runs 10 instances of an AMM performing any specified number of swaps.

## Modifying Benchmarking[​](https://icarus131.github.io/devcookbook/docs/Benchmarking#modifying-the-benchmarking-tests) <a href="#modifying-the-benchmarking-tests" id="modifying-the-benchmarking-tests"></a>

The default test is 275 swaps. To modify the number of swaps, modify line 63 in the `benchmark.ts` file inside the `token_swap` folder. The following is the code snippet to modify:

```javascript
    ...
    await mintTo(connection, payer, mintA, userAccountA, owner, SWAP_AMOUNT_IN);

    console.log("Run test: benchmark swap");
    await benchmarkSwap(275);

    console.log("Success\n");
```

If you've followed the steps successfully, you should see an output similar to the following:&#x20;

<figure><img src="https://icarus131.github.io/devcookbook/assets/images/benchmarking-371ec579dea9b15878bbb125fda5211f.jpg" alt=""><figcaption></figcaption></figure>


# Running AMM benchmarking tests

{% hint style="info" %}
INFO

The following section aims to help us run benchmarking tests on the Eclipse Network.
{% endhint %}

### Why AMM Benchmarking?[​](https://icarus131.github.io/devcookbook/docs/Benchmarking#why-amm-benchmarking) <a href="#why-amm-benchmarking" id="why-amm-benchmarking"></a>

* Essentially, we want to test the performance of the Eclipse Network by obtaining the transactions per second (TPS) that the network can handle and its latency.

### Pre-requisites[​](https://icarus131.github.io/devcookbook/docs/Benchmarking#pre-requisites) <a href="#pre-requisites" id="pre-requisites"></a>

* You will have to have nodejs installed on your machine. You can install it from [here](https://nodejs.org/en/download/).
* Now, once you have that ready, you will have to clone our benchmarking repository. You can do that by running the following command:

```bash
git clone https://github.com/Eclipse-Laboratories-Inc/eclipse-benchmarking/
```

* To do this you will also have to ensure that git is installed. You can install it from [here](https://git-scm.com/downloads).

### Running the benchmarking tests[​](https://icarus131.github.io/devcookbook/docs/Benchmarking#running-the-benchmarking-tests) <a href="#running-the-benchmarking-tests" id="running-the-benchmarking-tests"></a>

* To run the benchmarking tests, you will first have to navigate to the `token_swap` folder after cloning the repository.
* First we need to install ts-node. To do this, run the following command:

```bash
npm i -g ts-node
```

{% hint style="warning" %}
WARNING

You might have to give super user or admin permissions to install globally or use the `-g` flag.
{% endhint %}

* Now we need to install the dependencies. To do this, run the following command:

```bash
npm i
```

* Make sure to run this command inside the `token_swap` folder.
* Now, the final step is to run the benchmarking tests using the following command:

```
ts-node spam.ts
```

* This runs 10 instances of an AMM performing any specified number of swaps.

### Modifying the benchmarking tests[​](https://icarus131.github.io/devcookbook/docs/Benchmarking#modifying-the-benchmarking-tests) <a href="#modifying-the-benchmarking-tests" id="modifying-the-benchmarking-tests"></a>

* To modify the number of swaps, we will have to modify the benchmark.ts file inside the `token_swap` folder.
* The following is the code snippet that we will have to modify:

```tsx
...
   await mintTo(connection, payer, mintA, userAccountA, owner, SWAP_AMOUNT_IN);

    console.log("Run test: benchmark swap");
    await benchmarkSwap(275);

    console.log("Success\n");
```

* Here we can change the specified number of swaps. The default is 275.
* The above code snippet is located at line 63 in the benchmark.ts file.

### Example[​](https://icarus131.github.io/devcookbook/docs/Benchmarking#example) <a href="#example" id="example"></a>

* If all the steps are followed correctly, you should see an output similar to the following:&#x20;

  <figure><img src="https://icarus131.github.io/devcookbook/assets/images/benchmarking-371ec579dea9b15878bbb125fda5211f.jpg" alt=""><figcaption></figcaption></figure>


# Decentralized Identities

This section offers a comprehensive overview of the currently available decentralized identities (DID) protocols on Eclipse. By understanding the distinctive features and capabilities of these DID protocols, users and developers can make well-informed decisions tailored to their specific needs. Whether you’re looking to secure a unique digital identity or require advanced functionalities for your decentralized applications, this guide covers all the essential details about the DID protocols supported on Eclipse.\
\
List of available DID protocols on Eclipse:

{% content-ref url="/pages/YtNLHrgxqw24a8cBDvAj" %}
[AllDomains](/developers/developer-tooling/decentralized-identities/alldomains)
{% endcontent-ref %}


# AllDomains

## **What is AllDomains?**

**AllDomains** is a Web3 platform to create, register, and trade customizable Web3 Identities.

With AllDomains any user can choose not only a name they desire but also the community they wish to associate with, adding a new layer of customization to their Web3 identity. Be it a Token, an NFT collection, or a DAO, **everyone can create their own TLD** and unite their whole community under a unique brand.

* You can register a domain at: <https://alldomains.id/>
* AllDomains documentation: <https://docs.alldomains.id/protocol>

{% hint style="info" %}
If you want urgent help with alldomains, please go to their discord and open a ticket: <https://discord.com/invite/alldomains>
{% endhint %}

{% hint style="info" %}
You can also reach the alldomains team directly on the Eclipse discord by tagging the role "alldomains"
{% endhint %}

## AllDomains - Eclipse SDK

### How to integrate AllDomains Protocol: <a href="#how-to-integrate-alldomains-protocol" id="how-to-integrate-alldomains-protocol"></a>

Libraries are open source with MIT licenses:&#x20;

* Typescript: <https://github.com/onsol-labs/tld-parser>
* Rust: [https://github.com/onsol-labs/tld-parse](https://github.com/onsol-labs/tld-parser)[-rs](https://github.com/onsol-labs/tld-parser-rs)

### **1. Installation**

```
npm install @onsol/tldparser
```

### **2. Domain Resolution**

The following code shows how to get the Public Key owner of a domain name

* Works with **any AllDomains TLD**

```javascript
import { TldParser } from "@onsol/tldparser";
import { Connection } from "@solana/web3.js";

const RPC_URL = 'https://mainnetbeta-rpc.eclipse.xyz';

// initialize a Solana Connection
const connection = new Connection(RPC_URL);

// get the owner pubkey of a domain name
async function resolveDomain(domain){

    // initialize a Tld Parser
    const parser = new TldParser(connection);
    
    return await parser.getOwnerFromDomainTld(domain);
}

//get the owner pubkey of "miester.turbo";
resolveDomain("miester.turbo");
```

### **3. Get domains owned by a Public Key**

#### **a. Get all owned domains**

```javascript
import { TldParser, NameRecordHeader } from "@onsol/tldparser";
import { Connection, PublicKey } from "@solana/web3.js";

const RPC_URL = 'https://mainnetbeta-rpc.eclipse.xyz';

// initialize a Solana Connection
const connection = new Connection(RPC_URL);

// get all the domains owned by a public key
async function getOwnedDomains(owner: PublicKey){

    // initialize a Tld Parser
    const parser = new TldParser(connection);

    // get all owned domains
    let allUserDomains = await parser.getParsedAllUserDomains(owner);

    return allUserDomains;
}

// get all owned domains
getOwnedDomains(new PublicKey(""));
```

#### **b. Get only unwrapped owned domains**

```javascript
import { TldParser, NameRecordHeader } from "@onsol/tldparser";
import { Connection, PublicKey } from "@solana/web3.js";

const RPC_URL = 'https://mainnetbeta-rpc.eclipse.xyz';

// initialize a Solana Connection
const connection = new Connection(RPC_URL);

// get only the unwrapped domains owned by a public key
async function getOwnedUnwrappedDomains(owner: PublicKey){

    // initialize a Tld Parser
    const parser = new TldParser(connection);
    
    // get only unwrapped domains
    let unwrappedUserDomains = await parser.getParsedAllUserDomainsUnwrapped(owner);

    return unwrappedUserDomains;
}

// get only unwrapped owned domains
getOwnedUnwrappedDomains(new PublicKey(""));
```

### **4. Get domains owned by a Public Key from a specific TLD**

#### **a. Get all owned domains from a specific TLD**

```javascript
import { TldParser, NameRecordHeader } from "@onsol/tldparser";
import { Connection, PublicKey } from "@solana/web3.js";

const RPC_URL = 'https://mainnetbeta-rpc.eclipse.xyz';

// initialize a Solana Connection
const connection = new Connection(RPC_URL);

// get the all the domains owned by a public key in a TLD
async function getOwnedDomainsFromTld(owner, tld){

    // initialize a Tld Parser
    const parser = new TldParser(connection);
    
    // get all owned domains from a TLD
    let ownedDomainsFromTld = parser.getParsedAllUserDomainsFromTld(owner, tld);

    return ownedDomainsFromTld;
}

// get all owned domains in the ".turbo" Tld, without the "."
getOwnedDomainsFromTld(new PublicKey(""), "turbo");
```

#### **b. Get all only unwrapped owned domains from a specific TLD**

```javascript
import { TldParser, NameRecordHeader } from "@onsol/tldparser";
import { Connection, PublicKey } from "@solana/web3.js";

const RPC_URL = 'https://mainnetbeta-rpc.eclipse.xyz';

// initialize a Solana Connection
const connection = new Connection(RPC_URL);

// get only the unwrapped domains owned by a public key from a TLD
async function getOwnedUnwrappedDomainsFromTld(owner, tld){

    // initialize a Tld Parser
    const parser = new TldParser(connection);
    
    // get only unwrapped domains from a TLD
    let ownedUnwrappedDomainsFromTld = parser.getParsedAllUserDomainsFromTldUnwrapped(owner, tld);

    return ownedUnwrappedDomainsFromTld;
}

// get owned unwraped domains in the ".turbo" Tld, without the "."
getOwnedUnwrappedDomainsFromTld(new PublicKey(""), "turbo");
```

### **5. Get all active AllDomains TLDs**

```javascript
import { getAllTld } from "@onsol/tldparser";
import { Connection } from "@solana/web3.js";

const RPC_URL = 'https://mainnetbeta-rpc.eclipse.xyz';

// initialize a Solana Connection
const connection = new Connection(RPC_URL);

// get all active AllDomains TLDs
const allTlds = await getAllTld(connection);
```

### **6. Get all domains registered in All TLDs**

```javascript
import { NameRecordHeader, TldParser, findAllDomainsForTld, getAllTld } from "@onsol/tldparser";
import { Connection } from "@solana/web3.js";

const RPC_URL = 'https://mainnetbeta-rpc.eclipse.xyz';

// initialize a Solana Connection
const connection = new Connection(RPC_URL);

// slow
// please use no. 8 for a batch/faster implementation 
// this code doesn't check if a domain is expired or not
async function getAllRegisteredDomains(connection: Connection){
    //get all TLDs
    const allTlds = await getAllTld(connection);
    const parser = new TldParser(connection);
    let domains = [];
    for (let tld of allTlds) {

        //get the parent name record for a TLD
        const parentNameRecord = await NameRecordHeader.fromAccountAddress(connection, tld.parentAccount);
            
        //get all name accounts in a specific TLD
        const allNameAccountsForTld = await findAllDomainsForTld(connection, tld.parentAccount);

        if (!parentNameRecord || !parentNameRecord.owner) return;
        
        //parse all name accounts in a specific TLD
        for (let nameAccount of allNameAccountsForTld) {

            //get domain as string without the tld
            const domain = await parser.reverseLookupNameAccount(nameAccount, parentNameRecord.owner);
            domains.push(                {
                nameAccount: nameAccount,
                domain: `${domain}${tld.tld}`
            });
        }
    }
    return domains;
}

// get all domains registered on AllDomains
console.log(await getAllRegisteredDomains(connection))
```

### 7. Get User Main Domain

```javascript
import { MainDomain, findMainDomain } from "@onsol/tldparser";
import { Connection, PublicKey } from "@solana/web3.js";


// returns MainDomain struct if it is available. it will return undefined if it is not.
// MainDomains are usually shown as mainDomain.domain + mainDomain.tld 
// the mainDomain.nameAccount is proof that the user has set it.
const fetchMainDomain = async (connection: Connection, pubkey: string | PublicKey): Promise<MainDomain | undefined> => {
    if (typeof pubkey === "string") {
        pubkey = new PublicKey(pubkey)
    }
    const [mainDomainPubkey] = findMainDomain(pubkey);
    let mainDomain = undefined;
    try {
        mainDomain = await MainDomain.fromAccountAddress(
            connection,
            mainDomainPubkey,
        );
        return mainDomain
    } catch (e) {
        console.log("No main domain found")
    }
    return mainDomain
};


const CONNECTION = new Connection("");
console.log(await fetchMainDomain(CONNECTION, "2EGGxj2qbNAJNgLCPKca8sxZYetyTjnoRspTPjzN2D67"))

// MainDomain {
//     nameAccount: PublicKey [PublicKey(9YzfCEHb62bQ47snUyjkxhC9Eb6y7CSodK3m8CKWstjV)] {
//       _bn: <BN: 7f0fb1f72ae0af9c5e7f5e4190d02ed2a720e88fb5787425157b9a9ec3fc39ec>
//     },
//     tld: '.abc',
//     domain: 'miester'
//   }
```

### **8. Batch get AllDomains Domains**

```javascript
import {
    ANS_PROGRAM_ID,
    findNameHouse,
    findNftRecord,
    getAllTld,
    getHashedName,
    getNameAccountKeyWithBump,
    NameRecordHeader,
    NftRecord,
    TldParser,
} from "@onsol/tldparser";
import {
    Connection,
    GetProgramAccountsResponse,
    PublicKey,
} from "@solana/web3.js";
import { setTimeout } from "timers/promises";

const connection = new Connection("");

async function findAllDomainsForTld(
    connection: Connection,
    parentAccount: PublicKey,
): Promise<{ pubkey: PublicKey; nameRecordHeader: NameRecordHeader }[]> {
    const filters: any = [
        {
            memcmp: {
                offset: 8,
                bytes: parentAccount.toBase58(),
            },
        },
    ];

    const accounts: GetProgramAccountsResponse =
        await connection.getProgramAccounts(ANS_PROGRAM_ID, {
            filters: filters,
        });
    return accounts.map((a) => {
        return {
            pubkey: a.pubkey,
            nameRecordHeader: NameRecordHeader.fromAccountInfo(a.account),
        };
    });
}

export async function performReverseLookupBatched(
    connection: Connection,
    nameAccounts: PublicKey[],
    tldHouse: PublicKey,
): Promise<(string | undefined)[]> {
    let reverseLookupDomains: (string | undefined)[] = [];

    while (nameAccounts.length > 0) {
        const currentBatch = nameAccounts.splice(0, 100);

        const promises = currentBatch.map(async (nameAccount) => {
            const reverseLookupHashedName = await getHashedName(
                nameAccount.toBase58(),
            );
            const [reverseLookUpAccount] = getNameAccountKeyWithBump(
                reverseLookupHashedName,
                tldHouse,
                undefined,
            );
            return reverseLookUpAccount;
        });

        const reverseLookUpAccounts: PublicKey[] = await Promise.all(promises);
        const reverseLookupAccountInfos =
            await connection.getMultipleAccountsInfo(reverseLookUpAccounts);

        const batchDomains = reverseLookupAccountInfos.map(
            (reverseLookupAccountInfo) => {
                const domain = reverseLookupAccountInfo?.data
                    .subarray(200, reverseLookupAccountInfo?.data.length)
                    .toString();
                return domain;
            },
        );

        reverseLookupDomains = reverseLookupDomains.concat(batchDomains);
    }

    return reverseLookupDomains;
}

// onlyDomains will grab only domains and no nfts
async function getAllRegisteredDomains(
    tldExpected?: string,
    onlyDomains: boolean = false,
) {
    // get all TLDs
    const allTlds = await getAllTld(connection);

    const domains = [];
    for (const tld of allTlds) {
        if (tldExpected) {
            if (tld.tld != tldExpected) continue;
        } 
        // get the parent name record for a TLD
        const parentNameRecord = await NameRecordHeader.fromAccountAddress(
            connection,
            tld.parentAccount,
        );
        if (!parentNameRecord) continue;
        if (!parentNameRecord.owner) continue;

        // get all name accounts in a specific TLD
        const allNameAccountsForTld = await findAllDomainsForTld(
            connection,
            tld.parentAccount,
        );
        await setTimeout(50);
        
        const [nameHouseAccount] = findNameHouse(parentNameRecord.owner);

        const nameAccountPubkeys = allNameAccountsForTld.map((a) => a.pubkey);

        const domainsReverse = await performReverseLookupBatched(
            connection,
            nameAccountPubkeys,
            parentNameRecord.owner,
        );

        let index = 0;
        for (const domain of domainsReverse) {
            const [nftRecord] = findNftRecord(
                allNameAccountsForTld[index].pubkey,
                nameHouseAccount,
            );
            let finalOwner =
                allNameAccountsForTld[index].nameRecordHeader.owner?.toString();
            if (finalOwner == nftRecord.toString() && !onlyDomains) {
                const nftRecordData = await NftRecord.fromAccountAddress(
                    connection,
                    nftRecord,
                );
                const largestAccounts =
                    await connection.getTokenLargestAccounts(
                        nftRecordData.nftMintAccount,
                    );
                if (largestAccounts.value.length > 0) {
                    const largestAccountInfo =
                        await connection.getParsedAccountInfo(
                            largestAccounts.value[0].address,
                        );
                    if (largestAccountInfo?.value?.data) {
                        finalOwner = new PublicKey(
                            // @ts-ignore
                            largestAccountInfo.value.data.parsed.info.owner,
                        ).toString();
                    }
                }
                await setTimeout(50);
            }
            domains.push({
                nameAccount: allNameAccountsForTld[index].pubkey,
                domain: `${domain}${tld.tld}`,
                owner: finalOwner,
                expiresAt:
                    allNameAccountsForTld[index].nameRecordHeader.expiresAt,
                createdAt:
                    allNameAccountsForTld[index].nameRecordHeader.createdAt,
            });
            index += 1;
        }
    }
    return domains;
}

async function main() {
    // or ".eyekon" or ".superteam" or ".monke"
    // if tldExpected is undefined it will grab all domains
    const tldExpected: string | undefined = ".zk";
    // if set true it will grab only domains and no nfts
    const onlyDomains = false;
    const domains = await getAllRegisteredDomains(tldExpected, onlyDomains);
    console.log(JSON.stringify(domains));
    // console.log(domains?.length)
}

// get all domains registered on AllDomains
main();
```

### **9. Batch get Main Domains**

```javascript
import {
  MainDomain,
  findMainDomain,
} from "@onsol/tldparser";
import { Connection, PublicKey } from "@solana/web3.js";
import pLimit from "p-limit";

// const connection = new Connection("");

export const getMultipleMainDomains = async (
  connection: Connection,
  pubkeys: PublicKey[],
): Promise<{ pubkey: string; mainDomain: string | undefined }[]> => {
  const mainDomainKeys = pubkeys.map((pubkey) => findMainDomain(pubkey)[0]);
  const mainDomainAccounts =
    await connection.getMultipleAccountsInfo(mainDomainKeys);

  return pubkeys.map((pubkey, index) => {
    const mainDomainAccount = mainDomainAccounts[index];
    if (!!mainDomainAccount?.data) {
      const mainDomainData = MainDomain.fromAccountInfo(mainDomainAccount)[0];
      return {
        pubkey: pubkey.toString(),
        mainDomain: mainDomainData.domain + mainDomainData.tld,
      };
    }
    return { pubkey: pubkey.toString(), mainDomain: undefined };
  });
};

// retrives users main domain in batches of 100 with pLimit of 20 it calls the rpc 20 times per second
// thus, 2000 accounts data can be fetched per second.
// pLimit could be increased depending on your rpc limits.
async function getMainDomainsSample(connection: Connection, data: any[]) {
  const mainDomains: { pubkey: string; mainDomain: string | undefined }[] = [];
  const batches = [];
  for (let i = 0; i < data.length; i += 100) {
    batches.push(data.slice(i, i + 100));
  }
  const limit = pLimit(20);

  await Promise.all(
    batches.map(async (batch) => {
      await limit(async () => {
        const publicKeys = batch.map((data) =>
            data.userPubkey ? new PublicKey(data.userPubkey) : PublicKey.default,
        );
        mainDomains.push(
          ...(await getMultipleMainDomains(connection, publicKeys)),
        );
      });
    }),
  );
  return mainDomains
}
```


# OpenBook Quickstart

{% hint style="info" %}
The goal of this section is to develop a smart contract to interact with the OpenBook deployment on the Eclipse Devnet
{% endhint %}

### Prerequisites[​](https://icarus131.github.io/devcookbook/docs/DevCookBook#prerequisites) <a href="#prerequisites" id="prerequisites"></a>

**Install and configure Rust**[**​**](https://icarus131.github.io/devcookbook/docs/DevCookBook#install-and-configure-rust)

```bash
curl --proto '=https' --tlsv1.2 -sSf https://sh.rustup.rs | sh
```

**Check if Rust is installed**[**​**](https://icarus131.github.io/devcookbook/docs/DevCookBook#check-if-rust-is-installed)

```bash
rustc --version
cargo --version
```

{% hint style="warning" %}
WARNING

**Make sure you add the Rust toolchain to your PATH**
{% endhint %}

**Make sure you add the Rust toolchain to your PATH**

**Finally, let's go ahead and install the Solana CLI tools**[**​**](https://icarus131.github.io/devcookbook/docs/DevCookBook#finally-lets-go-ahead-and-install-the-solana-cli-tools)

```bash
sh -c "$(curl -sSfL https://release.solana.com/stable/install)"
```

### Switching to the Eclipse Devnet[​](https://icarus131.github.io/devcookbook/docs/DevCookBook#switching-to-the-eclipse-devnet) <a href="#switching-to-the-eclipse-devnet" id="switching-to-the-eclipse-devnet"></a>

**Now set your solana cli to the Eclipse Devnet**[**​**](https://icarus131.github.io/devcookbook/docs/DevCookBook#now-set-your-solana-cli-to-the-eclipse-devnet)

```bash
solana config set --url https://staging-rpc.dev2.eclipsenetwork.xyz
```

**Tokens**[**​**](https://icarus131.github.io/devcookbook/docs/DevCookBook#tokens)

```bash
solana airdrop 0.2
```

**Now you should be good to go!**[**​**](https://icarus131.github.io/devcookbook/docs/DevCookBook#now-you-should-be-good-to-go)

***

### Writing the smart contract:[​](https://icarus131.github.io/devcookbook/docs/DevCookBook#writing-the-smart-contract) <a href="#writing-the-smart-contract" id="writing-the-smart-contract"></a>

#### Interfacing with OpenBook[​](https://icarus131.github.io/devcookbook/docs/DevCookBook#interfacing-with-openbook) <a href="#interfacing-with-openbook" id="interfacing-with-openbook"></a>

* We need our smart contract to connect with the OpenBook deployment on Eclipse
* OpenBook essentially allows us keep records of the trades and transactions that take place on our network.
* The Eclipse OpenBook deployment has its own API which is essential for us to interact with it.
* We will mostly follow the standard deployment process for any Solana app
* We will also need the programId for the OpenBook deployment on the Eclipse Devnet, which is as follows: `xY9r3jzQQLYuxBycxfT31xytsPDrpacWnyswMskn16s`
* Let's begin by writing out our `lib.rs` file.
* First we need to include the anchor crates and declare the programId

```rust
use anchor_lang::prelude::*;

declare_id!("<smart_contract_programId>");

...

```

* Now let's go ahead and write the logic for our smart contract here.
* Since everything is an account on Solana, we need to define our accounts here.
* We can also add any required function and its logic here

```rust
...

#[program]
pub mod my_smart_contract {
    use super::*;

    #[derive(Accounts)]
    pub struct MyAccounts<'info> {
    }

    #[access_control(allow)]
    pub fn trade(ctx: Context<MyAccounts>) -> ProgramResult {
        Ok(())
    }
}
...
```

* Now let's go ahead and interact with the OpenBook deployment.
* First let's connect to the Eclipse devnet by supplying the RPC url
* Now we can use the programId to connect to the OpenBook deployment
* After this we can write whatever API calls we need

```rust
...

#[tokio::main]
async fn main() {
    let ecl_rpc = "https://staging-rpc.dev2.eclipsenetwork.xyz";
    let provider = Provider::new(ecl_rpc).await.unwrap();

    let dex_program_id = Pubkey::from_str("xY9r3jzQQLYuxBycxfT31xytsPDrpacWnyswMskn16s").unwrap();
    // First we need to perform authorization based on the token. This is the first account.
    struct Identity;

    impl Identity {
      fn prepare_pda<'info>(acc_info: &AccountInfo<'info>) -> AccountInfo<'info> {
        let mut acc_info = acc_info.clone();
        acc_info.is_signer = true;
        acc_info
      }
  }
    // Now to interact with the deployment
  impl MarketMiddleware for Identity {
    // Here is an example API call
        fn new_order_v3(&self, ctx: &mut Context, _ix: &mut NewOrderInstructionV3) -> ProgramResult {
        verify_and_strip_auth(ctx)
    }
    // Note that these calls are based on the public crate that is available for the deployment. This example assumes the availability of the default crates from a standard openbook deployment.
  }
}

...

```

#### Deploying the smart contract:[​](https://icarus131.github.io/devcookbook/docs/DevCookBook#deploying-the-smart-contract) <a href="#deploying-the-smart-contract" id="deploying-the-smart-contract"></a>

* To deploy the smart contract with anchor we can just do the following:

```
  anchor build
```

And then

```
  anchor deploy
```

* Using this template you can write your own trade functions and deploy it on the Eclipse Devnet.


# Multisig

Squads Protocol is a collection of programs (smart contracts) that enables developers to use smart account technology to build novel asset management and self-custody solutions.

### Program ID <a href="#program-id" id="program-id"></a>

<table><thead><tr><th width="192">Network</th><th>Program address</th></tr></thead><tbody><tr><td>Eclipse Mainnet</td><td><code>eSQDSMLf3qxwHVHeTr9amVAGmZbRLY2rFdSURandt6f</code></td></tr><tr><td>Eclipse Devnet</td><td><code>eSQDSMLf3qxwHVHeTr9amVAGmZbRLY2rFdSURandt6f</code></td></tr></tbody></table>

### Create Multisig <a href="#getting-started" id="getting-started"></a>

#### Public UI <a href="#getting-started" id="getting-started"></a>

The [public UI](https://backup.app.squads.so/#/create/) is recommended. Navigate to settings and set the RPC URL to a valid [Eclipse endpoint](https://docs.squads.so/main/development/cli/installation), and the program ID to the one above.

#### CLI

Follow [these steps](https://docs.squads.so/main/development/cli/installation) to install the CLI. Set the RPC URL to a valid [Eclipse endpoint](https://docs.squads.so/main/development/cli/installation), and the program ID to the one above.

If you intend to create a Squad via the CLI, here's an example command that you would run:

{% code overflow="wrap" %}

```bash
squads-multisig-cli multisig-create --keypair <path-to-your-keypair> --members <member-1-key>,<permissions> --members <member-2-key>,<permissions> --threshold <threshold> --program-id eSQDSMLf3qxwHVHeTr9amVAGmZbRLY2rFdSURandt6f --rpc-url 
https://staging-rpc.dev2.eclipsenetwork.xyz
```

{% endcode %}

Permissions are numbers, which map to the following:

* Proposer - `1`
* Voter - `2`
* Executor - `4`
* All of the above - `7`
* Or any combination of permissions (i.e Proposer & Voter would be `3`)

So an example member entry would look like this:

```bash
--members FcBpwMquaMURbYwpRFUrBrYgFwJzfWiBEGfHLbik1Wsm,7
```

{% hint style="info" %}
For more info on Squads, check out the [official docs](https://docs.squads.so/main/development).
{% endhint %}


# Eclipse Bug Bounty Program

## Eclipse x Immunefi

We’re excited to announce the launch of Eclipse's Bug Bounty Program on Immunefi!&#x20;

Solana on Ethereum enables developers to build with ease while scaling and delivering exceptional user experiences. We offer the speed of Solana coupled with the liquidity and security of Ethereum. Eclipse’s mission is to create a fast, scalable, and secure L2 on Ethereum, leveraging the Solana Virtual Machine to deliver the most performant execution environment in crypto.&#x20;

Security has always been a priority for Eclipse, and to ensure the safety of our ecosystem, Eclipse has chosen to launch this comprehensive bug bounty program. With a maximum bounty of $1,000,000, the program offers an incredible opportunity for skilled security researchers to contribute to the protection of Eclipse's users and assets.

<figure><img src="/files/tneaGgiQNpd469r4ndnc" alt=""><figcaption></figcaption></figure>

{% embed url="<https://immunefi.com/bug-bounty/eclipse/information/>" %}
Bug Submission Page
{% endembed %}

## Rewards and Severity Levels

Eclipse’s reward system is designed to reflect the impact of vulnerabilities:

* **Critical vulnerabilities**: Up to $1,000,000 (minimum of $25,000), depending on the funds at risk.
* **High vulnerabilities**: $5,000 to $25,000, with rewards increasing for extended impact (e.g., temporary freezing of funds).
* **Medium vulnerabilities**: $5,000.
* **Low vulnerabilities**: $1,000.

Security researchers who participate will be rewarded based on the severity of the vulnerabilities found, with payouts denominated in USDC on Ethereum. As with all programs on Immunefi, Eclipse follows the Immunefi Vulnerability Severity Classification System (V2.3) to determine the reward amounts. You can find more detailed information on how to participate [here](https://immunefi.com/bug-bounty/eclipse/information/).


# Eclipse Status Page

{% embed url="<https://status.eclipse.xyz/>" %}

The Eclipse status page is able to provide a comprehensive overview, current status, and status history of multiple Eclipse infra components including:

* Eclipse Mainnet Archive RPC Status
* Eclipse Mainnet RPC
* EclipseScan
* Mainnet Canonical Bridge


# Frequently Asked Questions

We've compiled a list of the most commonly asked questions about integrating with Eclipse. If you can't find what you're looking for here, please don't hesitate to reach out via [Discord](https://discord.gg/PVcbxdqj6r).

<details>

<summary>What is the timeline for Eclipse Mainnet?</summary>

Eclipse Mainnet is **live**! Learn about how to get started [here](/developers).

</details>

<details>

<summary>Does Eclipse Mainnet have its own token?</summary>

No. ETH is the native token for Eclipse Mainnet. ETH is used to pay for gas. See [here](/developers/differences-between-eclipse-and-solana#native-token) for more details.

</details>

<details>

<summary>How expensive will transaction fees be on Eclipse Mainnet?</summary>

It's impossible for any blockchain to guarantee low fees, but median transaction fees on Eclipse Mainnet is in line with or even lower than the cheapest blockchains such as Solana.

</details>

<details>

<summary>Why not just use Solana?</summary>

We think Solana is great! At the same time, the Solana blockchain optimizes for [different goals](https://www.youtube.com/live/YshSwky6nG8?si=sKyYIYX0592dO3nN\&t=790) than the Eclipse L2. In short, Solana is [all about performance](https://x.com/aeyakovenko/status/1713948517277044849?s=20), whereas Eclipse aims to preserve as much of that performance as possible while maximizing verifiability.

The Eclipse ecosystem denominates in ETH, the native currency for the chain which comes via the canonical bridge.

</details>

<details>

<summary>What's a virtual machine (VM)?</summary>

A virtual machine is a piece of software that can run programs. Specifically, the virtual machine executes smart contracts for a blockchain.

</details>

<details>

<summary>What is a rollup? Is Eclipse an optimistic or zero-knowledge rollup?</summary>

For comparison, a Layer 1 blockchain is a blockchain that does not depend on any other chain for security. Layer 1 blockchains require that the majority of voting power is honest. A [*rollup*](https://www.eclipse.builders/blog/what-is-a-rollup) is a type of scaling solution that executes transactions outside of any Layer 1 and later posts the data to a Layer 1 retroactively.\
\
For an *optimistic rollup*, a "sequencer" orders transactions and the resulting state root is posted to a Layer 1 along with a bounty. A "verifier" can re-execute the transactions, and if it disagrees on the result, the verifier can challenge the state root via "settlement." If the verifier is correct, the bounty is awarded to the verifier.\
\
For a *zero-knowledge rollup*, sequencers order transactions, and the resulting state root is posted along with a "validity proof" (evidence) that the transactions were executed correctly. This validity proof must be posted to the settlement layer for a result to be accepted. The validity proof is typically expensive to generate.\
\
Eclipse Mainnet is deploying as an optimistic rollup, but we are working on a zero-knowledge rollup in parallel.

</details>

<details>

<summary>What is a data availability layer?</summary>

This question requires some additional context. A full node in a blockchain network downloads all blocks (transactions) and executes them. A light node doesn't do that, but a *data availability layer* enables the light node to efficiently verify that blocks are available to all full nodes on the network.\
\
Data availability is important because storing huge amounts of data limits how decentralized and scalable a blockchain can get. It would not be possible to build a decentralized Solana VM rollup without this critical feature. Most chains today don't provide data availability because they aren't designed for rollups. Celestia, Avail, and EigenLayer are all data availability layers, and danksharding will bring data availability sampling to Ethereum in the future.

</details>

<details>

<summary>What is a settlement layer?</summary>

Full nodes re-execute every transaction and determine the current state of the blockchain. What happens when these full nodes disagree? In general, the blockchain will fork.\
\
For a blockchain where the majority of nodes are honest, the "fork choice rule" will dictate that the correct chain is whatever the honest nodes decide. For a rollup that does not make the assumption that the majority of nodes are honest, the majority of actors might be lying. As a blockchain user (light node), how do we determine which is the correct fork?\
\
A *settlement layer* is a hub to verify proofs and resolve fraud disputes to determine the "correct" chain. The settlement layer also lets you move tokens between the execution chains (a bridge).

</details>

<details>

<summary>Why does Eclipse use the Solana VM?</summary>

The Solana (Sealevel) virtual machine is a highly parallelized runtime that is constantly improving. For EVM blockchains such as Ethereum or Optimism, at any given point there is only a single program running. (This is called "single-threaded.") For the Solana VM, if you have multiple cores, you can run several programs at the exact same time, substantially increasing throughput. Moreover, the execution layer continues to improve:

* Seahorse Lang lets you write Solana VM programs in Python.
* [Soon the Solana VM will support Move bytecode](https://docs.solana.com/proposals/embedding-move)
* [The Solana VM has a best-in-class fee market coming](https://twitter.com/aeyakovenko/status/1537270721570824192?s=20\&t=uOV108no_nYGnkTPnizUMA)

</details>

<details>

<summary>What is the main difference between devnet and testnet for a project deploying on Eclipse?</summary>

The difference is that the testnet includes the initial version of the validating bridge, and it also posts blobs Celestia. This means that you can view these blobs in a [block explorer](https://mocha-4.celenium.io/namespace/0000000000000000000000000000000000000000000065636c74330a?tab=Blobs) and test out the [ETH bridge](https://app.eclipse.xyz/?target=deposit). This is a more realistic experience compared to devnet.

</details>

<details>

<summary>Why did Eclipse choose Celestia DA over Solana’s DA?</summary>

Celestia is purpose-built for data availability, meaning that many convenience features already exist. If we were to use Solana, there is various surrounding infrastructure that we would have to build ourselves (for example, relayers from Solana to Eth L1) or data availability sampling (DAS). Because Celestia already has DAS, users can directly verify the blocks are not being withheld.

</details>

<details>

<summary>Security is a paramount concern. How does Eclipse ensure security and trust of its L2 infrastructure?</summary>

At a high level, we have multiple audits on our code, and our bridge delays withdrawals, meaning that we can identify exploits early and respond as a community. At a more technical level, we provide safety guarantees by posting commitments to the Ethereum canonical bridge, and these commitments can be disputed via "fraud proofs." We provide liveness via a mechanism called "forced inclusion”.

</details>

<details>

<summary>What factors influenced Eclipse’s decision to utilize SVM for tackling scalability and performance issues within the Ethereum ecosystem?</summary>

The Solana Virtual Machine (SVM) is the most battletested parallelized virtual machine on the market. This means that it is able to handle unmatched levels of throughput. Moreover, an innovation called "local fee markets'' means that apps with lots of activity don't spike fees for other apps on the network. This is in contrast to EVM chains where a big NFT drop can congest the entire network.

</details>

<details>

<summary>Have we undergone any third-party audits?</summary>

Yes, we have completed audits with Zellic & OtterSec and Halborn is completing a second audit.

</details>


# Differences Between Eclipse and Solana

For the most part, developing and interacting with dApps on Eclipse is the same as Solana. However, there are some minor differences.

### Native Token

The native token on Eclipse is ETH. It uses 9 decimal places, unlike Ethereum. You can get this token by bridging over ETH from mainnet Ethereum or from bridging over SOL or USDC from Solana. See our guide on how to do this [here](https://docs.eclipse.xyz/readme/bridge-assets-for-gas-and-transactions).

Similar to Solana, there are also wrapped versions of the native token for both the SPL Token and SPL Token 2022, both with 9 decimals as well. You can read more about the reasoning behind this [here](https://www.quicknode.com/guides/solana-development/getting-started/a-complete-guide-to-wrapped-sol#what-is-wrapped-sol).

The addresses for these wrapped native tokens are the same as Solana:

SPL Token: `So11111111111111111111111111111111111111112`

SPL Token 2022: `9pan9bMn5HatX4EJdBwg9VgCa7Uz5HL8N1m5D3NdXejP`

### Priority Fees

Priority fees are paid in **ETH**, but follow [**Solana’s fee logic**](https://solana.com/developers/guides/advanced/how-to-use-priority-fees). When calculating priority fees using libraries like `@solana/web3.js`, the units will still appear as **micro-lamports**, since the library is Solana-native. On Eclipse, **1 micro-lamport is interpreted as 1 kwei** (i.e. `10^-15 ETH`), preserving equivalence with Solana’s fee structure while using ETH as the native token.

We **recommend using `getRecentPriorityFees`** to dynamically fetch current fee rates instead of hardcoding values, as the **USD-denominated cost of 1 micro-lamport (SOL) differs from 1 kwei (ETH)**.

### Transaction Costs

Recent updates have significantly reduced the cost of transactions and account storage on Eclipse:

* **Lamports per Signature:** `100` (↓ from 10,000) - 100x cheaper
* **Transaction Fee Burn:** `0%` (↓ from 50%)&#x20;
* **Rent per Byte-Year:** 100x cheaper, mirrors the reduction in lamports per signature
* **Rent Burn Percentage:** `0%` (↓ from 50%)&#x20;

These changes make transactions and account creation dramatically cheaper than on Solana, while maintaining the same developer experience.

### Wallets

You can find a complete list of Eclipse compatible wallets [here](https://docs.eclipse.xyz/developers/wallet).

### dApps

Building dApps and deploying programs to Eclipse is the same process as with Solana. Just ensure any hardcoded program addresses exist on Eclipse. Please check [this guide](/developers/tutorials-and-guides/developer-guides/modifying-a-solana-dapp-to-support-eclipse-chomping-glass) out for an example.


# Eclipse Program Registry Guide

### What is the Eclipse Program Registry?[​](https://icarus131.github.io/devcookbook/docs/ProgramRegistry#what-is-the-eclipse-program-registry) <a href="#what-is-the-eclipse-program-registry" id="what-is-the-eclipse-program-registry"></a>

The Eclipse Program Registry serves as a somewhat comprehensive list of programs running on the Eclipse network. It can be found [here](https://github.com/Eclipse-Laboratories-Inc/program-registry).

This guide will walk you through the steps necessary to add your program to the registry.

#### Prerequisites[​](https://icarus131.github.io/devcookbook/docs/ProgramRegistry#prerequisites) <a href="#prerequisites" id="prerequisites"></a>

Before you submit your program to the registry, ensure you have:

* A program deployed on the Eclipse blockchain.
* A public GitHub repository for your program's code.
  * Your repository should be prepared according to [this guide](https://solana.com/developers/guides/advanced/verified-builds#prepare-project) so the program can be verified against the source code.
* A published IDL (Interface Definition Language) on-chain.
  * The Anchor CLI docs [show you how to do this](https://www.anchor-lang.com/docs/cli#idl-init). You'll need to use `init`if it's your first time, or `upgrade`if you're updating the IDL.
  * When done correctly, a published IDL will look like [this](https://eclipsescan.xyz/account/LfacfEjtujQTWBXZVzgkiPBw7Mt4guHSsmAi7y3cycL#anchorProgramIdl) on our explorer.

#### Submission Process[​](https://icarus131.github.io/devcookbook/docs/ProgramRegistry#submission-process) <a href="#submission-process" id="submission-process"></a>

To submit your program to the Eclipse Program Registry, you need to create a pull request (PR) with the following items completed:

1. **Update programs.yaml File**

Add an entry for your program in the `programs.yaml` file. The example below uses our Canonical Bridge. Replace the info with your program's details.

```
- name: canonical_bridge
  description: The Eclipse Canonical Bridge facilitates depositing and withdrawing ether from the Eclipse Chain
  repo: https://github.com/Eclipse-Laboratories-Inc/syzygy/tree/main/solana-programs/canonical_bridge
  icon: https://i.imgur.com/y0JEPfQ.png
  framework: Anchor
  program_address: br1xwubggTiEZ6b7iNZUwfA3psygFfaXGfZ1heaN9AW
  categories:
    - Bridge
```

#### After Submission[​](https://icarus131.github.io/devcookbook/docs/ProgramRegistry#after-submission) <a href="#after-submission" id="after-submission"></a>

**After your pull request is created:**[**​**](https://icarus131.github.io/devcookbook/docs/ProgramRegistry#after-your-pull-request-is-created)

* The Eclipse team will review your submission.
* If all criteria are met, your PR will be merged.
* Upon successful merging, your program will be eligible to be featured in the Eclipse Program Explorer.


# Developer Guides

Below is a list of available tutorials and guides for Eclipse developers:

{% content-ref url="/pages/uNQnVThgjJzUB83AFqD7" %}
[Quick Start: "Hello World"](/developers/tutorials-and-guides/developer-guides/quick-start-hello-world)
{% endcontent-ref %}

{% content-ref url="/pages/THapmvldG4YXR3cKH5si" %}
[Modifying a Solana dApp to Support Eclipse: "Chomping Glass"](/developers/tutorials-and-guides/developer-guides/modifying-a-solana-dapp-to-support-eclipse-chomping-glass)
{% endcontent-ref %}

{% content-ref url="/pages/v44W2OoBj9eQoXamXeLs" %}
[Eclipse Program Registry Guide](/developers/eclipse-program-registry-guide)
{% endcontent-ref %}

{% content-ref url="/pages/A16RM0F5OfX7M8Pvz61D" %}
[Dapp Deployment Tutorial - Eclipse Devnet](/developers/tutorials-and-guides/developer-guides/dapp-deployment-tutorial-eclipse-devnet)
{% endcontent-ref %}

{% content-ref url="/pages/hdmKIlTvP1ossaDdf3Pp" %}
[Eclipse Testnet ETH Transfer Transaction Fee Estimator](/developers/tutorials-and-guides/developer-guides/eclipse-testnet-eth-transfer-transaction-fee-estimator)
{% endcontent-ref %}

{% content-ref url="/pages/9Ql94gtsfJZwe5N9cgcB" %}
[Pyth: How to Use Real-Time Data in Solana Programs](/developers/tutorials-and-guides/developer-guides/pyth-how-to-use-real-time-data-in-solana-programs)
{% endcontent-ref %}


# Quick Start: "Hello World"

These guides walk you through deploying a simple smart contract to Eclipse Testnet or Eclipse Devnet.

Eclipse runs the Solana VM (SVM), so you can deploy smart contracts on it just like you would on Solana.

Here's a simple step-by-step tutorial on deploying a "Hello World" contract to Eclipse Testnet and Devnet. The experience of deploying to our testnet or devnet will closely resemble a mainnet deployment.

{% hint style="info" %}
This guide works right out of the box on Linux and macOS. We recommend using the Windows Subsystem for Linux (WSL) if you're using Windows. Check the official [Microsoft documentation](https://learn.microsoft.com/en-us/training/modules/wsl/wsl-introduction/introduction) for setting it up.
{% endhint %}


# Testnet

This guide walks you through deploying a simple smart contract to Eclipse Testnet.

## Prerequisites

You'll have to do a few things before you can deploy your smart contract to Eclipse Testnet.

### Install Dependencies

Install Rust, and its package manager Cargo.

```bash
curl --proto '=https' --tlsv1.2 -sSf https://sh.rustup.rs | sh
```

You can check if the installation was successful by running the following commands:

```bash
rustc --version
cargo --version
```

**ii.** We'll also have to install Node.js and npm using, which will be used later in this guide.

Visit the official [**Node.js download page**](https://nodejs.org/en/download/) and download the installation binary for your system. Versions recommended are 14.0 and above. If you have trouble with this, you might consider using Homebrew or some other package manager.

Note that npm is bundled with the Node.js installation, so you don't have to install it separately.

**iii.** Now let's install the Solana CLI. This allows you to interact with Solana clusters (Eclipse Testnet in this case).

```bash
sudo sh -c "$(curl -sSfL https://release.anza.xyz/v1.18.22/install)"
```

**iv.** Instead of setting your Solana CLI to a local cluster, set it to Eclipse Testnet with the following command:

```bash
solana config set --url https://testnet.dev2.eclipsenetwork.xyz
```

**v.** If this is your first time using the Solana CLI, you will need to generate a new keypair:

```bash
solana-keygen new
```

This will generate a new key pair and save it to your local machine. You will need this key pair to sign transactions to deploy your smart contract to Eclipse Testnet.

### **Getting Sepolia ETH Tokens**

You will need an Ethereum wallet such as Metamask to claim and bridge Sepolia ETH. As a user, you can use Sepolia ETH to explore the Eclipse testnet and dApps deployed on the network.&#x20;

{% hint style="info" %}
Sepolia ETH is not meant to be traded, and is only used to test applications.&#x20;
{% endhint %}

Sepolia ETH can be claimed from a number of faucets: Alchemy, QuickNode, Chainlink and Infura.&#x20;

Here are instructions on how to claim Sepolia ETH on [**Chainlink Sepolia ETH faucet**](https://faucets.chain.link/sepolia).&#x20;

1. Select 'Ethereum Sepolia' and click 'Continue'
2. Visit the Alchemy Sepolia faucet and log in with your Alchemy account.
3. Enter your wallet address in the provided box and click "Get tokens".

### Deposit Sepolia ETH to Eclipse Testnet

Once you've acquired Sepolia ETH, this script allows you to deposit Sepolia ETH to the Eclipse test network.

### Wallet Setup

#### Getting Your Ethereum Private Key

Once you have [Sepolia ETH](https://faucets.chain.link/sepolia), copy your Ethereum wallet address and your private private key for later use by navigating to "Account details" and clicking "Show private key".

#### Getting Your Eclipse Public Address

Copy the previously generated "Solana" address using the Solana CLI:&#x20;

`solana-keygen new --no-outfile` or `solana-keygen new --outfile my-wallet.json`.

The public key in the output should resemble something like this following: `6g8wB6cJbodeYaEb5aD9QYqhdxiS8igfcHpz36oHY7p8`

### Create a Deposit

Obtain and set up the deposit.js script: <https://github.com/Eclipse-Laboratories-Inc/testnet-deposit>

You'll need to install the dependencies with `yarn`.

Finally, execute the script:

1. `cd eclipse-deposit`
2. `npm install`
3. Change name of `"example-private-key.txt"` to `"private-key.txt"` and paste your Metamask wallet's private key in the file.
4. Run the CLI tool with the necessary options:

```sh
node bin/cli.js -k <path_to_private_key> -d <solana_destination_address> -a <amount_in_ether> --mainnet|--sepolia 
```

For example:

**Sepolia Testnet Deposit:**

```sh
node bin/cli.js -k private-key.txt -d 6g8wB6cJbodeYaEb5aD9QYqhdxiS8igfcHpz36oHY7p8 -a 0.004 --sepolia
```

* The `-k, --key-file` option specifies the path to the Ethereum private key file.
* The `-d, --destination` option specifies the Solana destination address on the rollup (base58 encoded).
* The `-a, --amount` option specifies the amount of Ether to deposit.
* Use `--mainnet` or `--sepolia` to select the network. The tool will use different contract addresses depending on the network.
* The `-r, --rpc-url` option is optional and allows overriding the default JSON RPC URL.

A successful command example:

{% code title="Output" overflow="wrap" %}

```
Transaction hash: 0x15041e2f67e821f8a76671aa282f3b7994d81b2c0b3434d67880ef88c9884186
```

{% endcode %}

You can check the transaction hash on [Sepolia testnet](https://sepolia.etherscan.io/).

You can verify your testnet account balance using the [Eclipse Explorer](https://explorer.dev.eclipsenetwork.xyz/?cluster=testnet).

## Deploying the Smart Contract[​](https://documentation-nine-smoky.vercel.app/Build/SVM/intro#deploying-the-smart-contract) <a href="#deploying-the-smart-contract" id="deploying-the-smart-contract"></a>

Now that we've set up our environment, we can deploy our smart contract to Eclipse Testnet. Let's make sure that everything is installed properly by running a local Solana cluster.

```
solana-test-validator
```

{% hint style="info" %}
In case the validator fails to start, restart your computer and run the following command:

```bash
sudo $(command -v solana-sys-tuner) --user $(whoami) > sys-tuner.log 2>&1 &
```

{% endhint %}

We don't need that local Solana cluster but we're using it to check that everything is installed properly. Next, we'll clone the Solana Hello World repository and install the dependencies.

```bash
git clone https://github.com/solana-labs/example-helloworld
cd example-helloworld
npm install
```

Next,

1. install "[Even Better TOML](https://marketplace.visualstudio.com/items?itemName=tamasfe.even-better-toml)" extension
2. Locate and open the 'Cargo.toml' file at `src/program-rust/Cargo.toml. Might see a few outdated dependencies, marked with a red ❌ thanks to the extension.`
3. Update the dependencies according to the latest versions shown right next to the current ones.

We build the smart contract:

```bash
npm run build:program-rust
```

Finally, we can deploy the smart contract to Eclipse Testnet:

```sh
solana program deploy dist/program/helloworld.so
```

Expected output

```
Program Id: Butt9GJQQPXX6ih65e1Z11R4QyQ8YfAEHit7VmkrLs8v
```

{% hint style="warning" %}
It might prompt with

```
// It might prompt with

Error: Account 9BEnr8WzpJ9kaEJQyG65iE6357hcXG8EpDEGgbLi2AZ1 has insufficient funds for spend (0.00331058 SOL) + fee (0.0000026 SOL)
Nothing to worry about, just ask Anmol to send you some Eclipse testnet funds or do it yourself (hint: the command is somewhere up there 👀 )!
```

Nothing to worry about, just ask Anmol to send you some Eclipse testnet funds or do it yourself (hint: the command is somewhere up there 👀 )!
{% endhint %}

We can run the JavaScript client and confirm whether the smart contract was deployed successfully:

```bash
npm run start
```

The output should be something like this:

```
Let's say hello to a Solana account...
Connection to cluster established: http://127.0.0.1:8899 { 'feature-set': 2045430982, 'solana-core': '1.7.8' }
Using account AiT1QgeYaK86Lf9kudqKthQPCWwpG8vFA1bAAioBoF4X containing 0.00141872 SOL to pay for fees
Using program Dro9uk45fxMcKWGb1eWALujbTssh6DW8mb4x8x3Eq5h6
Creating account 8MBmHtJvxpKdYhdw6yPpedp6X6y2U9dCpdYaZJdmwV3A to say hello to
Saying hello to 8MBmHtJvxpKdYhdw6yPpedp6X6y2U9dCpdYaZJdmwV3A
8MBmHtJvxpKdYhdw6yPpedp6X6y2U9dCpdYaZJdmwV3A has been greeted 1 times
Success
```

{% hint style="info" %}
**Not seeing the expected output?**

* Make sure you've run all the commands in the previous steps.
* Inspect the program logs by running `solana logs` to see why the program failed.

An example of what you might find is given below.

```bash
Signature: 4pya5iyvNfAZj9sVWHzByrxdKB84uA5sCxLceBwr9UyuETX2QwnKg56MgBKWSM4breVRzHmpb1EZQXFPPmJnEtsJ
Status: Error processing Instruction 0: Program failed to complete
Log Messages:
  Program G5bbS1ipWzqQhekkiCLn6u7Y1jJdnGK85ceSYLx2kKbA invoke [1]
  Program log: Hello World Rust program entrypoint
  Program G5bbS1ipWzqQhekkiCLn6u7Y1jJdnGK85ceSYLx2kKbA consumed 200000 of 200000 compute units
  Program failed to complete: exceeded maximum number of instructions allowed (200000) at instruction #334
  Program G5bbS1ipWzqQhekkiCLn6u7Y1jJdnGK85ceSYLx2kKbA failed: Program failed to complete
```

{% endhint %}

## Integration Assistance <a href="#guides" id="guides"></a>

Do you need additional assistance integrating something special like a wallet, bridge, or something else? Feel free to reach out via [Discord](https://discord.com/invite/5jDfXHJGCk).


# Devnet

This guide walks you through deploying a simple smart contract to Eclipse Devnet.

## Prerequisites

You'll have to do a few things before you can deploy your smart contract to Eclipse Devnet.

### Install Dependencies

Install Rust, and its package manager Cargo.

```bash
curl --proto '=https' --tlsv1.2 -sSf https://sh.rustup.rs | sh
```

You can check if the installation was successful by running the following commands:

```bash
rustc --version
cargo --version
```

**ii.** We'll also have to install Node.js and npm using, which will be used later in this guide.

Visit the official [**Node.js download page**](https://nodejs.org/en/download/) and download the installation binary for your system. Versions recommended are 14.0 and above. If you have trouble with this, you might consider using Homebrew or some other package manager.

Note that npm is bundled with the Node.js installation, so you don't have to install it separately.

**iii.** Now let's install the Solana CLI. This allows you to interact with Solana clusters (Eclipse Devnet in this case).

```bash
sh -c "$(curl -sSfL https://release.solana.com/stable/install)"
```

**iv.** Instead of setting your Solana CLI to a local cluster, set it to Eclipse Devnet with the following command:

```bash
solana config set --url https://staging-rpc.dev2.eclipsenetwork.xyz
```

**v.** If this is your first time using the Solana CLI, you will need to generate a new keypair:

```bash
solana-keygen new
```

This will generate a new key pair and save it to your local machine. You will need this key pair to sign transactions to deploy your smart contract to Eclipse Devnet.

### Acquiring Devnet Tokens[​](https://documentation-nine-smoky.vercel.app/Build/SVM/intro#acquiring-testnet-tokens)

We need to claim devnet tokens to pay for transaction fees to deploy your smart contract to the devnet.

Run the following commands to get 10 devnet tokens in your local wallet:

1. `solana config set --url https://staging-rpc.dev2.eclipsenetwork.xyz`
2. `solana airdrop 10`

{% hint style="danger" %}
These devnet tokens are only valid on the devnet and are meant for testing purposes only. Eclipse will never charge you for devnet tokens. Please be wary of scams. Report any suspicious activity to us on our [Discord server](https://discord.com/invite/5jDfXHJGCk).
{% endhint %}

## Deploying the Smart Contract[​](https://documentation-nine-smoky.vercel.app/Build/SVM/intro#deploying-the-smart-contract) <a href="#deploying-the-smart-contract" id="deploying-the-smart-contract"></a>

Now that we've set up our environment, we can deploy our smart contract to Eclipse Devnet. Let's make sure that everything is installed properly by running a local Solana cluster.

```
solana-test-validator
```

{% hint style="info" %}
In case the validator fails to start, restart your computer and run the following command:

```bash
sudo $(command -v solana-sys-tuner) --user $(whoami) > sys-tuner.log 2>&1 &
```

{% endhint %}

We don't need that local Solana cluster but we're using it to check that everything is installed properly. Next, we'll clone the Solana Hello World repository and install the dependencies.

```bash
git clone https://github.com/solana-labs/example-helloworld
cd example-helloworld
npm install
```

We build the smart contract:

```bash
npm run build:program-rust
```

Finally, we can deploy the smart contract to Eclipse Devnet:

```bash
solana program deploy dist/program/helloworld.so
```

We can run the JavaScript client and confirm whether the smart contract was deployed successfully:

```bash
npm run start
```

The output should be something like this:

```bash
Let's say hello to a Solana account...
Connection to cluster established: http://127.0.0.1:8899 { 'feature-set': 2045430982, 'solana-core': '1.7.8' }
Using account AiT1QgeYaK86Lf9kudqKthQPCWwpG8vFA1bAAioBoF4X containing 0.00141872 SOL to pay for fees
Using program Dro9uk45fxMcKWGb1eWALujbTssh6DW8mb4x8x3Eq5h6
Creating account 8MBmHtJvxpKdYhdw6yPpedp6X6y2U9dCpdYaZJdmwV3A to say hello to
Saying hello to 8MBmHtJvxpKdYhdw6yPpedp6X6y2U9dCpdYaZJdmwV3A
8MBmHtJvxpKdYhdw6yPpedp6X6y2U9dCpdYaZJdmwV3A has been greeted 1 times
Success
```

{% hint style="info" %}
**Not seeing the expected output?**

* Make sure you've run all the commands in the previous steps.
* Inspect the program logs by running `solana logs` to see why the program failed.

An example of what you might find is given below.

```bash
Signature: 4pya5iyvNfAZj9sVWHzByrxdKB84uA5sCxLceBwr9UyuETX2QwnKg56MgBKWSM4breVRzHmpb1EZQXFPPmJnEtsJ
Status: Error processing Instruction 0: Program failed to complete
Log Messages:
  Program G5bbS1ipWzqQhekkiCLn6u7Y1jJdnGK85ceSYLx2kKbA invoke [1]
  Program log: Hello World Rust program entrypoint
  Program G5bbS1ipWzqQhekkiCLn6u7Y1jJdnGK85ceSYLx2kKbA consumed 200000 of 200000 compute units
  Program failed to complete: exceeded maximum number of instructions allowed (200000) at instruction #334
  Program G5bbS1ipWzqQhekkiCLn6u7Y1jJdnGK85ceSYLx2kKbA failed: Program failed to complete
```

{% endhint %}

## Integration Assistance <a href="#guides" id="guides"></a>

Do you need additional assistance integrating something special like a wallet, bridge, or something else? Feel free to reach out via [Discord](https://discord.com/invite/5jDfXHJGCk).


# Deployment Walkthrough

## Deploying on the Eclipse Testnet

{% embed url="<https://www.youtube.com/watch?v=_Z6696Qwa8g>" fullWidth="false" %}

This demo will showcase the deployment of a smart contract on the Eclipse Testnet. For this particular example, we will be using a simple "hello world" smart contract.


# Deployment Walkthrough

{% embed url="<https://youtu.be/_Z6696Qwa8g>" %}

## Prerequisites

You'll have to do a few things before you can deploy your smart contract to Eclipse Devnet & Testnet.

### Install Dependencies

Install Rust, and its package manager Cargo.

```bash
curl --proto '=https' --tlsv1.2 -sSf https://sh.rustup.rs | sh
```

You can check if the installation was successful by running the following commands:

```bash
rustc --version
cargo --version
```

**ii.** We'll also have to install Node.js and npm using, which will be used later in this guide.

Visit the official [**Node.js download page**](https://nodejs.org/en/download/) and download the installation binary for your system. Versions recommended are 14.0 and above. If you have trouble with this, you might consider using Homebrew or some other package manager.

Note that npm is bundled with the Node.js installation, so you don't have to install it separately.

**iii.** Now let's install the Solana CLI. This allows you to interact with Solana clusters (Eclipse Testnet in this case).

```bash
sudo sh -c "$(curl -sSfL https://release.anza.xyz/v1.18.22/install)"
```

**iv.** Instead of setting your Solana CLI to a local cluster, set it to Eclipse **Testnet** with the following command:

```bash
solana config set --url https://testnet.dev2.eclipsenetwork.xyz
```

For **Devnet**:

```
solana config set --url https://staging-rpc.dev2.eclipsenetwork.xyz
```

**v.** If this is your first time using the Solana CLI, you will need to generate a new keypair:

```bash
solana-keygen new
```

This will generate a new key pair and save it to your local machine. You will need this key pair to sign transactions to deploy your smart contract to Eclipse Testnet/Devnet.

## **Getting Test Tokens**

### Testnet:

#### **Getting Sepolia ETH Tokens**

You will need an Ethereum wallet such as Metamask to claim and bridge Sepolia ETH. As a user, you can use Sepolia ETH to explore the Eclipse testnet and dApps deployed on the network.&#x20;

{% hint style="info" %}
Sepolia ETH is not meant to be traded, and is only used to test applications.&#x20;
{% endhint %}

Sepolia ETH can be claimed from a number of faucets: Alchemy, QuickNode, Chainlink and Infura.&#x20;

Here are instructions on how to claim Sepolia ETH on [**Chainlink Sepolia ETH faucet**](https://faucets.chain.link/sepolia).&#x20;

1. Select 'Ethereum Sepolia' and click 'Continue'
2. Visit the Alchemy Sepolia faucet and log in with your Alchemy account.
3. Enter your wallet address in the provided box and click "Get tokens".

#### Deposit Sepolia ETH to Eclipse Testnet

Once you've acquired Sepolia ETH, this script allows you to deposit Sepolia ETH to the Eclipse test network.

#### Wallet Setup

#### Getting Your Ethereum Private Key

Once you have [Sepolia ETH](https://faucets.chain.link/sepolia), copy your Ethereum wallet address and your private private key for later use by navigating to "Account details" and clicking "Show private key".

#### Getting Your Eclipse Public Address

Copy the previously generated "Solana" address using the Solana CLI:&#x20;

`solana-keygen new --no-outfile` or `solana-keygen new --outfile my-wallet.json`.

The public key in the output should resemble something like this following: `6g8wB6cJbodeYaEb5aD9QYqhdxiS8igfcHpz36oHY7p8`

#### Create a Deposit

Obtain and set up the deposit.js script: <https://github.com/Eclipse-Laboratories-Inc/testnet-deposit>

You'll need to install the dependencies with `yarn`.

Finally, execute the script:

1. `cd eclipse-deposit`
2. `npm install`
3. Change name of `"example-private-key.txt"` to `"private-key.txt"` and paste your Metamask wallet's private key in the file.
4. Run the CLI tool with the necessary options:

```sh
node bin/cli.js -k <path_to_private_key> -d <solana_destination_address> -a <amount_in_ether> --mainnet|--sepolia 
```

For example:

**Sepolia Testnet Deposit:**

```sh
node bin/cli.js -k private-key.txt -d 6g8wB6cJbodeYaEb5aD9QYqhdxiS8igfcHpz36oHY7p8 -a 0.004 --sepolia
```

* The `-k, --key-file` option specifies the path to the Ethereum private key file.
* The `-d, --destination` option specifies the Solana destination address on the rollup (base58 encoded).
* The `-a, --amount` option specifies the amount of Ether to deposit.
* Use `--mainnet` or `--sepolia` to select the network. The tool will use different contract addresses depending on the network.
* The `-r, --rpc-url` option is optional and allows overriding the default JSON RPC URL.

A successful command example:

{% code title="Output" overflow="wrap" %}

```
Transaction hash: 0x15041e2f67e821f8a76671aa282f3b7994d81b2c0b3434d67880ef88c9884186
```

{% endcode %}

You can check the transaction hash on [Sepolia testnet](https://sepolia.etherscan.io/).

You can verify your testnet account balance using the [Eclipse Explorer](https://explorer.dev.eclipsenetwork.xyz/?cluster=testnet).

### For Devnet:

### Acquiring Devnet Tokens[​](https://documentation-nine-smoky.vercel.app/Build/SVM/intro#acquiring-testnet-tokens)

We need to claim devnet tokens to pay for transaction fees to deploy your smart contract to the devnet.

Run the following commands to get 10 devnet tokens in your local wallet:

1. `solana config set --url https://staging-rpc.dev2.eclipsenetwork.xyz`
2. `solana airdrop 0.2`

{% hint style="danger" %}
These devnet tokens are only valid on the devnet and are meant for testing purposes only. Eclipse will never charge you for devnet tokens. Please be wary of scams. Report any suspicious activity to us on our [Discord server](https://discord.com/invite/5jDfXHJGCk).
{% endhint %}

## Deploying the Smart Contract[​](https://documentation-nine-smoky.vercel.app/Build/SVM/intro#deploying-the-smart-contract) <a href="#deploying-the-smart-contract" id="deploying-the-smart-contract"></a>

Now that we've set up our environment, we can deploy our smart contract to Eclipse Testnet. Let's make sure that everything is installed properly by running a local Solana cluster.

```
solana-test-validator
```

{% hint style="info" %}
In case the validator fails to start, restart your computer and run the following command:

```bash
sudo $(command -v solana-sys-tuner) --user $(whoami) > sys-tuner.log 2>&1 &
```

{% endhint %}

We don't need that local Solana cluster but we're using it to check that everything is installed properly. Next, we'll clone the Solana Hello World repository and install the dependencies.

```bash
git clone https://github.com/solana-labs/example-helloworld
cd example-helloworld
npm install
```

Next,

1. install "[Even Better TOML](https://marketplace.visualstudio.com/items?itemName=tamasfe.even-better-toml)" extension
2. Locate and open the 'Cargo.toml' file at `src/program-rust/Cargo.toml. Might see a few outdated dependencies, marked with a red ❌ thanks to the extension.`
3. Update the dependencies according to the latest versions shown right next to the current ones.

We build the smart contract:

```bash
npm run build:program-rust
```

Finally, we can deploy the smart contract to Eclipse Testnet:

```sh
solana program deploy dist/program/helloworld.so
```

Expected output

```
Program Id: Butt9GJQQPXX6ih65e1Z11R4QyQ8YfAEHit7VmkrLs8v
```

{% hint style="warning" %}
It might prompt with

```
// It might prompt with

Error: Account 9BEnr8WzpJ9kaEJQyG65iE6357hcXG8EpDEGgbLi2AZ1 has insufficient funds for spend (0.00331058 SOL) + fee (0.0000026 SOL)
Nothing to worry about, just ask Anmol to send you some Eclipse testnet funds or do it yourself (hint: the command is somewhere up there 👀 )!
```

Nothing to worry about, just ask Anmol to send you some Eclipse testnet funds or do it yourself (hint: the command is somewhere up there 👀 )!
{% endhint %}

We can run the JavaScript client and confirm whether the smart contract was deployed successfully:

```bash
npm run start
```

The output should be something like this:

```
Let's say hello to a Solana account...
Connection to cluster established: http://127.0.0.1:8899 { 'feature-set': 2045430982, 'solana-core': '1.7.8' }
Using account AiT1QgeYaK86Lf9kudqKthQPCWwpG8vFA1bAAioBoF4X containing 0.00141872 SOL to pay for fees
Using program Dro9uk45fxMcKWGb1eWALujbTssh6DW8mb4x8x3Eq5h6
Creating account 8MBmHtJvxpKdYhdw6yPpedp6X6y2U9dCpdYaZJdmwV3A to say hello to
Saying hello to 8MBmHtJvxpKdYhdw6yPpedp6X6y2U9dCpdYaZJdmwV3A
8MBmHtJvxpKdYhdw6yPpedp6X6y2U9dCpdYaZJdmwV3A has been greeted 1 times
Success
```

{% hint style="info" %}
**Not seeing the expected output?**

* Make sure you've run all the commands in the previous steps.
* Inspect the program logs by running `solana logs` to see why the program failed.

An example of what you might find is given below.

```bash
Signature: 4pya5iyvNfAZj9sVWHzByrxdKB84uA5sCxLceBwr9UyuETX2QwnKg56MgBKWSM4breVRzHmpb1EZQXFPPmJnEtsJ
Status: Error processing Instruction 0: Program failed to complete
Log Messages:
  Program G5bbS1ipWzqQhekkiCLn6u7Y1jJdnGK85ceSYLx2kKbA invoke [1]
  Program log: Hello World Rust program entrypoint
  Program G5bbS1ipWzqQhekkiCLn6u7Y1jJdnGK85ceSYLx2kKbA consumed 200000 of 200000 compute units
  Program failed to complete: exceeded maximum number of instructions allowed (200000) at instruction #334
  Program G5bbS1ipWzqQhekkiCLn6u7Y1jJdnGK85ceSYLx2kKbA failed: Program failed to complete
```

{% endhint %}

## Integration Assistance <a href="#guides" id="guides"></a>

Do you need additional assistance integrating something special like a wallet, bridge, or something else? Feel free to reach out via [Discord](https://discord.com/invite/5jDfXHJGCk).


# Reading from the blockchain

Eclipse Token Dashboard demonstrates essential functionality like connecting wallets, checking balances, and sending tokens - all with a clean, approachable codebase.

## App Preview

Here's what the application looks like when running:

#### Balance View

<figure><img src="https://github.com/Eclipse-Laboratories-Inc/Beginner-Example-App/raw/main/screenshots/balance-view.png" alt=""><figcaption></figcaption></figure>

#### Transfer View

<figure><img src="https://github.com/Eclipse-Laboratories-Inc/Beginner-Example-App/raw/main/screenshots/transfer-view.png" alt=""><figcaption></figcaption></figure>

#### Gas Fee Comparison

<figure><img src="https://github.com/Eclipse-Laboratories-Inc/Beginner-Example-App/raw/main/screenshots/gas-fee-comparison.png" alt=""><figcaption></figcaption></figure>

## Learning Goals

This example project covers:

* Connecting crypto wallets to your dApp
* Displaying token balances
* Transferring tokens between addresses
* Comparing gas fees across networks
* Handling transaction receipts and errors

No previous blockchain experience needed - just basic React knowledge!

## Tech Stack

Built with beginner-friendly tools:

* Next.js
* Solana wallet adapters (compatible with Eclipse)
* shadcn/ui components
* Tailwind CSS

## Getting Started

### Prerequisites

* Node.js 18+
* pnpm (or npm/yarn if you prefer)

### Setup Steps

1. Clone this repo

   ```bash
   git clone https://github.com/Eclipse-Laboratories-Inc/Beginner-Example-App.git
   cd Beginner-Example-App
   ```
2. Install dependencies

   ```bash
   pnpm install
   ```
3. Set up your environment\
   Create a `.env.local` file:

   ```
   # Testnet is easier to start with
   NEXT_PUBLIC_SOLANA_RPC_URL=https://testnet.dev2.eclipsenetwork.xyz

   # For mainnet later (just uncomment)
   # NEXT_PUBLIC_SOLANA_RPC_URL=https://mainnet.eclipsenetwork.xyz
   ```
4. Start the dev server

   ```bash
   pnpm dev
   ```
5. Open <http://localhost:3000> in your browser

### Important! Wallet Setup

Before testing the app:

* Make sure your wallet is set to the Eclipse testnet
* For testnet, use this RPC URL: <https://testnet.dev2.eclipsenetwork.xyz>
* If you switch to mainnet later, update your wallet settings accordingly

### Code Highlights

Some key aspects of the implementation:

#### Wallet Connection

```tsx
// Simple wallet connection with just one line
const { publicKey, sendTransaction, connected, disconnect } = useWallet()
```

#### Sending Tokens

```tsx
// Basic transaction creation and sending
const transferTokens = async () => {
  const transaction = new Transaction().add(
    SystemProgram.transfer({
      fromPubkey: publicKey,
      toPubkey: recipientPubkey,
      lamports,
    })
  );
  
  const signature = await sendTransaction(transaction, connection);
}
```

## Source Code

[Link to Github](https://github.com/Eclipse-Laboratories-Inc/Beginner-Example-App)

### License

This project is MIT licensed - feel free to use it as a starting point for your own applications!


# Modifying a Solana dApp to Support Eclipse: "Chomping Glass"

In this tutorial, we're going to take an existing Solana dApp and deploy it multichain to Eclipse Devnet. Specifically, we're going to use Jarry Xiao's [Chomping Glass](https://github.com/jarry-xiao/chomping-glass) game as an example.

You can also take a look at the [forked GitHub repo](https://github.com/Eclipse-Laboratories-Inc/chomping-glass) or the [deployed frontend](https://chomping-glass.vercel.app/).

At a high level, developers should take the following steps:

1. Acquire Devnet tokens or Sepolia Testnet ETH
2. Deploy smart contract with the Eclipse Devnet RPC or Eclipse Testnet RPC
3. Set up developer wallet
4. Modify frontend
5. Test and deploy

## Deploying the Smart Contracts

This part is easy, since smart contracts on Eclipse typically require no changes compared to the Solana deployment. We're going to use the Eclipse Devnet RPC for this example: `https://staging-rpc.dev2.eclipsenetwork.xyz`

The first step is to clone the Chomping Glass repo:

```
git clone git@github.com:jarry-xiao/chomping-glass.git
```

We assume that you've followed the [Quick Start](/developers/tutorials-and-guides/developer-guides/quick-start-hello-world) guide and configured your Solana CLI properly to point to the Eclipse Devnet RPC. Give yourself some devnet tokens: `solana airdrop 1`

Some programs might hardcode dependencies such as oracles or bridges. You should [review your code](#v2-deploying-a-multichain-frontend) to see where you might need to make changes and reach out to the Eclipse team if you need assistance.

Assuming there are no changes to be made, you can deploy the program as per usual:

```
cargo build-bpf --manifest-path=./Cargo.toml --bpf-out-dir=dist/program
solana program deploy dist/program/chomping_glass.so
```

You'll want to copy the program ID:

```
neelsomani@Neels-MacBook-Pro chomping-glass % solana program deploy dist/program/chomping_glass.so
Program Id: Gg9RXnAuiQDYadKP4tExAFCkhXSc3kBywCGqqPVx2duH
```

## Deploying A New Frontend

For this section of the tutorial, we'll explore the simplest way to get the app working, which just involves creating a new frontend that interacts with Eclipse Devnet, separate from the frontend used for the Solana deployment.

### Updating Hardcoded References

We start by looking through the React app to find any references to hardcoded addresses or keys.

In [App.tsx](https://github.com/jarry-xiao/chomping-glass/blob/main/chomping-glass/src/App.tsx):

```jsx
const PROGRAM_ID = new PublicKey(
  "ChompZg47TcVy5fk2LxPEpW6SytFYBES5SHoqgrm8A4D"
);
const FEE = new PublicKey("EGJnqcxVbhJFJ6Xnchtaw8jmPSvoLXfN2gWsY9Etz5SZ");
```

The `PROGRAM_ID` needs to be changed to the program ID from the deployment above. You might want to consider changing that address that the game is sending fees to!

Here's a spot where a block explorer link is hardcoded, which assumes that the only options are localhost or Solana mainnet:

```jsx
if (connection.rpcEndpoint.includes("localhost")) {
  console.log(
    `https://explorer.solana.com/tx/${signature}?cluster=custom&customUrl=http%3A%2F%2Flocalhost%3A8899`
  );
} else {
  console.log(`https://solscan.io/tx/${signature}`);
}
```

We modify this to provide a third option:

```jsx
else if (connection.rpcEndpoint.includes("eclipsenetwork")) {
    console.log(
        `https://solscan.io/tx/${signature}?cluster=custom&customUrl=https%3A%2F%2Fstaging-rpc.dev2.eclipsenetwork.xyz`
    );
}
```

We could have changed this reference too, but it's not really necessary for the purpose of this walkthrough:

```jsx
  notify(
    `${signature}`,
    `https://solscan.io/tx/${signature}`,
    "View on Solscan"
  );
```

In [index.tsx](https://github.com/jarry-xiao/chomping-glass/blob/main/chomping-glass/src/index.tsx), we see where the RPC connection referenced earlier is provided:

```jsx
const isDevelopment = window.location.hostname === "localhost";
const RPC_TOKEN = process.env.REACT_APP_RPC_TOKEN || "";
const RPC_URL = process.env.REACT_APP_RPC_URL || "";

function Root() {
  return (
    <ConnectionProvider
      endpoint={!isDevelopment ? RPC_URL : `${RPC_URL}${RPC_TOKEN}`}
```

Seems like we don't need to touch this part, and instead we can just update that environment variable. You're likely familiar with how to set an environment variable given your frontend deployment. For create-react-app, you can add a .env file to the root of the project.

Suggested .env file:

```
REACT_APP_RPC_URL=https://staging-rpc.dev2.eclipsenetwork.xyz
```

Finally, we run the frontend and test it to make sure transactions are indeed going through and can be observed in the block explorer.

We run the app with `npm start`. We need to add a custom config-overrides.js file to the root of the React project specified in this [StackOverflow answer](https://stackoverflow.com/a/70488628/657200). We add one additional override not mentioned in the StackOverflow post:

```
zlib: require.resolve('browserify-zlib')
```

And it works:

<figure><img src="/files/O2aMwNKNsrTQibYWiyB4" alt="" width="375"><figcaption></figcaption></figure>

### Adding Wallet Support

To use the dApp, you can set up an Eclipse [developer wallet](/developers/wallet) and [modify the Solana wallet adapter](/developers/wallet/testnet-and-devnet-wallets/adding-eclipse-wallet-to-dapp) to only show Eclipse compatible wallets. Note that the Solscan link that pops up on the page won't be correct since we didn't update that part, but you can check the developer console for a working link.

## Deploying A Multichain Frontend

The above example was particularly simple. For a real deployment, you likely need to make the following changes as well:

* Review where your smart contracts invoke other smart contracts or dependencies which might only exist on the Solana L1, and replace those with Eclipse's alternatives.
* Update offchain infrastructure to support this additional RPC, possibly with a flag or a second deployment of your offchain infrastructure.
* If you have any tokens deployed to Solana mainnet, you'll want to consider how you'll incorporate those into your Eclipse Mainnet deployment: maintaining the old mint authority on Solana and bridging tokens, deploying a second mint authority, or removing your application's dependency on tokens.
* Modify your frontend to support both Solana and Eclipse simultaneously, rather than only supporting the Eclipse network such as the example above. This might be achieved via a toggle which changes which RPC the web app sends transactions to, and a prompt to tell the user to switch networks.


# Developing on the Solana Virtual Machine (SVM)

#### What is Solana?[​](https://icarus131.github.io/devcookbook/docs/SVM#what-is-solana) <a href="#what-is-solana" id="what-is-solana"></a>

Solana is a high-performance blockchain platform designed for decentralized applications (dApps) and crypto-native projects. It distinguishes itself by offering fast transaction speeds, low fees, and scalability without sacrificing decentralization. At the core of Solana uses a proof-of-stake architecture, which allows for high throughput and efficiency.

#### Solana Programs[​](https://icarus131.github.io/devcookbook/docs/SVM#solana-programs) <a href="#solana-programs" id="solana-programs"></a>

In the context of Solana, a "program" refers to a smart contract or application deployed on the Solana blockchain. Solana programs are typically written in Rust or C, and they execute within the Solana Virtual Machine (SVM). Each program is associated with a specific address on the blockchain and contains the logic for handling transactions, updating state, and interacting with other programs.

#### Developing on Solana[​](https://icarus131.github.io/devcookbook/docs/SVM#developing-on-solana) <a href="#developing-on-solana" id="developing-on-solana"></a>

Developing on Solana involves writing smart contracts or programs that run on the Solana blockchain. Unlike traditional centralized applications, Solana development requires understanding blockchain concepts such as consensus mechanisms, transaction processing, and decentralized data storage. Developers use programming languages like Rust or C to write Solana programs, and they interact with the blockchain using the Solana Command Line Tool (CLI) or specialized SDKs.

#### SVM vs. EVM?[​](https://icarus131.github.io/devcookbook/docs/SVM#svm-vs-evm) <a href="#svm-vs-evm" id="svm-vs-evm"></a>

**Parallel Execution Capability:**[**​**](https://icarus131.github.io/devcookbook/docs/SVM#parallel-execution-capability)

The SVM executes transactions in parallel, while the EVM processes them sequentially. This parallel execution of SVM addresses gas cost issues, especially during concurrent transactions.

**Mitigation of Gas Costs:**[**​**](https://icarus131.github.io/devcookbook/docs/SVM#mitigation-of-gas-costs)

EVM's sequential processing can lead to increased gas costs for unrelated transactions due to congestion. In contrast, SVM's parallel execution ensures that highly contested applications don't impact others, mitigating the "noisy neighbor problem."

**State Handling:**[**​**](https://icarus131.github.io/devcookbook/docs/SVM#state-handling)

EVM allows unrestricted state access per transaction, potentially causing slower lookups as the rollup state expands. SVM requires specifying necessary state for each transaction, offering a more efficient approach.

**Performance:**[**​**](https://icarus131.github.io/devcookbook/docs/SVM#performance)

Leveraging Solana's execution engine within the Ethereum ecosystem represents a significant enhancement in scalability and performance for decentralized applications deployed on the Eclipse rollup.

#### How does the SVM fit into the Eclipse workflow?[​](https://icarus131.github.io/devcookbook/docs/SVM#how-does-the-svm-fit-into-the-eclipse-workflow) <a href="#how-does-the-svm-fit-into-the-eclipse-workflow" id="how-does-the-svm-fit-into-the-eclipse-workflow"></a>

**Transaction Execution:**[**​**](https://icarus131.github.io/devcookbook/docs/SVM#transaction-execution)

Within the Eclipse workflow, transactions are processed using the Solana Virtual Machine (SVM). Unlike the traditional Ethereum rollups that rely on the Ethereum Virtual Machine (EVM), Eclipse leverages Solana's execution engine for transaction execution.

**Parallel Transaction Processing:**[**​**](https://icarus131.github.io/devcookbook/docs/SVM#parallel-transaction-processing)

The SVM is distinguished by its capability to execute transactions in parallel, without overlapping states. This stands in contrast to the sequential processing nature of the EVM. With SVM's parallel execution, multiple transactions can occur simultaneously, addressing potential gas cost issues and enhancing overall efficiency.

**Efficient State Handling:**[**​**](https://icarus131.github.io/devcookbook/docs/SVM#efficient-state-handling)

SVM requires specific state specification for each transaction, ensuring efficient processing. In contrast, the EVM allows unrestricted state access per transaction, which can lead to slower processing as the rollup state expands. By mandating precise state specification, SVM optimizes transaction execution within the Eclipse workflow.

**Integration with Eclipse's Workflow:**[**​**](https://icarus131.github.io/devcookbook/docs/SVM#integration-with-eclipses-workflow)

As transactions are dispatched to a sequencer within Eclipse, they are subsequently processed using SVM. The parallel execution capability of SVM contributes to the scalability and performance of the Eclipse rollup. This integration showcases the innovative potential of combining Solana's execution engine with Ethereum's ecosystem, ultimately enhancing the functionality and efficiency of decentralized applications deployed on the Eclipse platform.

## Sub Page - Development guide with examples

### How to use the Solana CLI[​](https://icarus131.github.io/devcookbook/docs/SVM#how-to-use-the-solana-cli) <a href="#how-to-use-the-solana-cli" id="how-to-use-the-solana-cli"></a>

The Solana Command Line Interface (CLI) is a powerful tool that allows developers and users to interact with the Solana blockchain. It provides a comprehensive set of commands for various tasks such as deploying smart contracts, managing accounts, and monitoring network activity. Here's a hands-on guide to using the Solana CLI:

Follow this guide to install the Solana CLI on your machine: [Solana CLI Installation Docs](https://docs.solanalabs.com/cli/install)

Usage:

Once installed, you can use the Solana CLI to interact with the Solana blockchain. Here are some common commands:

Check Cluster Status:

```
solana cluster-version
```

Create a Wallet:

```
solana-keygen new --outfile ~/my-wallet.json
```

Show Account Balance:

```
solana balance <account_address>
```

Send SOL to Another Account:

```
solana transfer <recipient_address> <amount>
```

Deploy a Smart Contract:

```
solana deploy <program_binary>
```

Interact with a Smart Contract:

```
solana program <program_address>
```

View Transaction Logs:

```
solana logs
```

### Setting up your Development Environment[​](https://icarus131.github.io/devcookbook/docs/SVM#setting-up-your-development-environment) <a href="#setting-up-your-development-environment" id="setting-up-your-development-environment"></a>

Before you can start developing smart contracts for SVM, you need to set up your development environment. This involves installing the necessary tools and libraries. Follow the instructions in this section to get started.

* Install Rust and Cargo, the package manager for Rust, by following the official Rust installation guide: rustup.rs.
* Install the Solana Command Line Tool (CLI) by following the instructions in the Solana documentation: solana.com/docs/.
* Install the Solana SDK for Rust by adding the following dependency to your Cargo.toml file:

```toml
[dependencies]
solana-sdk = "1.9.0"
```

* Initialize a new Rust project using Cargo

```bash
cargo new my_project
cd my_project
```

* All set, now you can begin writing out the smart contract

### Creating Your First Solana Smart Contract[​](https://icarus131.github.io/devcookbook/docs/SVM#creating-your-first-solana-smart-contract) <a href="#creating-your-first-solana-smart-contract" id="creating-your-first-solana-smart-contract"></a>

In this section, you will learn how to create a simple Solana smart contract using Rust. Follow these steps to create a basic "Hello, World!" smart contract:

* Create a new Rust file in your project directory:

```bash
touch src/lib.rs
```

* Open src/lib.rs in your favorite text editor and add the following code:

```rust
#![cfg_attr(not(feature = "std"), no_std)]

use solana_program::{
    account_info::{next_account_info, AccountInfo},
    entrypoint,
    entrypoint::ProgramResult,
    msg,
    pubkey::Pubkey,
};

entrypoint!(process_instruction);

pub fn process_instruction(
    _program_id: &Pubkey,
    accounts: &[AccountInfo],
    _instruction_data: &[u8],
) -> ProgramResult {
    msg!("Hello, Solana!");
    Ok(())
}
```

* Save the file and exit your text editor.

### Deploying Smart Contracts on the Solana Blockchain[​](https://icarus131.github.io/devcookbook/docs/SVM#deploying-smart-contracts-on-the-solana-blockchain) <a href="#deploying-smart-contracts-on-the-solana-blockchain" id="deploying-smart-contracts-on-the-solana-blockchain"></a>

Once you've created your smart contract, the next step is to deploy it on the Solana blockchain.

Follow these steps to deploy your contract using the Solana CLI:

* Build your smart contract:

```bash
cargo build-bpf
```

* Deploy your smart contract:

```bash
solana deploy target/deploy/my_project.so
```

Your smart contract is now deployed on the Solana blockchain!

### Interacting with Smart Contracts[​](https://icarus131.github.io/devcookbook/docs/SVM#interacting-with-smart-contracts) <a href="#interacting-with-smart-contracts" id="interacting-with-smart-contracts"></a>

Now that your smart contract is deployed, you can interact with it using various tools and libraries. Here are some common ways to interact with Solana smart contracts:

* Using the Solana CLI:

```bash
solana program call <contract_address> <instruction_data>
```

### Advanced Smart Contract Development Techniques[​](https://icarus131.github.io/devcookbook/docs/SVM#advanced-smart-contract-development-techniques) <a href="#advanced-smart-contract-development-techniques" id="advanced-smart-contract-development-techniques"></a>

In this section, you will learn advanced techniques for developing smart contracts on Solana, including:

* State management: Let us see how to use account states efficiently, minimizing storage costs and implement state transitions carefully to maintain data consistency.

```rust
pub struct MyContractState {
    pub balance: u64,
}

impl MyContractState {
    pub fn new(balance: u64) -> Self {
        Self { balance }
    }

    pub fn update_balance(&mut self, amount: u64) {
        self.balance += amount;
    }
}

```

* Event handling: You can emit events from your smart contract to notify external systems about state changes or other important events.
* Here is a simple example:

```rust
use solana_program::program::invoke;

fn emit_event() {
    // Emit event
    let event_data = vec![1, 2, 3]; // Example event data
    let event_instruction = solana_program::system_instruction::log(&event_data);
    invoke(&event_instruction, &[]).unwrap();
}

```

* Error handling: You can define custom error types and handle errors gracefully in your smart contracts.

```rust
#[derive(Debug)]
pub enum MyError {
    InsufficientFunds,
    InvalidInstruction,
}

pub fn process_instruction(
    instruction_data: &[u8],
) -> Result<(), MyError> {
    if instruction_data.len() < 4 {
        return Err(MyError::InvalidInstruction);
    }

    // Check for sufficient funds
    if balance < amount {
        return Err(MyError::InsufficientFunds);
    }

    Ok(())
}

```

* Gas optimization: You can optimize gas usage by batching operations and minimizing storage costs.

```rust
// gas optimization by batching operations
let mut ix_batch = Vec::new();
for (account, amount) in transfers.iter() {
    let ix = solana_program::system_instruction::transfer(source, account, *amount);
    ix_batch.push(ix);
}
let batch_instruction = solana_program::instruction::Instruction::new_batch(&ix_batch);
invoke(&batch_instruction, &[]).unwrap();
```

* Upgrading smart contracts safely: You can implement a safe upgrade mechanism to update your smart contract's program ID without losing data or funds.

```rust
pub fn upgrade_contract(new_program_id: &Pubkey) {
    // Update contract's program ID to new_program_id
}
```

### Testing and Debugging Smart Contracts[​](https://icarus131.github.io/devcookbook/docs/SVM#testing-and-debugging-smart-contracts) <a href="#testing-and-debugging-smart-contracts" id="testing-and-debugging-smart-contracts"></a>

Testing and debugging are critical aspects of smart contract development. In this section, you will learn how to write tests for your smart contracts and debug common issues using tools like the Solana CLI

* Debugging: You can use the Solana CLI to debug your smart contracts by inspecting account states and transaction logs.

```rust
fn process_instruction(instruction_data: &[u8]) -> ProgramResult {
    msg!("Received instruction: {:?}", instruction_data);
    // Process instruction...
    Ok(())
}
```

* Testing: You can write unit tests and integration tests for your smart contracts using the Rust testing framework.

```rust
#[cfg(test)]
mod tests {
    use super::*;

    #[test]
    fn test_process_instruction() {
        let instruction_data = vec![1, 2, 3]; // Example instruction data
        assert_eq!(process_instruction(&instruction_data), Ok(()));
    }
}
```

* Integration testing: You can write integration tests to deploy and interact with multiple smart contracts in a simulated environment.

```rust
#[cfg(test)]
mod integration_tests {
    use super::*;

    #[test]
    fn test_contract_integration() {
        // Deploy and interact with multiple contracts...
    }
}
```

#### What is Anchor[​](https://icarus131.github.io/devcookbook/docs/SVM#what-is-anchor) <a href="#what-is-anchor" id="what-is-anchor"></a>

Anchor is a framework for building Solana smart contracts using the Rust programming language. It simplifies the development process by providing high-level abstractions and utilities for interacting with the Solana blockchain. Here's an overview of using Anchor for Rust development in Solana: Installation:

You can install Anchor using Cargo, the Rust package manager:

```bash
cargo install --git https://github.com/project-serum/anchor --tag <latest_version>
```

Usage:

* Create a New Anchor Project:

```bash
anchor init my_project
cd my_project
```

* Define Your Anchor Program:

Anchor programs are defined using a combination of Rust and a domain-specific language (DSL) provided by Anchor. You define your program's state, instructions, and events in Rust structs annotated with Anchor macros.

```rust
use anchor_lang::prelude::*;

#[program]
mod my_program {
    use super::*;

    #[state]
    pub struct MyState {
        pub value: u64,
    }

    impl MyState {
        pub fn new(ctx: Context<Initialize>, value: u64) -> Result<Self> {
            let state = &mut ctx.accounts.state;
            state.value = value;
            Ok(())
        }

        pub fn update(ctx: Context<Update>, value: u64) -> Result<()> {
            let state = &mut ctx.accounts.state;
            state.value = value;
            Ok(())
        }
    }
}
```

* Build and Deploy Your Program:

```bash
anchor build
anchor deploy
```

Interact with Your Program:

Anchor generates client libraries that you can use to interact with your Solana program from other Rust code or external applications. You can use these libraries to send transactions, call methods, and query state on the blockchain.

```rust
use my_project::my_program::MyProgram;
use anchor_lang::prelude::*;

let program_id = Pubkey::new_from_array([0; 32]);
let payer = Keypair::new();
let client = RpcClient::new("https://api.devnet.solana.com".to_string());

let mut transaction = Transaction::new_with_payer(
    &[Instruction::new_with_bincode(
        program_id,
        &MyProgram::Instruction::Update { value: 42 },
        vec![],
    )],
    Some(&payer.pubkey()),
);
transaction.sign(&[&payer], recent_blockhash);
client.send_and_confirm_transaction(&transaction);
```

In conclusion, understanding how to develop for the Solana Virtual Machine (SVM) within Eclipse will give you significant advantages in the Ethereum ecosystem. By leveraging the SVM's highly performant parallelized architecture, developers can unlock improved scalability, lower fees, and enhanced throughput for their decentralized applications. This not only ensures a smoother user experience but also allows you to build more efficient and scalable applications with Eclipse.


# Multi-chain toggle frontend component

The following section is a guide to working with React components to switch chains and make calls to desired RPC URLs in TypeScript.

### The component[​](https://icarus131.github.io/devcookbook/docs/SwitchingChains#the-component) <a href="#the-component" id="the-component"></a>

The [TabbedButtons](https://github.com/Eclipse-Laboratories-Inc/modular-network-component) component is a React TypeScript component designed to provide an easy toggle between different blockchain networks within a React application. It provides a tabbed interface that allows to easily navigate between various blockchain networks, and it dynamically connects to the selected blockchain using the associated RPC URL.

### Prerequisites[​](https://icarus131.github.io/devcookbook/docs/SwitchingChains#prerequisites) <a href="#prerequisites" id="prerequisites"></a>

* Ensure that your project has React installed. If not, you can create a new React project using Create React App.
* Copy the TabbedButtons.tsx file into your project directory.
* Import and use the TabbedButtons component in your desired React component or page.

```tsx
import TabbedButtons from "./TabbedButtons";

const App = () => {
  return (
    <div>
      <TabbedButtons tabs={customTabs} onTabClick={exampleFunction} />
    </div>
  );
};

export default App;
```

### Usage[​](https://icarus131.github.io/devcookbook/docs/SwitchingChains#usage) <a href="#usage" id="usage"></a>

The TabbedButtons component consists of a tabbed interface with predefined tabs for the Solana and Eclipse mainnet. You can easily switch between these networks by clicking on the respective tabs.

Customizing the tabs by overriding the default options can simply be done by creating a `customTabs` array. This array contains the user tab configurations. You can modify this array by adding, removing, or updating tab objects according to your requirements.

```rust
const customTabs = [
  {
    name: "Solana Devnet", //Example tabs that can be overriden by the user
    rpcUrl: "https://api.devnet.solana.com",
    iconSrc: "sol.png",
  },
  {
    name: "Eclipse Devnet",
    rpcUrl: "https://staging-rpc.dev.eclipsenetwork.xyz",
    iconSrc: "eclipse.jpg",
  },
];
```

### The onTabClick property[​](https://icarus131.github.io/devcookbook/docs/SwitchingChains#the-ontabclick-property) <a href="#the-ontabclick-property" id="the-ontabclick-property"></a>

You can extend the functionality of the TabbedButtons component by adding a custom function using the onTabClick property. This function is called each time a user switches between blockchain networks, and it receives the selected RPC URL as a parameter.

```rust
const exampleFunction = (rpcUrl: string, networkName: string) => {
  // Add your arbitrary function here that uses rpcUrl
  console.log(`Setting RPC URL: ${rpcUrl}`);
  // Example: creating alert to confirm the rpcUrl
  alert(
    `Executing custom function with RPC URL: ${rpcUrl} for network: ${networkName}`,
  );
};
```

### Customizing UI[​](https://icarus131.github.io/devcookbook/docs/SwitchingChains#customizing-ui) <a href="#customizing-ui" id="customizing-ui"></a>

The UI is designed to be easily modifiable. As for the icons, you can directly modify them using the customTabs array. For the styling of the tabs themselves, you can modify the TabbedButtons.tsx file to match the requirements of your project. Since the component uses a UI framework, all the styling is taken care of by just modifying class names. This allows for easy customization without any prior modification.

### Conclusion[​](https://icarus131.github.io/devcookbook/docs/SwitchingChains#conclusion) <a href="#conclusion" id="conclusion"></a>

The TabbedButtons component provides a user-friendly way to switch between blockchain networks in a React application. It is easily customizable, allowing developers to modify the UI, extend functionality and modify the displayed networks on the fly, according to their specific project requirements.


# Dapp Deployment Tutorial - Eclipse Devnet

Welcome to the program deployment tutorial for the Eclipse Devnet. This guide will walk you through the process of setting up your development environment, setting up Solana CLI & Keypair, setting up your Anchor VSC project, deploying your program to the Eclipse Devnet, creating a React front-end, and with our example code minting your own NFTs on the Eclipse blockchain. Follow the steps carefully to ensure a smooth experience.

{% hint style="info" %}
We will be deploying an NFT Minter program code example during this tutorial, but feel free to replace it with your own program code and follow along.
{% endhint %}

### Getting Started

This comprehensive tutorial on Dapp deployment to the Eclipse blockchain (including a minter NFT example) is meticulously organized into four distinct sections to facilitate a seamless learning journey.

<table data-view="cards"><thead><tr><th></th><th></th><th data-hidden data-card-cover data-type="files"></th><th data-hidden data-card-target data-type="content-ref"></th></tr></thead><tbody><tr><td><strong>Install Dependencies - Windows</strong></td><td>This section will guide you through installing the necessary dependencies on a Windows system.</td><td><a href="/files/321VtrndqtVfc9XXsQJY">/files/321VtrndqtVfc9XXsQJY</a></td><td><a href="/pages/MBsuOvqBhVJ2b6VivDIQ">/pages/MBsuOvqBhVJ2b6VivDIQ</a></td></tr><tr><td><strong>Solana CLI &#x26; Solana Keypair</strong></td><td>Guides you through setting up the CLI &#x26; a secure keypair for interacting with the Eclipse Devnet.</td><td><a href="/files/TmgGU2ghGH7C0iTsYrfI">/files/TmgGU2ghGH7C0iTsYrfI</a></td><td><a href="/pages/MEDvGXRi5rzTsqHtvuoY">/pages/MEDvGXRi5rzTsqHtvuoY</a></td></tr><tr><td><strong>Creating an Anchor Project in Visual Studio Code</strong></td><td>Walks you through initiating and configuring an Anchor framework project within the popular VSC editor.</td><td><a href="/files/HB773rAtpb3q1LCXmERl">/files/HB773rAtpb3q1LCXmERl</a></td><td><a href="/pages/LWry76MEqEglsLt3E9GU">/pages/LWry76MEqEglsLt3E9GU</a></td></tr><tr><td><strong>Building a React App Front-End</strong></td><td>Demonstrates how to construct a user-friendly interface for minting your NFTs.</td><td><a href="/files/fvNBZwvoq33hZs5RikFv">/files/fvNBZwvoq33hZs5RikFv</a></td><td><a href="/pages/AWGARssgqMLZGTBJdCDZ">/pages/AWGARssgqMLZGTBJdCDZ</a></td></tr></tbody></table>


# Install Dependencies - Windows

To develop and deploy NFTs on the Eclipse blockchain, you need to install several tools and dependencies. This section covers the steps to set up your environment on a Windows operating system.

{% content-ref url="/pages/b9c7RO2lgWkr3fQdhnFx" %}
[Step 1: Install Visual Studio Code (VSC)](/developers/tutorials-and-guides/developer-guides/dapp-deployment-tutorial-eclipse-devnet/install-dependencies-windows/step-1-install-visual-studio-code-vsc)
{% endcontent-ref %}

{% content-ref url="/pages/BIRstafrgdneF1HvLG4f" %}
[Step 2: Install Rust and Cargo](/developers/tutorials-and-guides/developer-guides/dapp-deployment-tutorial-eclipse-devnet/install-dependencies-windows/step-2-install-rust-and-cargo)
{% endcontent-ref %}

{% content-ref url="/pages/7Lnwk66xcBN29RN6RBqH" %}
[Step 3: Download Visual Studio C++ Build Tools](/developers/tutorials-and-guides/developer-guides/dapp-deployment-tutorial-eclipse-devnet/install-dependencies-windows/step-3-download-visual-studio-c++-build-tools)
{% endcontent-ref %}

{% content-ref url="/pages/XthoeXcgIO7hiIDsrXsy" %}
[Step 4: Download Node.js](/developers/tutorials-and-guides/developer-guides/dapp-deployment-tutorial-eclipse-devnet/install-dependencies-windows/step-4-download-node.js)
{% endcontent-ref %}

{% content-ref url="/pages/NcT9DlWBzKIBOnJeBNaS" %}
[Step 5: Install Git on Windows](/developers/tutorials-and-guides/developer-guides/dapp-deployment-tutorial-eclipse-devnet/install-dependencies-windows/step-5-install-git-on-windows)
{% endcontent-ref %}

{% content-ref url="/pages/sfx6ib4TNXStLpIBcfC9" %}
[Step 6: Install the Solana CLI](/developers/tutorials-and-guides/developer-guides/dapp-deployment-tutorial-eclipse-devnet/install-dependencies-windows/step-6-install-the-solana-cli)
{% endcontent-ref %}

{% content-ref url="/pages/Wv74tSBsGNLohl1z76NE" %}
[Step 7: Install WSL on Visual Studio Code and Upgrade to WSL2](/developers/tutorials-and-guides/developer-guides/dapp-deployment-tutorial-eclipse-devnet/install-dependencies-windows/step-7-install-wsl-on-visual-studio-code-and-upgrade-to-wsl2)
{% endcontent-ref %}

{% content-ref url="/pages/5sqBdNxaxw1dQ2VXt74p" %}
[Step 8: Set Up Development Environment in Ubuntu WSL](/developers/tutorials-and-guides/developer-guides/dapp-deployment-tutorial-eclipse-devnet/install-dependencies-windows/step-8-set-up-development-environment-in-ubuntu-wsl)
{% endcontent-ref %}

{% content-ref url="/pages/BavXPOzXHEkCyBrjUdrq" %}
[Step 9: Install Anchor on Windows and WSL](/developers/tutorials-and-guides/developer-guides/dapp-deployment-tutorial-eclipse-devnet/install-dependencies-windows/step-9-install-anchor-on-windows-and-wsl)
{% endcontent-ref %}


# Step 1: Install Visual Studio Code (VSC)

Visual Studio Code is a powerful and lightweight code editor that supports a wide range of programming languages and tools. It will be our primary editor for writing and deploying smart contracts on the Eclipse blockchain.

1. **Download Visual Studio Code**: Visit the [Visual Studio Code download page](https://code.visualstudio.com/download) to download the installer for Windows.
2. **Install Visual Studio Code**: Run the downloaded installer and follow the on-screen instructions to install Visual Studio Code on your system.
3. **Verify Installation**: Once installed, launch Visual Studio Code to ensure it's correctly installed and operational.

<figure><img src="https://lh7-us.googleusercontent.com/cXNSqHEhkAliLwMtB8g9gVy_mzmJNtgZ0enIQWQr4gRrgF3IxYxa9H9ONAxpjQ4vb25dY4PruNgDwFJw32vPtZb07OLykxK3UFulpluNLIvHn9qQohd5ivJfKPcB1bfW0StnrSYVPwGuvIvlW7yN-go" alt=""><figcaption></figcaption></figure>


# Step 2: Install Rust and Cargo

Rust is a fast and memory-efficient programming language with no runtime or garbage collector, making it ideal for blockchain development. Cargo is Rust's package manager and build system, simplifying the process of managing dependencies and building packages.

1. **Download Rust and Cargo**:
   * Navigate to the [Rust installation page](https://www.rust-lang.org/tools/install) to access the Rustup installer, which will install Rust and Cargo.

<figure><img src="https://lh7-us.googleusercontent.com/3WZ-gfkYT9p3p3m8RpKneJ6Ju9BSr_wBO2bWLN28RomnmQxYeJ7nJ7-gY434nSsoGPIsTmZTKrJ3QB5hcTTJyskuPl1dzsukUzf9-JNjRjVJnBuhKqyMuLubxaGojaILSeDy0NLV76GoXNCR1qc9Sg4" alt=""><figcaption></figcaption></figure>

1. **Install Rust and Cargo**:
   * Follow the instructions on the website to download and run the Rustup installer. The installer will automatically download and install Rust, along with its package manager, Cargo.

<figure><img src="https://lh7-us.googleusercontent.com/s3AHAu3xIizSojX5WMd7lMNXWu4qQYlTo0ZjFL6Cr3eAslVigkmfA7ibZQ9Ra6g2kO98yZGdFhQZ6-Ywhmsz6ovo3VXdsHfM1AL5Z0Oa99eYUhMc7RksH1R13Azrt0TVgDvs3gOT5SxvDIKAIeu3ZuI" alt=""><figcaption><p>Example Output</p></figcaption></figure>

1. **Verify Installation**:
   * Open a new terminal window and run the following command to verify that Rust and Cargo are successfully installed:

```bash
rustc --version
cargo --version
```


# Step 3: Download Visual Studio C++ Build Tools

The Visual Studio C++ Build Tools are essential for compiling and building certain dependencies that may require native extensions. These tools include the C++ compiler and standard libraries, which are necessary for developing applications on the Eclipse blockchain.

1. **Navigate to the Visual Studio C++ Build Tools Download Page**:
   * Visit the [Visual Studio C++ Build Tools download page](https://visualstudio.microsoft.com/visual-cpp-build-tools/) to access the installer.
2. **Download and Install the Build Tools**:

   * Click on the "Download" or "Free download" button to start the download. Once downloaded, run the installer.
   * In the installer menu, ensure you select the "C++ build tools" workload. This includes the necessary compiler and libraries needed for blockchain development.
   * Follow the on-screen instructions to complete the installation.<br>

   <figure><img src="https://lh7-us.googleusercontent.com/ZawsxKZsxiZFTVwTvfo5To1yO9zyc5A3qK1XoZ_OlLzeLqK2B_uK-C8Z0xJYizL_N70QsQrrkllqb7OUmcqMGUBA5cnWWRCvYIh-eqbMJ0otF7o4qelK1czICtfmMOb-dxuOXjYlDMXXVr2lp5WOQZU" alt=""><figcaption></figcaption></figure>


# Step 4: Download Node.js

Node.js is a runtime environment that allows you to execute JavaScript code server-side. It's essential for developing decentralized applications (DApps) on the Eclipse blockchain, as it enables you to run scripts, tests, and interact with the blockchain through JavaScript.

1. **Navigate to the Node.js Download Page**:
   * Access the [Node.js download page](https://nodejs.org/en/download/) to find the installer suited for your Windows system.
2. **Choose the Correct Version**:
   * For most users, the LTS (Long-Term Support) version is recommended as it provides a more stable and well-supported Node.js environment. Click on the "Windows Installer" link to start the download.
3. **Install Node.js**:

   * Once the installer is downloaded, run it. Follow the installation prompts, accepting the license agreement and selecting the default installation options unless you have specific needs.
   * The installer will also include npm (Node Package Manager), which is vital for managing your project's dependencies.<br>

   <figure><img src="https://lh7-us.googleusercontent.com/45TM5hXUbLLWd09q_phQOqB8A58tqFImFtgEi0PmwLE28NHUtrJNyx2HJ0wRBQfvuZCoDfh1TD13PVzX6U7a1CmgMSuc21aYqnPz1vr-QmInwmVWRmfoLMx6cFsISZGJ04NWo6HlZGuYvfIom3oib-k" alt=""><figcaption></figcaption></figure>
4. **Verify Installation**:
   * To ensure Node.js and npm are installed correctly, open a command prompt or terminal and run the following commands:

```bash
node --version
npm --version
```


# Step 5: Install Git on Windows

Git is critical for version control and collaboration in software development, allowing you to track changes, revert to previous stages, and collaborate with others on your project. Installing Git on Windows will enable you to manage your NFT project's source code efficiently.

1. **Navigate to the Git Download Page**:
   * Visit the [Git download page for Windows](https://git-scm.com/download/win) to access the Git installer for Windows. The website should automatically suggest the best version for your system.
2. **Download and Install Git**:

   * Click on the link to download the installer. Once the download is complete, run the installer.
   * During the installation process, you can accept the default settings, which are suitable for most users. Advanced users can customize the installation options according to their preferences.
   * Ensure that you choose to add Git to your PATH during installation. This step is crucial as it allows you to run Git commands from the Command Prompt or PowerShell.

   <figure><img src="https://lh7-us.googleusercontent.com/t-ZMcru4yRsKm_6fYV0s8zMo4tnEfMIxylSXaWHdsgye0L8lkugjnctsQEJWJgyf4MWfSEhCVMO0Wnm1lCZRvDInojwz4Hy9srU7fw4V8bmNygievjyJsvlwdHn0pHUNYd2yuN8h_eMqXdCLRrsljvg" alt=""><figcaption></figcaption></figure>
3. **Verify Installation**:
   * To confirm that Git has been successfully installed, open a Command Prompt or PowerShell window and type the following command:

```bash
git --version
```

This command should display the currently installed version of Git, indicating that Git is correctly installed on your system.


# Step 6: Install the Solana CLI

The Solana Command Line Interface (CLI) is a powerful tool that enables developers to interact with the SVM based blockchains, deploy programs, and manage accounts. This step guides you through the installation of the Solana CLI on your Windows system.

1. **Run Visual Studio Code as Administrator**:
   * Before proceeding with the installation commands, ensure that you run Visual Studio Code as an administrator. This permission level is required to install the Solana CLI tools correctly.
2. **Install Solana CLI**:
   * Open a new terminal in Visual Studio Code (run as administrator) and execute the following commands to download and install the Solana CLI:

     * Download the Solana Install Initiation Script:

       ```
       cmd /c "curl https://release.solana.com/v1.18.3/solana-install-init-x86_64-pc-windows-msvc.exe --output C:\solana-install-tmp\solana-install-init.exe --create-dirs"
       ```
     * Run the Installer:

       ```cmd
       C:\solana-install-tmp\solana-install-init.exe v1.18.3
       ```

     These commands download the Solana installer to a temporary directory and then execute it to install the Solana CLI of the specified version.
3. **Verify Installation**:
   * After the installation process completes, you can verify the installation by running the following command in the terminal:

     ```bash
     solana --version
     ```
   * This command should output the version of the Solana CLI that you have installed (v1.18.3), confirming that the installation was successful.

<figure><img src="https://lh7-us.googleusercontent.com/SUvOhmEeBSbN810uMqgX_0kIWNQLMPdbB7VkRdCsxbaJjKSKDumgne8VX0gFQREWHOlZG5DRB2GwJsABj9KgfgDfhQOBLnp13P465Ze3a15Ni1GDv0qMAvSWbcLRZnEcpWErQRPiZB1Jc0dANLQ3Uyw" alt=""><figcaption><p>Example Output</p></figcaption></figure>


# Step 7: Install WSL on Visual Studio Code and Upgrade to WSL2

The Windows Subsystem for Linux (WSL) allows you to run a Linux environment directly on Windows, without the overhead of a traditional virtual machine or dual-boot setup. Installing WSL and upgrading to WSL2 enhances performance and supports full system call compatibility, which is crucial for development tasks.

**Install WSL on Visual Studio Code**

1. **Enable WSL on Windows**:
   * Before installing a Linux distribution, you must enable the Windows Subsystem for Linux feature. Open PowerShell as Administrator and run:

     ```powershell
     dism.exe /online /enable-feature /featurename:Microsoft-Windows-Subsystem-Linux /all /norestart
     ```
2. **Install Your Linux Distribution of Choice (Ubuntu)**:
   * Open the Microsoft Store and search for Ubuntu. Select the version you wish to install (e.g., Ubuntu 20.04 LTS) and click "Get" to install it.<br>

     <figure><img src="https://lh7-us.googleusercontent.com/yY_Oe5uhq2UlEK0QzWStLQprwsFabLzT3hOhUSOak2AVAlK0GwwrBYqe7twngpZyftIePQmo36Cz_cqgvnRi_afFfjZzCKsLo1tj94Btqg_nS3IOt1JANIvEGYiRYOG-eu-eQXLbPxRxOvgQerCHCLk" alt=""><figcaption></figcaption></figure>
   * Once installed, launch Ubuntu from the Start menu, and you'll be prompted to create a user account and password.<br>

     <figure><img src="https://lh7-us.googleusercontent.com/f4ekncPDoKbr4Klpugoxa3jpAgwkv5iY1u2dzsDYHd5dAs4eVyF9RM_4TG1XCbBdYeGfwgS-Vx5iQQrBbYuxSRCKsohLkcONENL9j2NDBCprXnO4KbGwrbvN1Hf7IfUjNUy8hfcdEf-L16WLnvjmDTA" alt=""><figcaption><p>Example Output</p></figcaption></figure>

**Upgrade to WSL2**

1. **Ensure Your System Supports WSL2**:
   * WSL2 requires Windows 10 version 1903 or higher. Ensure your Windows is up to date.
2. **Download the Linux Kernel Update Package**:
   * Follow the instructions at [Microsoft's official guide](https://learn.microsoft.com/en-us/windows/wsl/install-manual#step-4---download-the-linux-kernel-update-package) to download and install the Linux kernel update package for WSL2.
3. **Set WSL2 as Your Default Version**:
   * Open PowerShell as Administrator and run:

     ```powershell
     wsl --set-default-version 2
     ```
   * This command sets WSL2 as the default version for any future Linux distribution installations.
4. **Verify Installation**:
   * To confirm that WSL2 is installed and running, you can open your Linux distribution (e.g., Ubuntu) and run:

     ```bash
     uname -a
     ```
   * This command should display a Linux kernel version indicating that WSL2 is actively running.

**Install WSL Extension in VSC**

* **Navegate to "Extensions" tab in VSC and search for "WSL"; install the extension:**

<figure><img src="https://lh7-us.googleusercontent.com/yMwisx6N6GyWiLk6AlO5LkHevOHAnGb8NHqaj3aq1hM9Q-wemZODHc36WTdAqOmh4gM8WKHrv6vEquwyaGbqaCHhYEND4jQR6Lep-Jusu4mKD0dHpXongcCfKMX_D_2Uhe4IUzufzEJj9mYkYH7oRk8" alt=""><figcaption></figcaption></figure>


# Step 8: Set Up Development Environment in Ubuntu WSL

After installing the necessary tools and extensions, it's time to switch your development environment to Ubuntu on WSL and set up Rust, Cargo, and Solana. This step ensures you have all the necessary components for Solana blockchain development within a Linux environment.

**Switch Visual Studio Code to Use Ubuntu WSL**

1. **Open Visual Studio Code**:
   * Launch Visual Studio Code on your Windows system.
2. **Open a New Terminal**:
   * Open a new terminal in VS Code by going to `Terminal` > `New Terminal` or using the shortcut `` Ctrl+` `` .
3. **Select WSL: Ubuntu from the Terminal Dropdown**:

   * In the new terminal window, you'll see a dropdown menu at the top right corner. Click on it and select "Select Default Profile".
   * Choose "WSL: Ubuntu" (or the specific version of Ubuntu you installed) from the list. This changes the terminal to use the Ubuntu environment within WSL for the current and future terminal sessions.

   <figure><img src="/files/g0moI90Fb2Ouf50lW71L" alt=""><figcaption></figcaption></figure>
4. **Navigate to Your Project Directory**:
   * Use the `cd` command to change to your project directory. For example:

     ```bash
     cd /path/to/your/project
     ```

**Install Rust on WSL**

1. **Install Rust**:
   * Execute the following command in the Ubuntu terminal to install Rust:

     ```bash
     curl --proto '=https' --tlsv1.2 -sSf https://sh.rustup.rs | sh
     ```
   * Follow the on-screen instructions to complete the Rust installation process.

**Install Cargo on WSL**

1. **Verify Cargo Installation**:
   * Installing Rust with rustup also installs Cargo. You can verify Cargo is installed by running:

     ```bash
     cargo --version
     ```
   * This command should display the version of Cargo installed, confirming its availability.

**Install Solana on WSL**

1. **Install Solana Toolkit**:
   * To install the Solana toolkit, including the CLI tools, run:

     ```bash
     sh -c "$(curl -sSfL https://release.solana.com/stable/install)"
     ```
   * This command downloads and installs the latest stable version of the Solana toolkit.
2. **Verify Solana Installation**:
   * Ensure the installation was successful by checking the Solana version with:

     ```bash
     solana --version
     ```
   * The command output should display the version of Solana installed, indicating that it is ready for use in your development projects.


# Step 9: Install Anchor on Windows and WSL

Anchor is a framework for Solana smart contract development. It simplifies the process of writing, testing, and deploying programs on SVM blockchains. To ensure compatibility and flexibility in your development environment, it's recommended to install Anchor both on your Windows system and within WSL. This section covers the installation process for both environments.

**Install Anchor in Windows Terminal**

1. **Open Windows Terminal as Administrator**:
   * This is necessary to ensure that the installation process has the required permissions.
2. **Install Anchor CLI**:
   * Run the following command in the terminal:

     ```bash
     cargo install --git https://github.com/project-serum/anchor anchor-cli --locked
     ```
   * This command downloads and installs the latest version of Anchor CLI from the official GitHub repository.<br>

     <figure><img src="https://lh7-us.googleusercontent.com/BQn236M-Z9efjwwQjW0MJTgpGtpvJ1W94QYCi22gdeP7DGfwEIGmukF0fN1DXS7RYfmy-I8d2MqJni2mTxdxFwf2alV583TyyW5LFQQlouPU4pqMMsA_2uv-SsRLg9qVUsRAqYtPb0_Dm9nU5um2zms" alt=""><figcaption><p>Example Output</p></figcaption></figure>
3. **Verify Installation**:
   * To check that Anchor was installed correctly, type:

     ```bash
     anchor --version
     ```
   * The terminal should display the version of Anchor CLI installed.

**Install Anchor in WSL**

To install Anchor within your WSL environment, follow these steps:

1. **Open WSL Terminal**:
   * Launch your WSL terminal from the Start menu or through VS Code's Remote - WSL extension.
2. **Install Anchor CLI**:
   * Execute the same Cargo command within your WSL terminal:

     ```bash
     cargo install --git https://github.com/project-serum/anchor anchor-cli --locked
     ```
   * This ensures that Anchor CLI is available in your Linux environment, offering consistency across your development platforms.
3. **Verify Installation**:
   * Confirm the installation by checking the Anchor version in WSL:

     ```bash
     anchor --version
     ```
   * The version number indicates that Anchor CLI is ready for use within WSL.


# Solana CLI & Solana Keypair

To begin developing on the Eclipse blockchain, you need to configure the Solana CLI to connect to the Eclipse devnet. This environment is ideal for testing and development purposes, offering a similar experience to the mainnet without the need for real cryptocurrency. This section will walk you through configuring the Solana CLI and setting up a Solana Keypair.

{% content-ref url="/pages/6Zo1HiiL3Rw8nEal1AWq" %}
[Step 1: Set Solana CLI to Use Eclipse Devnet](/developers/tutorials-and-guides/developer-guides/dapp-deployment-tutorial-eclipse-devnet/solana-cli-and-solana-keypair/step-1-set-solana-cli-to-use-eclipse-devnet)
{% endcontent-ref %}

{% content-ref url="/pages/ZQYMPO6k0DQlqDCg9iGi" %}
[Step 2: Verify Solana CLI Configuration](/developers/tutorials-and-guides/developer-guides/dapp-deployment-tutorial-eclipse-devnet/solana-cli-and-solana-keypair/step-2-verify-solana-cli-configuration)
{% endcontent-ref %}

{% content-ref url="/pages/Mfchq5TCJtTcIgE9DT3F" %}
[Step 3: Generate a New Solana Keypair](/developers/tutorials-and-guides/developer-guides/dapp-deployment-tutorial-eclipse-devnet/solana-cli-and-solana-keypair/step-3-generate-a-new-solana-keypair)
{% endcontent-ref %}

{% content-ref url="/pages/COAZfHQ3xiS2bt0WTlTx" %}
[Step 4: Claim Devnet ETH for Transaction Fees](/developers/tutorials-and-guides/developer-guides/dapp-deployment-tutorial-eclipse-devnet/solana-cli-and-solana-keypair/step-4-claim-devnet-eth-for-transaction-fees)
{% endcontent-ref %}

{% content-ref url="/pages/Uo5ZEdoSWyxamqehJwmn" %}
[Optional Step: View Balance on Devnet Explorer](/developers/tutorials-and-guides/developer-guides/dapp-deployment-tutorial-eclipse-devnet/solana-cli-and-solana-keypair/optional-step-view-balance-on-devnet-explorer)
{% endcontent-ref %}


# Step 1: Set Solana CLI to Use Eclipse Devnet

When developing for the Eclipse blockchain, connecting to the appropriate network environment is crucial. For this tutorial, we'll be using the Eclipse devnet, specifically targeting its staging environment. This environment offers a testing ground that closely mirrors the mainnet, providing a realistic backdrop for development, testing, and deployment of your projects without the need for real cryptocurrency. Here's how to configure your Solana CLI to connect to this environment.

**Prerequisites**

* Solana CLI installed on your machine. Refer back to earlier sections if you need guidance on installing the Solana CLI.
* Windows users should utilize WSL (Windows Subsystem for Linux) for full compatibility.

**Configuration Instructions**

1. **Open Your Terminal**:
   * Launch your terminal application. Windows users are advised to use WSL by opening the Ubuntu application or any other Linux distribution you've installed through WSL.
2. **Execute the Configuration Command**:
   * To configure the Solana CLI to communicate with the Eclipse blockchain's staging environment, enter and run the following command in your terminal:

     ```bash
     solana config set --url https://staging-rpc.dev2.eclipsenetwork.xyz
     ```
   * This command sets the Solana CLI's RPC URL to the Eclipse blockchain's devnet staging environment. It ensures all commands issued through the CLI are directed to this specific network.

**Understanding the Command**

* **RPC URL Configuration**: The `--url` parameter specifies the RPC endpoint that the Solana CLI will interact with. By setting it to `https://staging-rpc.dev2.eclipsenetwork.xyz`, you're telling the CLI to route all network requests to the Eclipse blockchain's devnet staging environment.
* **Target Network**: This staging environment is designed for developers to test their applications in a setting that simulates the actual conditions of the Eclipse blockchain's mainnet without the risk associated with real transactions.

**Verification and Next Steps**

* It's good practice to verify that your CLI is correctly configured after updating its settings. You can do this by running `solana config get` in your terminal. This command displays the current configuration of your Solana CLI, including the newly set RPC URL.
* With your CLI now pointing to the Eclipse blockchain's staging environment, you're set to begin the next phase of development, such as creating a wallet, deploying smart contracts, and interacting with the network.


# Step 2: Verify Solana CLI Configuration

After configuring the Solana CLI to connect to the Eclipse blockchain's staging environment, it's crucial to verify that the settings have been applied correctly. This ensures that your development activities are indeed targeting the correct network, allowing for a smooth development process. This step will guide you through verifying the current configuration of your Solana CLI.

**Why Verification Matters**

* **Accuracy**: Verification ensures that the CLI is configured to communicate with the intended RPC URL, preventing any unintended transactions or deployments on the wrong network.
* **Troubleshooting**: Identifying configuration issues early can save time by avoiding troubleshooting errors caused by incorrect network settings.

**Verification Instructions**

1. **Open Your Terminal**:
   * Access your terminal window where you have the Solana CLI available. Windows users should ensure they are using WSL for this process.
2. **Run the Configuration Get Command**:
   * To display your current Solana CLI configuration, execute the following command:

     ```bash
     solana config get
     ```
   * This command retrieves and displays the current settings of your Solana CLI, including the RPC URL, default wallet path, and other relevant configurations.
3. **Examine the Output**:

   * Focus on the "RPC URL" field in the output. It should match the URL you previously set:

     ```arduino
     RPC URL: https://staging-rpc.dev2.eclipsenetwork.xyz
     ```
   * Confirming that the "RPC URL" matches the intended staging environment URL ensures that your CLI is correctly set up to interact with the Eclipse blockchain's devnet.

   <figure><img src="/files/ZzjbkT7hpMccPrh2pntM" alt=""><figcaption><p>Example Output</p></figcaption></figure>


# Step 3: Generate a New Solana Keypair

A keypair in Solana/Eclipse consists of a public key (wallet address) and a private key (secret key), which are essential for interacting with the blockchain. The public key is used to receive funds or identify your account, while the private key is used to sign transactions securely. If you're new to the Solana CLI, generating a new keypair is one of the first steps you'll need to take to start working with the Eclipse blockchain.

**Why You Need a Keypair**

* **Identity**: Your keypair serves as your identity on the blockchain, allowing you to own and transact with ETH and other tokens.
* **Security**: The private key in the keypair is used to sign transactions, ensuring that only the key owner can authorize actions associated with the account.

**Generating a Keypair**

1. **Open Your Terminal**:
   * Ensure you have access to your terminal or command line interface where the Solana CLI is installed. Windows users should use WSL for this process.
2. **Run the Keypair Generation Command**:
   * Enter the following command to generate a new keypair:

     ```bash
     solana-keygen new
     ```
   * The Solana CLI will generate a new keypair and save the keys to a file in your home directory (by default). It will also display the public key, which represents your new Eclipse blockchain address.
3. **Secure Your Keypair**:
   * Upon generating a new keypair, the CLI will prompt you to save the seed phrase associated with your keypair. It's crucial to write down this seed phrase and store it in a secure location. The seed phrase can be used to recover your keypair in case you lose access to your computer or the file where your keys are stored.<br>

     <figure><img src="https://lh7-us.googleusercontent.com/YZlZWEZprfTTBgrIhOsY3TbvsDDcToU7xvclS01cqBvN5Xe4qtEYVFNKi5kdFmU0OuSUI_CnjUkwRqZ0zhLcmgWRrTvxIUOo02Ebqq6XmWI-Du-MyWgZyVLaQRLt-ippxh7PwRsU0RuKMkpbj2quFLw" alt=""><figcaption><p>Example Output</p></figcaption></figure>

**Next Steps**

* With your new keypair generated, you're now equipped with a fundamental tool required for Eclipse blockchain development. This keypair will be used for various tasks, including sending and receiving ETH, deploying programs, and interacting with contracts on the blockchain.
* Remember to keep your private key and seed phrase secure at all times. Anyone with access to your private key can control your blockchain assets.

**Troubleshooting**

* If you encounter any issues during the keypair generation process, ensure that your Solana CLI is correctly installed and updated to the latest version. Running `solana --version` can verify your CLI version.


# Step 4: Claim Devnet ETH for Transaction Fees

To deploy your smart contract to the Eclipse blockchain's devnet, you'll need devnet ETH to cover transaction fees. Despite the use of Ethereum as the transaction currency, the Solana CLI provides a convenient method for claiming devnet tokens, which in this context, are used similarly to ETH for transaction fees on the Eclipse blockchain's devnet. This step will guide you through the process of obtaining these tokens.

**Why You Need Devnet ETH**

* **Transaction Fees**: Deploying smart contracts and executing transactions on the blockchain requires paying fees, which are denoted in ETH within the Eclipse devnet environment.
* **Testing Environment**: Having devnet ETH allows you to test your smart contracts thoroughly, simulating real-world transaction conditions without the need for real ETH.

**Claiming Devnet ETH**

1. **Open Your Terminal**:
   * Ensure you have access to your terminal or command line interface where the Solana CLI is installed. Windows users should use WSL for this process.
2. **Confirm CLI Configuration for Devnet**:
   * Before proceeding, ensure that your Solana CLI is correctly configured to interact with the Eclipse blockchain's devnet. This setup should have been completed in previous steps.
3. **Execute the Airdrop Command**:
   * To claim devnet ETH, use the same Solana CLI airdrop command, which in this context, facilitates the acquisition of the necessary tokens for development activities:

     ```bash
     solana airdrop 0.2
     ```
   * This command requests 10 units of the devnet currency, which, for the purposes of Eclipse blockchain development, will be used as if it were ETH. Adjust the amount as needed based on your testing requirements.<br>

     <figure><img src="https://lh7-us.googleusercontent.com/sRGKVe5kyWk0mivls04qWA7G6wda8pJYslV8sOesYlBYPR4W41gHPZ7iLd2w-Ensq-VRaaumvDenNF2y8fZ4z9IQ_-sF-whS8Jb8QwCW-3ArldpplnMS41YuTfAO545OBOd296EGtkpAdjwT1gl1JpY" alt=""><figcaption><p>Example Output</p></figcaption></figure>
4. **Verify Receipt of Tokens**:
   * After requesting the airdrop, confirm that you've received the tokens by checking your balance:

     ```bash
     solana balance
     ```
   * The output will show your updated balance, reflecting the receipt of the devnet tokens.

**Troubleshooting**

* **Issues with Airdrop**: If the airdrop doesn't seem to work, double-check that your configuration is set to the Eclipse blockchain's devnet. Use `solana config get` to verify your settings.
* **Delay in Token Receipt**: Network congestion or delays can occasionally affect the timing of the airdrop. If your balance doesn't update immediately, give it a few minutes and check again.

**Next Steps**

* With the necessary devnet ETH in your account, you're prepared to move forward with deploying and testing your smart contracts on the Eclipse blockchain's devnet. This crucial step ensures that you can conduct thorough testing in a realistic but safe environment before any mainnet deployment.


# Optional Step: View Balance on Devnet Explorer

After obtaining devnet tokens for transaction fees, an excellent way to verify your account's balance and ensure everything is set up correctly is by using the Eclipse blockchain's devnet explorer. This online tool allows you to view transaction history, account balances, and other blockchain data by simply entering your public key. This step is optional but recommended for a comprehensive check of your account status.

**Why Check Your Balance on the Explorer**

* **Verification**: Confirming your balance on the blockchain explorer provides an additional layer of verification outside the CLI environment.
* **Transparency**: Viewing your account on the explorer allows you to see transactions and balances as they are recorded on the blockchain, offering transparency and peace of mind.

**How to Check Your Balance**

1. **Access the Eclipse Blockchain Devnet Explorer**:
   * Open your web browser and navigate to the Eclipse blockchain's devnet explorer at <https://explorer.dev.eclipsenetwork.xyz/>.
2. **Find Your Public Key**:
   * If you don’t already have your public key handy, you can retrieve it by running the following command in your terminal:

     ```bash
     solana address
     ```
   * This command displays the public key associated with your current Solana CLI configuration, which corresponds to your devnet account address.
3. **Search for Your Public Key**:
   * On the devnet explorer page, locate the search bar at the top. Enter your public key into this search bar and press Enter or click the search icon.
   * The explorer will navigate to a page detailing the account associated with the public key you entered. Here, you can view your current balance, recent transactions, and other relevant account information.<br>

     <figure><img src="https://lh7-us.googleusercontent.com/Iu4JvARqrw5nPl64k3XIAxpBwnLkZijT3lo-Xucjajd8S6Ifj1rD9U-ypiW-l6VDiFL_AV-ECoZF0yFfxf8Eq_yEHM_dO9pG4T6PMm64kUonL59B9we-3Z_WE0fpticq6q-5xEnSX91i-Ki-CgbIcf4" alt=""><figcaption><p>Eclipse Devnet Explorer</p></figcaption></figure>

**Troubleshooting**

* **No Results Found**: If the explorer does not display any information for your public key, ensure that the key is correct and that you have successfully claimed devnet tokens. Remember, blockchain explorers can only display information for accounts that have been activated or have transaction history on the network.

**Next Steps**

* With your balance verified on the Eclipse blockchain's devnet explorer, you have an additional confirmation that your setup is correctly configured and ready for development activities. This check ensures that you are fully prepared to deploy and test smart contracts, interact with the blockchain, and engage in further development tasks with confidence.


# Creating an Anchor Project in Visual Studio Code

Starting your development journey with the Eclipse blockchain involves creating and setting up a project environment that supports Solana and Anchor frameworks. This section guides you through initializing an Anchor project for NFT minting, which lays the foundation for your smart contract development.

{% content-ref url="/pages/QTlYT9F1ME27ZF9LWbDm" %}
[Step 1: Initialize Anchor Project](/developers/tutorials-and-guides/developer-guides/dapp-deployment-tutorial-eclipse-devnet/creating-an-anchor-project-in-visual-studio-code/step-1-initialize-anchor-project)
{% endcontent-ref %}

{% content-ref url="/pages/H0GDkEQgp0L2XNeNNXE1" %}
[Step 2: Update the lib.rs File with Smart Contract Code](/developers/tutorials-and-guides/developer-guides/dapp-deployment-tutorial-eclipse-devnet/creating-an-anchor-project-in-visual-studio-code/step-2-update-the-lib.rs-file-with-smart-contract-code)
{% endcontent-ref %}

{% content-ref url="/pages/3LKYJYtFatVefiUHDhVu" %}
[Step 3: Update the Smart Contract's Cargo.toml File](/developers/tutorials-and-guides/developer-guides/dapp-deployment-tutorial-eclipse-devnet/creating-an-anchor-project-in-visual-studio-code/step-3-update-the-smart-contracts-cargo.toml-file)
{% endcontent-ref %}

{% content-ref url="/pages/rPC5fgqS7AZ7o6px0Piw" %}
[Step 4: Update the Project's Root Cargo.toml File](/developers/tutorials-and-guides/developer-guides/dapp-deployment-tutorial-eclipse-devnet/creating-an-anchor-project-in-visual-studio-code/step-4-update-the-projects-root-cargo.toml-file)
{% endcontent-ref %}

{% content-ref url="/pages/9IvRGStoHweNmTmGpLwc" %}
[Step 5: Compile Your Program with anchor build](/developers/tutorials-and-guides/developer-guides/dapp-deployment-tutorial-eclipse-devnet/creating-an-anchor-project-in-visual-studio-code/step-5-compile-your-program-with-anchor-build)
{% endcontent-ref %}

{% content-ref url="/pages/9WGLWNNmTWXtYDeOPFzx" %}
[Step 6: Deploy Your Project to the Eclipse Devnet](/developers/tutorials-and-guides/developer-guides/dapp-deployment-tutorial-eclipse-devnet/creating-an-anchor-project-in-visual-studio-code/step-6-deploy-your-project-to-the-eclipse-devnet)
{% endcontent-ref %}

{% content-ref url="/pages/W6IZjIPax3kLgM0QRGTe" %}
[Step 7: Verify Program Deployment on the Eclipse Devnet Explorer](/developers/tutorials-and-guides/developer-guides/dapp-deployment-tutorial-eclipse-devnet/creating-an-anchor-project-in-visual-studio-code/step-7-verify-program-deployment-on-the-eclipse-devnet-explorer)
{% endcontent-ref %}


# Step 1: Initialize Anchor Project

Anchor is a framework that simplifies SVM development, providing tools and abstractions for building Eclipse programs. Initializing an Anchor project sets up the necessary project structure and configurations.

**Prerequisites**

* Ensure you have Anchor and Solana CLI installed. If not, refer to earlier sections of this guide for installation instructions.
* Visual Studio Code (VS Code) should be installed and configured to use WSL (Windows Subsystem for Linux) if you are on a Windows machine.

**Project Initialization**

1. **Open Visual Studio Code**:
   * Launch Visual Studio Code. If you're working within WSL, make sure VS Code is connected to your WSL instance.
2. **Create a New Directory**:
   * Open a terminal in VS Code (`Terminal` > `New Terminal`) and navigate to the location where you want to create your project.
   * Create a new directory for your project with:

     ```bash
     dir NFTMinter
     ```
   * Navigate into your newly created directory:

     ```bash
     cd NFTMinter
     ```
3. **Initialize Anchor Project**:
   * Within your project directory, initialize a new Anchor project by running:

     ```bash
     anchor init NFTMinter --javascript
     ```
   * This command creates a new Anchor project named "NFTMinter" and sets it up to use JavaScript for the project's scripts. Anchor will generate a basic project structure, including a lib folder for your program's logic and a tests folder for your project's test scripts.

     <figure><img src="https://lh7-us.googleusercontent.com/hJwQd3QQkLb-0DlplMDmedSTy8IXpwtEKm-qU7ZsMyER-AXXbzO1OLSey58Uw31X3L4oJVi8p3_aAYbvFgiBZwvFP_08MlvrrYl4MGyU6Q02BQwkfs42sfvW8kjtsmx-ohTd4UNNC3uehd0L2O3zEcU" alt=""><figcaption><p>Example Output</p></figcaption></figure>
4. **Examine Project Structure**:
   * After initialization, take a moment to explore the created project structure. You can use the VS Code explorer pane to navigate through the files and folders. You’ll find:

     * `Anchor.toml`: The configuration file for your Anchor project.
     * `programs/`: Directory where your program source code will reside.
     * `tests/`: Directory for your project's test scripts.
     * `app/`: A template for a front-end application if you decide to develop one.<br>

     <figure><img src="/files/KoEYfHyG0hlhgU9AFpNi" alt=""><figcaption><p>Example Directory</p></figcaption></figure>

**Next Steps**

* With your Anchor project initialized, you’re ready to begin smart contract development. The next steps involve writing your smart contract logic within the `programs/` directory and creating tests to ensure your contract works as expected.


# Step 2: Update the lib.rs File with Smart Contract Code

In this step, you'll define the functionality for NFT minting within your project by updating the `lib.rs` file with provided Rust code. This smart contract code includes the structure and logic necessary for creating NFTs.

**Instructions**

1. **Access the `lib.rs` File**:
   * Use Visual Studio Code to navigate to `programs/nftminter/src/` in your project's directory.
   * Open the `lib.rs` file. Initially, this contains Anchor's default scaffolded code.
2. **Update the File with Provided Code**:
   * Erase the existing content and insert the following example code or your own code:

     ```rust
     use anchor_lang::prelude::*;
     use anchor_spl::token::{self, MintTo, Token, TokenAccount};

     declare_id!("28yv9AxVwUtw1HtDYin7JS3F3x1Z2G9cqAdowUb3iCs6");

     #[program]
     pub mod nftminter {
         use super::*;
         pub fn mint_nft(ctx: Context<MintNft>, name: String, description: String, image_uri: String) -> Result<()> {
             let nft_info = &mut ctx.accounts.nft_info;
             nft_info.name = name;
             nft_info.description = description;
             nft_info.image_uri = image_uri;
             Ok(())
         }
     }

     #[derive(Accounts)]
     pub struct MintNft<'info> {
         #[account(init, payer = user, space = 1024)]
         pub nft_info: Account<'info, NftInfo>,
         #[account(mut)]
         pub user: Signer<'info>,
         pub system_program: Program<'info, System>,
     }

     #[account]
     pub struct NftInfo {
         pub name: String,
         pub description: String,
         pub image_uri: String,
     }
     ```
   * This code establishes the functionality for your NFT minter, including the `mint_nft` function and the `NftInfo` structure to hold NFT metadata
3. **Key Components Overview**:
   * The `use` statements bring necessary modules into scope.
   * `declare_id!` uniquely identifies your smart contract on the blockchain.
   * The `#[program]` attribute and subsequent module define the contract's executable functions.
   * `#[derive(Accounts)]` specifies the accounts context required for the `mint_nft` function.
   * `NftInfo` struct holds the NFT's metadata.

{% hint style="success" %}
If you already have your own code that differs from this NFT example, feel free to paste that instead.
{% endhint %}

**Next Steps**

* With the smart contract code in place, you're set to further develop, test, and eventually deploy your NFT minter.


# Step 3: Update the Smart Contract's Cargo.toml File

This step focuses on precisely configuring the `Cargo.toml` file for your smart contract, located in the `programs/nftminter` directory. Updating this file ensures your project has the correct dependencies and settings for compilation and deployment.

**Instructions**

1. **Open the Smart Contract's `Cargo.toml`**:
   * In Visual Studio Code, navigate to the `programs/nftminter` directory within your project.
   * Open the `Cargo.toml` file located in this directory.
2. **Update the File with the Following Configuration**:
   * Replace the existing content of the `Cargo.toml` file with the config below or your own:

     ```toml
     [package]
     name = "nft-minter"
     version = "0.1.0"
     description = "Created with Anchor"
     edition = "2021"

     [lib]
     crate-type = ["cdylib", "lib"]
     name = "nft_minter"

     [features]
     no-entrypoint = []
     no-idl = []
     no-log-ix-name = []
     cpi = ["no-entrypoint"]
     default = []

     [dependencies]
     anchor-lang = "0.29.0"
     anchor-spl = "0.29.0"
     ```
   * This configuration sets up your project with specific settings and dependencies:
     * **Package Information**: Names your project `nft-minter`, sets the version, and specifies it was created with Anchor.
     * **Library Settings**: Defines the type of Rust library being created and its name.
     * **Features**: Configures various Anchor features and compilation options.
     * **Dependencies**: Specifies the versions of `anchor-lang` and `anchor-spl` that your project depends on, ensuring compatibility with your Anchor framework version.
3. **Save Your Changes**:

   * After updating the `Cargo.toml` file, save it to apply the changes.

   <figure><img src="/files/DrOQuKEnJntEdFpAXWyi" alt=""><figcaption><p>Loaded &#x26; Verified Dependencies</p></figcaption></figure>


# Step 4: Update the Project's Root Cargo.toml File

This step involves editing the `Cargo.toml` file located at the root of your Anchor project. The modifications will define the project workspace and optimize the Rust compiler's release profile settings for your smart contract, ensuring efficient compilation and deployment.

**Instructions**

1. **Locate the Root `Cargo.toml` File**:
   * In Visual Studio Code, go to the root directory of your Anchor project.
   * Find and open the `Cargo.toml` file. This is different from the `Cargo.toml` within the `programs/nft-minter` directory.
2. **Replace Existing Content with the Following Configuration**:
   * Clear the current contents of the file and paste the new configuration:

     ```toml
     [workspace]
     members = [
         "programs/nft-minter"
     ]
     resolver = "2"

     [profile.release]
     overflow-checks = true
     lto = "fat"
     codegen-units = 1

     [profile.release.build-override]
     opt-level = 3
     incremental = false
     codegen-units = 1
     ```
   * This updated configuration includes:
     * **Workspace Members**: Specifies the paths to workspace members, ensuring Cargo recognizes your smart contract as part of the project.
     * **Resolver Version**: Uses version 2 of Cargo's feature resolver, which can affect how dependencies are selected and compiled.
     * **Release Profile Optimizations**: Adjusts settings for the release build, including enabling overflow checks, using "fat" Link Time Optimization (LTO) for better optimization, and setting code generation units to 1 for more efficient compilation.
     * **Build-Override Settings**: Further optimizes release builds by setting the optimization level to 3, disabling incremental compilation, and enforcing a single code generation unit for consistency across builds.


# Step 5: Compile Your Program with anchor build

After setting up your project and configuring the `Anchor.toml` file, the next crucial step is to compile your smart contract program to ensure that your code is correct and to generate the necessary files for deployment. Here’s how to proceed:

**Compile Your Program**

1. **Open Terminal in Visual Studio Code**:
   * Ensure Visual Studio Code is open to your project's root directory.
   * Open a new terminal window in VS Code by navigating to `Terminal` > `New Terminal` from the top menu or using the shortcut \`Ctrl+\`\`.
2. **Run the Build Command**:
   * In the terminal, type the following command and press Enter:

     ```
     anchor build
     ```
   * This command compiles your entire Anchor project, including any smart contracts within the `programs/` directory. It checks for syntax errors, compiles the code into a deployable program, and generates a new keypair for the program if one does not already exist.
3. **Observe the Output**:
   * Watch the terminal output carefully for any compilation errors or warnings. Successful compilation will indicate that your program is syntactically correct and ready for further testing or deployment.
   * Upon successful build, Anchor generates several important files within the `target/` directory, including the compiled program in a `.so` file (shared object) which is the deployable bytecode for any SVM blockchain.

**Troubleshooting**

* **Compilation Errors**: If you encounter errors during compilation, review the error messages for clues on what needs to be fixed. Common issues include syntax errors, missing dependencies, or incorrect configurations in `Cargo.toml` or `Anchor.toml`.
* **Warnings**: Pay attention to any warnings as well. While they may not prevent your program from compiling, they could indicate potential issues or optimizations for your code.


# Step 6: Deploy Your Project to the Eclipse Devnet

Deploying your compiled smart contract to the Eclipse Devnet is a pivotal step, marking the transition from development to live operation. This step involves uploading your program to the blockchain, which assigns it a unique Program ID for interaction.

**Prerequisites**

* Ensure the Solana CLI is correctly configured for the intended network (e.g., devnet) and your wallet is funded with enough SOL to cover deployment costs.
* Confirm your project has been compiled successfully, producing the `.so` file in the `target/deploy/` directory.

**Deployment Process**

1. **Access Terminal in Visual Studio Code**:
   * Open the terminal within VS Code, ensuring you're in the root directory of your project.
2. **Execute Deployment Command**:
   * Run the following command to deploy your smart contract:

     ```bash
     solana program deploy target/deploy/nft_minter.so
     ```
   * This command uploads the `nft_minter.so` file to the Eclipse Devnet, and the CLI outputs the Program ID upon successful deployment. Note this Program ID for future transactions and interactions with your program.<br>

     <figure><img src="https://lh7-us.googleusercontent.com/V68rUuJVdJNKmlHXST3ZgOapT8IopZ7vYByx3xvHy0-7GGqNnSvnnbww4SohSQR_tNYyZbtnggCjVx23C7uhVskozd4CYx-KTAz2OhPLuNWnsBocOiOJiHUX7kf5UttLkfkHbIXNjVSiM868fV9D1uM" alt=""><figcaption><p>Example Output</p></figcaption></figure>

**Troubleshooting**

* **Funding Issues**: If you encounter errors related to insufficient funds, consider using the `solana airdrop` command to acquire ETH for the deployment fee.
* **Network Configuration**: Confirm you're connected to the appropriate Eclipse network. Use `solana config get` to verify your current settings.


# Step 7: Verify Program Deployment on the Eclipse Devnet Explorer

After deploying your smart contract to the Solana blockchain, it's essential to verify that the deployment was successful and the program is now live. This can be done using the Eclipse blockchain's devnet explorer, a powerful tool for inspecting transactions, accounts, and programs on the blockchain.

**Verifying Your Deployment**

1. **Obtain Your Program ID**:
   * After deploying your program, the terminal outputs a Program ID. Copy this ID; you'll need it for verification.
2. **Visit the Eclipse Devnet Explorer**:
   * Open a web browser and navigate to the Eclipse Devnet Explorer at <https://explorer.dev.eclipsenetwork.xyz/>.
3. **Search for Your Program ID**:
   * In the Explorer's search bar, paste your Program ID and press Enter or click the search icon.
   * The Explorer will display information related to your Program ID, including the program's deployment status, recent transactions involving the program, and more.<br>

     <figure><img src="/files/MQcaVIduXp2Y6v2fXknN" alt=""><figcaption><p>Eclipse Devnet Explorer</p></figcaption></figure>

**What to Look for**

* **Account Information**: Ensure that the account details page confirms the account type as a Program and that it is associated with your deployment.
* **Transaction History**: Check for the initial deployment transaction, which should be listed among the recent activities for your Program ID.

**Troubleshooting**

* **No Results Found**: If the Explorer does not show your program or reports it as not found, double-check the Program ID for any typos. If it still doesn't appear, there may have been an issue with the deployment process. Consider redeploying your program and ensuring the terminal confirms successful deployment.
* **Incorrect Information**: If the displayed information does not match your expectations (e.g., wrong account type or no deployment transaction), verify that you're looking at the correct network (devnet) and that the Program ID matches exactly with what was output during deployment.


# Building a React App Front-End

Creating a front-end interface for your smart contract enhances user interaction and usability. A React application serves as a powerful and flexible way to build your project's UI. This section guides you through setting up a basic React application that interacts with your deployed smart contract on the Eclipse Devnet.

{% content-ref url="/pages/vxJ0F7FnXHeIaZG7othk" %}
[Step 1: Create a New React Project with TypeScript](/developers/tutorials-and-guides/developer-guides/dapp-deployment-tutorial-eclipse-devnet/building-a-react-app-front-end/step-1-create-a-new-react-project-with-typescript)
{% endcontent-ref %}

{% content-ref url="/pages/p3Ob0jweBiWBWAshaASU" %}
[Step 2: Install Solana Web3.js and Wallet Adapter Dependencies](/developers/tutorials-and-guides/developer-guides/dapp-deployment-tutorial-eclipse-devnet/building-a-react-app-front-end/step-2-install-solana-web3.js-and-wallet-adapter-dependencies)
{% endcontent-ref %}

{% content-ref url="/pages/jXxmRn2U6YEgFDhyJfwX" %}
[Step 3: Install Additional Dependencies for Enhanced Functionality and Compatibility](/developers/tutorials-and-guides/developer-guides/dapp-deployment-tutorial-eclipse-devnet/building-a-react-app-front-end/step-3-install-additional-dependencies-for-enhanced-functionality-and-compatibility)
{% endcontent-ref %}

{% content-ref url="/pages/6Mu9Uz8dedNzZro4zhPO" %}
[Step 4: Configure Webpack for Browser Compatibility](/developers/tutorials-and-guides/developer-guides/dapp-deployment-tutorial-eclipse-devnet/building-a-react-app-front-end/step-4-configure-webpack-for-browser-compatibility)
{% endcontent-ref %}

{% content-ref url="/pages/cqsIyNqF4kjLBhzz04aR" %}
[Step 5: Start the Development Server and Verify Setup](/developers/tutorials-and-guides/developer-guides/dapp-deployment-tutorial-eclipse-devnet/building-a-react-app-front-end/step-5-start-the-development-server-and-verify-setup)
{% endcontent-ref %}

{% content-ref url="/pages/5NfuVNl2CMG8F03F2zKZ" %}
[Step 6: Implement the UI for Your NFT Minter in App.tsx with Updated Code](/developers/tutorials-and-guides/developer-guides/dapp-deployment-tutorial-eclipse-devnet/building-a-react-app-front-end/step-6-implement-the-ui-for-your-nft-minter-in-app.tsx-with-updated-code)
{% endcontent-ref %}


# Step 1: Create a New React Project with TypeScript

Starting your front-end development with a strong foundation is crucial for building robust and maintainable applications. For your NFT minter project on the Eclipse Devnet, using TypeScript with React adds static typing benefits, enhancing code quality and developer productivity. Here's how to create a new React project configured with TypeScript.

**Initialize Your React TypeScript Project**

1. **Open Your Terminal**:
   * Launch your terminal application. If you're working on Windows and using WSL (Windows Subsystem for Linux), ensure you're operating within your Linux distribution.
2. **Generate Your React TypeScript Project**:
   * Execute the following command to create a new React project named `nftminterfrontend`, specifying the TypeScript template:

     ```lua
     npx create-react-app nftminterfrontend --template typescript
     ```
   * This command uses `create-react-app`, a widely-used toolchain for React applications, to scaffold a new project. By specifying `--template typescript`, it ensures the project is set up with TypeScript from the start.
3. **Navigate into Your Project Directory**:
   * Change to the newly created project directory to begin development:

     ```bash
     cd nftminterfrontend
     ```


# Step 2: Install Solana Web3.js and Wallet Adapter Dependencies

Integrating your React app with the Eclipse Devnet and providing wallet connectivity are essential steps in enabling users to interact with your NFT minter. This requires installing several packages related to Solana's web3.js library and wallet adapters. Here's how to proceed with the installation of these dependencies.

**Install Core Dependencies**

1. **Open Your Project's Terminal**:
   * Ensure you're in the root directory of your `nftminterfrontend` React project in your terminal or command line interface.
2. **Execute the Installation Command**:
   * Run the following command to install the Solana web3.js library and wallet adapter packages:

     ```bash
     npm install @solana/web3.js @solana/wallet-adapter-react @solana/wallet-adapter-wallets @solana/wallet-adapter-react-ui
     ```
   * This command installs the core packages required for interacting with the Solana blockchain and integrating wallet functionality into your React app.

**Install Additional Dependencies**

Some functionalities and wallet integrations require additional packages. Ensure a comprehensive setup by installing these additional dependencies:

1. **Install Extended Dependencies**:
   * Run the following npm command to include all necessary libraries:

     ```bash
     npm install @solana/web3.js @solana/wallet-adapter-react @solana/wallet-adapter-react-ui @solana/wallet-adapter-wallets @solana/wallet-adapter-base @project-serum/sol-wallet-adapter @emotion/react @emotion/styled
     ```
   * These packages provide the foundational components for Solana blockchain communication, various wallet integrations, and UI components styled with Emotion (a library for writing CSS styles with JavaScript).

**Verify Installation**

* After installing the dependencies, it's good practice to verify that they are correctly added to your project. Check your `package.json` file to see the added libraries under the `dependencies` section.


# Step 3: Install Additional Dependencies for Enhanced Functionality and Compatibility

To ensure your React app is fully equipped to interact with the Eclipse Devnet, including token operations and to provide a smooth experience across different browsers, you'll need to install a set of additional dependencies. These include libraries for cryptographic functions, HTTP requests, streaming, and specific Solana programming library for SPL token management.

**Install Browser Compatibility and Utility Libraries**

The Solana Web3.js library and interacting with blockchain often require node-specific functionalities which are not natively available in the browser. To address this, you'll need to polyfill these functionalities:

1. **Install Browser Polyfills and Utilities**:
   * Open your terminal within your project directory and run the following commands to install the necessary packages:

     ```
     npm install crypto-browserify https-browserify browserify-zlib stream-http node-polyfill-webpack-plugin
     ```
   * These libraries polyfill Node.js modules for use in the browser, ensuring your application can use crypto, HTTP, and streaming functionalities in a web environment.

**Install Solana SPL Token Library and Buffer**

To interact with SPL tokens and handle binary data within your application, install the SPL token library and a buffer library:

1. **Execute Installation Commands**:
   * Continue in your terminal and install the SPL token library and buffer library with:

     ```arduino
     npm install @solana/spl-token buffer
     ```
   * `@solana/spl-token` provides convenient functions for interacting with the SPL Token program on the Solana blockchain, allowing for actions like querying token balances or transferring tokens.
   * `buffer` is used to handle binary data, a common requirement when dealing with blockchain transactions and data encoding/decoding.

**Verifying Your Installation**

* After completing the installations, review your `package.json` file to ensure all packages are correctly listed under `dependencies`.
* It's a good practice to run `npm install` again (or `yarn install` if using Yarn) to resolve any potential dependency conflicts or missing packages.

**Next Steps**

* With these dependencies installed, your project is now better equipped to handle a wide range of blockchain-related functionalities, from token management to data encoding and ensuring browser compatibility.

By installing these additional dependencies, you ensure that your React app has the comprehensive capability to interact with the Eclipse Devnet effectively, including support for SPL tokens and seamless operation across web environments.


# Step 4: Configure Webpack for Browser Compatibility

To ensure your React app is fully functional in the browser, especially when it requires node-specific functionalities not natively supported in web environments, you'll need to configure Webpack. This involves setting up polyfills for various Node.js modules and global variables like `process` and `Buffer`. Here’s how to create and configure the `webpack.config.js` file in your project.

**Create and Configure `webpack.config.js`**

1. **Open Your Project Directory**:
   * Navigate to the root folder of your `nftminterfrontend` React project in your code editor or file explorer.
2. **Create a New `webpack.config.js` File**:
   * In the root directory, create a new file named `webpack.config.js`.
3. **Add the Webpack Configuration Code**:
   * Open `webpack.config.js` in your editor and paste the following code into the file:

     ```javascript
     const webpack = require('webpack');
     module.exports = function override(config, env) {
         config.resolve.fallback = {
             url: require.resolve('url'),
             fs: false, // Specify "false" if the module should be ignored
             assert: require.resolve('assert'),
             crypto: require.resolve('crypto-browserify'),
             http: require.resolve('stream-http'),
             https: require.resolve('https-browserify'),
             os: require.resolve('os-browserify/browser'),
             buffer: require.resolve('buffer'),
             stream: require.resolve('stream-browserify'),
         };
         config.plugins.push(
             new webpack.ProvidePlugin({
                 process: 'process/browser',
                 Buffer: ['buffer', 'Buffer'],
             }),
         );

         return config;
     };
     ```
   * This configuration specifies fallbacks for several Node.js modules, using browser-compatible implementations. It also configures Webpack to provide global `process` and `Buffer` objects, mimicking a Node.js environment.
4. **Note on `fs` Module**:
   * The configuration sets `fs` (file system module) to `false`, indicating it should be ignored since it's not applicable in a browser context. Adjust this based on your application's requirements.

**Integrating the Configuration with Your Build Process**

* If you're using `create-react-app` (CRA), direct modification of the Webpack configuration is not supported without ejecting. Instead, use `react-app-rewired` or similar tools to override the CRA Webpack config without ejecting:
  * Install `react-app-rewired`:

    ```css
    npm install react-app-rewired --save-dev
    ```
  * Modify the `scripts` section in your `package.json` to use `react-app-rewired` instead of `react-scripts` for `start`, `build`, and `test`.

**Verifying Your Setup**

* After setting up your `webpack.config.js` and adjusting your build process, run your development server or build process again to ensure no errors occur:

  ```sql
  npm start
  ```
* Monitor the console output for any errors related to module resolution or Webpack configuration issues and address them as needed.

**Next Steps**

* With Webpack now configured to provide polyfills for Node.js modules and global variables, your React app should be capable of using blockchain-related functionalities seamlessly in the browser.
* Continue developing your app's UI and blockchain interaction logic, leveraging the full capabilities of the Solana Web3.js library and the wallet adapter libraries you've installed.

This step ensures that your development environment is primed for building blockchain-enabled web applications, bridging the gap between Node.js and browser environments.


# Step 5: Start the Development Server and Verify Setup

After configuring your project with necessary dependencies and adjusting the Webpack configuration for browser compatibility, the next step is to start your React app's development server. This will allow you to verify that your setup is correct and that your application is ready for development and interaction with the Eclipse Devnet.

**Starting the Development Server**

1. **Open Your Project's Terminal**:
   * Navigate to the terminal within Visual Studio Code or your preferred terminal application. Ensure you're in the root directory of your `nftminterfrontend` project.
2. **Run the Development Server**:
   * Execute the following command to start the development server:

     ```sql
     npm start
     ```
   * Alternatively, if you have configured your project to use `react-app-rewired` for overriding the Webpack configuration without ejecting from `create-react-app`, make sure to run:

     ```arduino
     npm run start
     ```
   * This command compiles your application and serves it locally, usually opening your default web browser to `http://localhost:3000/` automatically, where you can view your running application.\ <br>

     <figure><img src="/files/oZ6vx5IJQXAbDbZFkns3" alt=""><figcaption></figcaption></figure>

**Verifying Your Setup**

* **Check Browser Console**: Once your app is running in the browser, open the developer console (usually accessible with F12 or right-click > "Inspect" > "Console" tab). Look for any errors that might indicate issues with the Webpack configuration, missing dependencies, or other setup problems.<br>

  <figure><img src="/files/a9vobWKIRR2OQiTGEWFC" alt=""><figcaption><p>Browser Console - No errors</p></figcaption></figure>
* **Test Blockchain Connectivity**: If your app includes initial code to establish a connection to the Eclipse blockchain or interact with it, verify that these functionalities are working as expected. For example, you might have code to connect to the Eclipse blockchain's devnet and fetch the balance of a wallet address; ensure this executes without errors.
* **UI Rendering**: Ensure that your application's UI renders correctly and that any React components related to Solana interactions (e.g., wallet connection buttons) are visible and functioning.

**Troubleshooting**

* **Module Not Found Errors**: If you encounter errors related to missing modules or packages, double-check your `package.json` to ensure all necessary dependencies are listed and correctly installed with `npm install`.
* **Blockchain Connection Issues**: Ensure you're pointing to the correct RPC URL for the Eclipse blockchain's devnet and that your Solana wallet adapter setup is correctly configured for wallet connections.
* **Webpack Configuration Errors**: If you run into issues related to the Webpack configuration, review your `webpack.config.js` file or the configuration overrides via `react-app-rewired` to ensure they match the instructions provided.

**Next Steps**

* With your development server running and setup verified, you're ready to proceed with building out the front-end of your NFT minter application. This includes creating UI components for interacting with your smart contract, such as minting NFTs, and integrating wallet functionality for transactions on the Eclipse devnet.
* Consider implementing features step-by-step, continually testing and verifying functionality through the development server to ensure a smooth development process.

Starting the development server and verifying your setup confirms that your project environment is correctly configured for developing a blockchain-enabled React application, setting the stage for further development and blockchain integration.


# Step 6: Implement the UI for Your NFT Minter in App.tsx with Updated Code

To implement the UI for your NFT minter application in `App.tsx` with detailed functionalities such as wallet connection, input fields for NFT attributes, and minting actions, follow the provided code and instructions closely. This comprehensive setup will enable users to mint NFTs on the Eclipse Devnet directly from the UI.

#### Updated `App.tsx` Implementation

Replace the existing content of your `App.tsx` file with the following code snippet or your own code:

```typescript
import { WalletAdapterNetwork } from '@solana/wallet-adapter-base';
import { ConnectionProvider, WalletProvider, useWallet } from '@solana/wallet-adapter-react';
import { WalletModalProvider, WalletMultiButton } from '@solana/wallet-adapter-react-ui';
import { SalmonWalletAdapter } from '@solana/wallet-adapter-wallets';
import { Connection, PublicKey, SystemProgram } from '@solana/web3.js';
import { FC, ReactNode, useMemo, useCallback, useState } from 'react';
import { Program, AnchorProvider, web3, utils } from '@project-serum/anchor';
import logo from './eclipselogo.jpg';

import idl from './nftminter.json';
require('@solana/wallet-adapter-react-ui/styles.css');
require('./App.css');

const App: FC = () => {
    return (
        <Context>
            <Content />
        </Context>
    );
};
export default App;

const Context: FC<{ children: ReactNode }> = ({ children }) => {
    const customClusterEndpoint = "https://staging-rpc.dev2.eclipsenetwork.xyz";
    const endpoint = customClusterEndpoint;
    const wallets = useMemo(() => [new SalmonWalletAdapter()], []);

    return (
        <ConnectionProvider endpoint={endpoint}>
            <WalletProvider wallets={wallets} autoConnect>
                <WalletModalProvider>{children}</WalletModalProvider>
            </WalletProvider>
        </ConnectionProvider>
    );
};

const Content: FC = () => {
    const wallet = useWallet();
    const [nftName, setNftName] = useState('');
    const [nftDescription, setNftDescription] = useState('');
    const [nftImageUrl, setNftImageUrl] = useState('');

    const anchorWallet = useMemo(() => {
        if (!wallet.publicKey || !wallet.signTransaction || !wallet.signAllTransactions) return null;
        return {
            publicKey: wallet.publicKey,
            signTransaction: wallet.signTransaction.bind(wallet),
            signAllTransactions: wallet.signAllTransactions.bind(wallet),
        };
    }, [wallet]);

    const onMintNFT = useCallback(async () => {
        if (!anchorWallet) return;
        const connection = new Connection("https://staging-rpc.dev2.eclipsenetwork.xyz", 'confirmed');
        const provider = new AnchorProvider(connection, anchorWallet, AnchorProvider.defaultOptions());
        const programId = new PublicKey('28yv9AxVwUtw1HtDYin7JS3F3x1Z2G9cqAdowUb3iCs6');
        const program = new Program(idl, programId, provider);

        try {
            const [nftInfo] = await PublicKey.findProgramAddressSync(
                [utils.bytes.utf8.encode("nft_info"), anchorWallet.publicKey.toBuffer()],
                program.programId
            );

            await program.methods.mintNft(nftName, nftDescription, nftImageUrl).rpc();
            alert("NFT minted successfully");
        } catch (error) {
            console.error("Error minting NFT:", error);
            alert("Error minting NFT: " + error.message);
        }
    }, [anchorWallet, nftName, nftDescription, nftImageUrl]);

    return (
        <div className="App">
            <header className="title-header">
                Eclipse Devnet NFT Minter
            </header>
            <img src={logo} alt="Logo" className="logo" />
            <WalletMultiButton className="WalletMultiButton" />
            <div>
                <input type="text" placeholder="NFT Name" value={nftName} onChange={(e) => setNftName(e.target.value)} />
                <input type="text" placeholder="NFT Description" value={nftDescription} onChange={(e) => setNftDescription(e.target.value)} />
                <input type="text" placeholder="NFT Image URL" value={nftImageUrl} onChange={(e) => setNftImageUrl(e.target.value)} />
                <button onClick={onMintNFT} disabled={!wallet.connected || !nftName || !nftDescription || !nftImageUrl}>
                    Mint NFT
                </button>
            </div>
        </div>
    );
};
```

Replace the existing content of your `App.css` file with the following code snippet or your own code:

```css
/* App.css */
.App {
  display: flex;
  flex-direction: column;
  align-items: center;
  justify-content: center;
  text-align: center;
  min-height: 100vh;
  background-color: #f0f2f5;
  font-family: 'Arial', sans-serif;
}

.App img.logo {
  width: 150px;
  margin-bottom: 20px;
  transition: transform 0.2s;
}

.App img.logo:hover {
  transform: scale(1.05);
}

input[type="text"], button, .WalletMultiButton {
  width: 50%;
  padding: 15px 20px;
  margin: 0 auto;
  box-sizing: border-box;
  border-radius: 8px;
  border: 1px solid #ccc;
  transition: all 0.3s ease-in-out;
}

input[type="text"]:focus, button:focus, .WalletMultiButton:focus {
  outline: none;
  border-color: #007bff;
  box-shadow: 0 0 0 2px rgba(0,123,255,.25);
}

input[type="text"] {
  background-color: #ffffff;
  font-size: 16px;
}

button, .WalletMultiButton {
  background-color: #4CAF50;
  color: white;
  font-size: 16px;
  cursor: pointer;
  border: none;
}

button:hover, .WalletMultiButton:hover {
  background-color: #45a049;
  box-shadow: 0 5px 15px rgba(0,0,0,0.1);
}

div {
  display: flex;
  flex-direction: column;
  align-items: center;
  width: 100%;
}

button:disabled,
button[disabled]{
  background-color: #cccccc;
  color: #666666;
}

.title-header {
  width: 100%;
  padding: 20px;
  background-color: #282c34;
  color: white;
  text-align: center;
  font-size: 24px;
  font-weight: bold;
  margin-bottom: 30px; /* Added bottom margin for spacing */
}
```

#### Instructions for Use:

1. **Ensure Correct File Paths**: Verify that the path to your `nftminter.json` (the IDL file) matches its location within your project.
2. **Update Program ID**: Replace `'28yv9AxVwUtw1HtDYin7JS3F3x1Z2G9cqAdowUb3iCs6'` with the public key of your deployed smart contract on the Eclipse blockchain's devnet.
3. **Test Functionality**: After integrating this code, start your development server and test the wallet connection, input fields, and the minting button. Ensure that the minting process correctly interacts with your smart contract.
4. **Handle Wallet Connection**: The UI provides a wallet connection button (`WalletMultiButton`) that allows users to connect their Solana wallets before minting NFTs.
5. **Minting Process**: The `onMintNFT` function handles the logic for minting an NFT with the specified name, description, and image URL. It constructs and sends a transaction to your smart contract on the blockchain.

This step significantly enhances your NFT minter application by incorporating a user interface for minting NFTs, complete with wallet integration and smart contract interaction, providing a seamless user experience.

<figure><img src="/files/VfemMfHeHy5NXULXnKFu" alt=""><figcaption><p>NFT Minter Sample UI</p></figcaption></figure>

{% hint style="success" %}
Feel free to edit the code snippets and add more functionality. Remember you can always upgrade your smart contract program & corresponding IDL file using Anchor, and update the UI as required in your React App front-end.
{% endhint %}


# Eclipse Testnet ETH Transfer Transaction Fee Estimator

## Program Overview

This React program is designed as a transaction fee estimator, specifically for transferring ETH on the Eclipse testnet. It uses Solana's JavaScript API (`@solana/web3.js`) to interact with the Eclipse testnet. &#x20;

{% content-ref url="/pages/TLpw91VoJYeDfZ0KmWGi" %}
[Program Breakdown](/developers/tutorials-and-guides/developer-guides/eclipse-testnet-eth-transfer-transaction-fee-estimator/program-breakdown)
{% endcontent-ref %}

{% content-ref url="/pages/cwbCXP9h3L0CIPoEI9tK" %}
[Program JSX & CSS](/developers/tutorials-and-guides/developer-guides/eclipse-testnet-eth-transfer-transaction-fee-estimator/program-jsx-and-css)
{% endcontent-ref %}

{% content-ref url="/pages/LwnKvI7fZUJVZL9sOUFr" %}
[Program Execution](/developers/tutorials-and-guides/developer-guides/eclipse-testnet-eth-transfer-transaction-fee-estimator/program-execution)
{% endcontent-ref %}


# Program Breakdown

Here's a breakdown of the program's functionality:

1. **State Initialization**:

   ```jsx
   const [fee, setFee] = useState<number | null>(null);
   const [error, setError] = useState<string>('');
   const [senderAddress, setSenderAddress] = useState<string>('');
   const [receiverAddress, setReceiverAddress] = useState<string>('');
   const [rpcUrl, setRpcUrl] = useState<string>('');
   ```

   Here, React's `useState` hook initializes five pieces of state: `fee` for storing the estimated fee, `error` for any errors that occur during the estimation process, `senderAddress` and `receiverAddress` for the respective blockchain addresses involved in the transaction, and `rpcUrl` for the URL of the connected RPC.
2. **Effect Hook for Fee Estimation**:

   ```jsx
   useEffect(() => {
     // Async function to estimate transaction fee
     const estimateTransactionFee = async () => {
       // ... Code to estimate fee
     };
     estimateTransactionFee();
   }, []);
   ```

   This `useEffect` hook runs once when the component mounts, thanks to the empty dependency array (`[]`). It defines and invokes the `estimateTransactionFee` async function to estimate the transaction fee.
3. **Setting Up Connection and Transaction Details**:

   ```jsx
   const customRpcUrl = "https://testnet.dev2.eclipsenetwork.xyz";
   const connection = new web3.Connection(customRpcUrl);
   setRpcUrl(customRpcUrl);
   ```

   The program establishes a connection to the Eclipse testnet using a custom RPC URL and updates the `customRpcUrl` const with this URL.

   ```jsx
   const senderPublicKey = new web3.PublicKey('...');
   const recipientPublicKey = new web3.PublicKey('...');
   const amountInLamports = 1_000_000_000;
   setSenderAddress(senderPublicKey.toString());
   setReceiverAddress(recipientPublicKey.toString());
   ```

   It sets up the sender and receiver public keys and the amount to transfer (in lamports/wei), updating the corresponding states with these details.
4. **Transaction Preparation and Fee Estimation**:

   ```jsx
   const transferInstruction = web3.SystemProgram.transfer({
     fromPubkey: senderPublicKey,
     toPubkey: recipientPublicKey,
     lamports: amountInLamports
   });
   transaction.add(transferInstruction);
   ```

   A transfer instruction is created and added to the transaction. This instruction specifies the sender, receiver, and amount to transfer.

   ```jsx
   const { blockhash } = await connection.getLatestBlockhash();
   transaction.recentBlockhash = blockhash;
   transaction.feePayer = senderPublicKey;
   ```

   The transaction is prepared with the latest blockhash and the fee payer's public key.

   ```jsx
   const message = transaction.compileMessage();
   const estimatedFee = await connection.getFeeForMessage(message, 'recent');
   ```

   The transaction's message is compiled, and the fee is estimated by querying the blockchain with this message.
5. **Updating State with the Estimated Fee or Error**:

   ```jsx
   if (estimatedFee.value === null) {
     throw new Error('Failed to estimate fee');
   }
   setFee(estimatedFee.value);
   ```

   If the fee estimation is successful, the `fee` state is updated with the estimated value. If the estimation fails or an error occurs, the `error` state is updated accordingly.
6. **Rendering UI Components**: The UI displays the connected RPC URL, sender and receiver addresses, and either the estimated fee, an error message, or a loading indicator, based on the current state:

   ```jsx
   <p>Connected RPC URL: {rpcUrl}</p>
   <p>Sender Address: {senderAddress}</p>
   <p>Receiver Address: {receiverAddress}</p>
   ```

   This straightforward approach allows users to see the fee estimation results or the error encountered during the process, providing transparency and insight into the transaction fee estimation on the Eclipse blockchain.


# Program JSX & CSS

Here's the complete JSX code for `App.tsx`:

```jsx
import React, { useEffect, useState } from 'react';
import * as web3 from '@solana/web3.js';
import './SolanaFeeEstimator.css';

const SolanaFeeEstimator: React.FC = () => {
  const [fee, setFee] = useState<number | null>(null);
  const [error, setError] = useState<string>('');
  const [senderAddress, setSenderAddress] = useState<string>('');
  const [receiverAddress, setReceiverAddress] = useState<string>('');
  const [rpcUrl, setRpcUrl] = useState<string>('');

  useEffect(() => {
    const estimateTransactionFee = async () => {
      try {
        const customRpcUrl = "https://testnet.dev2.eclipsenetwork.xyz";
        const connection = new web3.Connection(customRpcUrl);
        setRpcUrl(customRpcUrl);

        const transaction = new web3.Transaction();
        const senderPublicKey = new web3.PublicKey('8HE3zo1iwCGnzcdVgrbRXikSYoBmv9MAaJLBAAkcmBBd');
        const recipientPublicKey = new web3.PublicKey('B3xJNQ8LKSStbjzCD3EMPq3xdcav6mmMWBsHAFE9TAkT');
        const amountInLamports = 1_000_000_000; // Example amount for transferring 1 ETH

        setSenderAddress(senderPublicKey.toString());
        setReceiverAddress(recipientPublicKey.toString());

        const transferInstruction = web3.SystemProgram.transfer({
          fromPubkey: senderPublicKey,
          toPubkey: recipientPublicKey,
          lamports: amountInLamports
        });
        transaction.add(transferInstruction);

        const { blockhash } = await connection.getLatestBlockhash();
        transaction.recentBlockhash = blockhash;
        transaction.feePayer = senderPublicKey;

        const message = transaction.compileMessage();
        const estimatedFee = await connection.getFeeForMessage(message, 'recent');

        if (estimatedFee.value === null) {
          throw new Error('Failed to estimate fee');
        }

        setFee(estimatedFee.value);
      } catch (err) {
        setError(err instanceof Error ? err.message : 'An unknown error occurred');
      }
    };

    estimateTransactionFee();
  }, []);

  return (
    <div>
      <h1>Eclipse Testnet ETH Transfer Transaction Fee Estimator</h1>
      <p>Connected RPC URL: {rpcUrl}</p>
      <p>Sender Address: {senderAddress}</p>
      <p>Receiver Address: {receiverAddress}</p>
      {fee !== null ? (
        <p>Estimated Fee: {fee} wei</p>
      ) : error ? (
        <p>Error: {error}</p>
      ) : (
        <p>Estimating fee...</p>
      )}
    </div>
  );
};

export default SolanaFeeEstimator;
```

Here is the complete CSS code for `SolanaFeeEstimator.css`:

```css
/* SolanaFeeEstimator.css */

/* Define color variables for light and dark themes */
:root {
    --background-color-light: #f4f7f6;
    --text-color-light: #333;
    --highlight-color: #010c00; /* Highlight color */
    --box-background-color-light: #ffffff;
  
    /* Dark mode colors */
    --background-color-dark: #121212;
    --text-color-dark: #110101;
    --box-background-color-dark: #1e1e1e;
  }
  
  body {
    font-family: 'Helvetica Neue', Arial, sans-serif;
    background-color: var(--background-color-light);
    color: var(--text-color-light);
    padding: 20px;
    margin: 0;
    line-height: 1.6;
    transition: background-color 0.3s ease, color 0.3s ease;
  }
  
  @media (prefers-color-scheme: dark) {
    body {
      background-color: var(--background-color-dark);
      color: var(--text-color-dark);
    }
  
    div {
      background-color: var(--box-background-color-dark);
    }
  
    h1, p, a {
      color: var(--text-color-dark);
    }
  }
  
  div {
    background-color: var(--box-background-color-light);
    border-radius: 12px;
    box-shadow: 0 6px 10px rgba(0, 0, 0, 0.1);
    padding: 30px;
    max-width: 800px; /* Adjusted for wider layout */
    margin: 50px auto;
    text-align: center;
    transition: transform 0.3s ease-in-out, background-color 0.3s ease;
  }
  
  div:hover {
    transform: translateY(-5px);
    box-shadow: 0 12px 20px rgba(0, 0, 0, 0.2);
  }
  
  h1 {
    color: var(--highlight-color); /* Using highlight color */
    font-size: 28px;
    margin-bottom: 30px;
    font-weight: 600;
  }
  
  p {
    font-size: 18px;
    margin: 15px 0;
  }
  
  p.error {
    color: #e57373; /* Softer red */
  }
  
  p.estimate {
    color: #81c784; /* Softer green */
  }
  
  /* Enhancements for links or additional elements */
  a {
    color: var(--highlight-color);
    text-decoration: none;
    transition: color 0.2s ease-in-out;
  }
  
  a:hover {
    color: darken(var(--highlight-color), 20%);
  }
  
  /* Responsive Design */
  @media (max-width: 768px) {
    div {
      margin: 30px 20px;
      padding: 20px;
    }
  
    h1 {
      font-size: 24px;
    }
  
    p {
      font-size: 16px;
    }
  }
```

This component efficiently encapsulates the functionality required to estimate transaction fees on the Eclipse testnet, providing a user-friendly interface for interacting with the blockchain's fee estimation capabilities.


# Program Execution

**Run the Development Server to start this React app**:

* Execute the following command to start the development server:

  ```sql
  npm start
  ```
* Alternatively, if you have configured your project to use `react-app-rewired` for overriding the Webpack configuration without ejecting from `create-react-app`, make sure to run:

  ```arduino
  npm run start
  ```
* This command compiles your application and serves it locally, usually opening your default web browser to `http://localhost:3000/` automatically, where you can view your running application.

<figure><img src="/files/91r4XqMxAIolJvhLxrbP" alt=""><figcaption><p>Eclipse testnet ETH Transfer Transaction Fee Estimator</p></figcaption></figure>

To validate the accuracy of the estimated fee component's output, you can perform a real-world test by executing an Ethereum (ETH) transfer transaction on the Eclipse testnet using Eclipse's form of the Salmon Wallet. \
\
This practical approach allows you to compare the estimated transaction fee provided by the program against the actual gas used by the transaction as recorded on the blockchain. Here's a brief overview of how to carry out this verification process:

1. **Prepare the Eclipse Wallet**: Ensure you have the Eclipse wallet set up and funded with testnet ETH on the Eclipse testnet. The wallet should be configured to interact with the Eclipse testnet environment.\
   \
   Full guide on installing Eclipse wallet: <https://docs.eclipse.builders/building-on-eclipse/wallet><br>
2. **Initiate an ETH Transfer**: Use the Eclipse wallet to create and send an ETH transfer transaction to another address on the Eclipse Testnet. Ensure that the transaction details (e.g., sender, receiver, and amount) closely match those used by the program for a meaningful comparison.
3. **Record the Actual Gas Used**: After executing the transaction, note the actual gas used. This information can typically be found in the transaction details on a blockchain explorer that supports the Eclipse Testnet.\
   \
   Eclipse Testnet Explorer: <https://explorer.dev.eclipsenetwork.xyz/?cluster=testnet>\ <br>
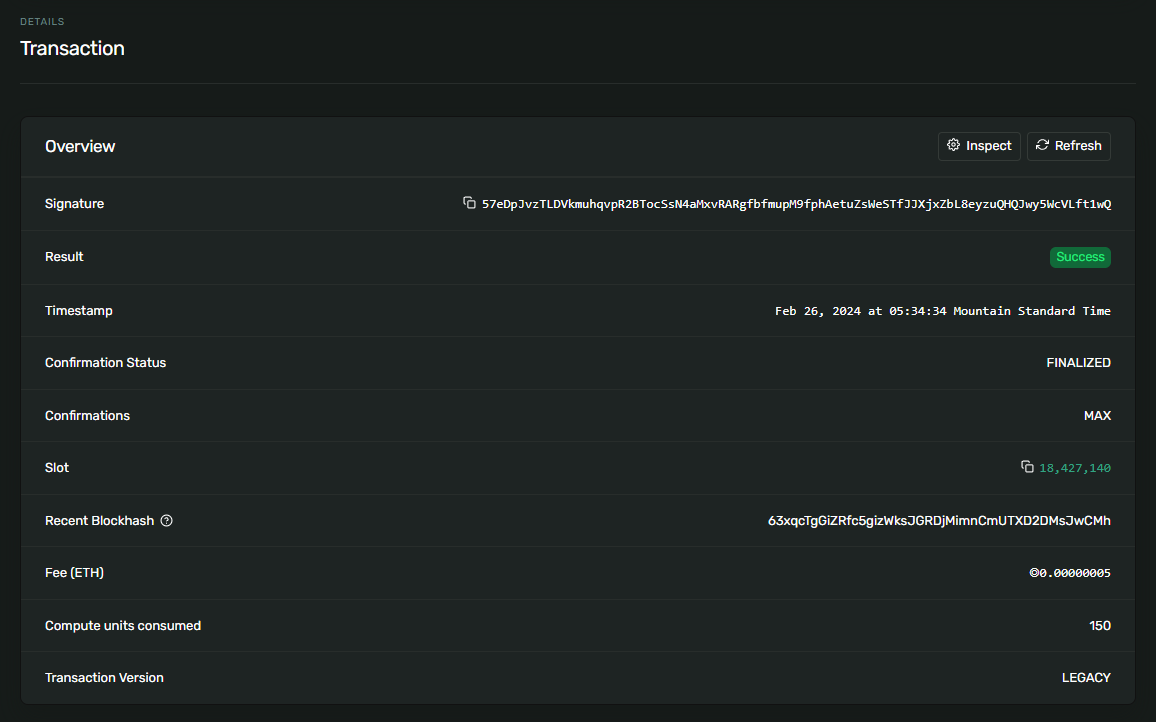
   <figure><img src="/files/fTtJDj4zissZO215jH78" alt=""><figcaption><p>Compare estimate to real fee value</p></figcaption></figure>
4. **Compare the Estimates**: Compare the gas estimate provided by the estimator with the actual gas used as recorded on the blockchain. This comparison will help you assess the accuracy and reliability of the estimated fees generated by the component.

By following these steps, you can confirm the effectiveness of the estimator in predicting the transaction fees for ETH transfers on the Eclipse Testnet. This method provides a practical way to gauge the estimator's performance in real-world conditions.


# Pyth: How to Use Real-Time Data in Solana Programs

This guide explains how to use real-time Pyth data in SVM applications.

### Install Pyth SDKs <a href="#install-pyth-sdks" id="install-pyth-sdks"></a>

Pyth provides two SDKs for SVM applications to cover the on- and off-chain portions of the integration:

#### Rust SDK <a href="#rust-sdk" id="rust-sdk"></a>

The [pyth-solana-receiver-sdk crate(opens in a new tab)](https://github.com/pyth-network/pyth-crosschain/tree/main/target_chains/solana/pyth_solana_receiver_sdk) can be used to consume Pyth prices inside Solana programs written in Rust. Add this crate to the dependencies section of your `Cargo.toml` file:

```rust
[dependencies]pyth-solana-receiver-sdk ="0.1.0"
```

#### Typescript SDK <a href="#typescript-sdk" id="typescript-sdk"></a>

Pyth provides two Typescript packages, [@pythnetwork/price-service-client(opens in a new tab)](https://github.com/pyth-network/pyth-crosschain/tree/main/price_service/client/js) and [@pythnetwork/pyth-solana-receiver(opens in a new tab)](https://github.com/pyth-network/pyth-crosschain/tree/main/target_chains/solana/sdk/js/pyth_solana_receiver), for fetching Pyth prices and submitting them to the blockchain respectively. Add these packages to your off-chain dependencies:

{% code overflow="wrap" %}

```typescript
npm install --save @pythnetwork/price-service-client @pythnetwork/pyth-solana-receiver
```

{% endcode %}

### Write Contract Code <a href="#write-contract-code" id="write-contract-code"></a>

Add code to your Solana program to read the Pyth price. Pyth prices are posted to price update accounts that can be passed to any instruction that needs price data. If you are using Anchor, you can simply add an `Account<'info, PriceUpdateV2>` field to your `Context` struct:

{% code overflow="wrap" %}

```rust
use pyth_solana_receiver_sdk::price_update::{PriceUpdateV2};
 
#[derive(Accounts)]
#[instruction()]
pub struct Sample<'info> {
    #[account(mut)]
    pub payer: Signer<'info>,
    // Add this account to any instruction Context that needs price data.
    pub price_update: Account<'info, PriceUpdateV2>,
}
```

{% endcode %}

Warning: users must ensure that the account passed to their instruction is owned by the Pyth pull oracle program. Using Anchor with the `Account<'info, PriceUpdateV2>` type will automatically perform this check. However, if you are not using Anchor, it is your responsibility to perform this check.

Next, update the instruction logic to read the price from the price update account:

{% code overflow="wrap" %}

```rust
pub fn sample(ctx: Context<Sample>) -> Result<()> {
    let price_update = &mut ctx.accounts.price_update;
    // get_price_no_older_than will fail if the price update is more than 30 seconds old
    let maximum_age: u64 = 30;
    // get_price_no_older_than will fail if the price update is for a different price feed.
    // This string is the id of the BTC/USD feed. See https://pyth.network/developers/price-feed-ids for all available ids.
    let feed_id: [u8; 32] = get_feed_id_from_hex("0xe62df6c8b4a85fe1a67db44dc12de5db330f7ac66b72dc658afedf0f4a415b43")?;
    let price = price_update.get_price_no_older_than(&Clock::get()?, maximum_age, &feed_id)?;
    // Sample output:
    // The price is (7160106530699 ± 5129162301) * 10^-8
    msg!("The price is ({} ± {}) * 10^{}", price.price, price.conf, price.exponent);
 
    Ok(())
}
```

{% endcode %}

Warning: it is your responsibility to validate that the provided price update is for the appropriate price feed and timestamp. `PriceUpdateV2` guarantees that the account contains a verified price for *some* price feed at *some* point in time. There are various methods on this struct (such as `get_price_no_older_than`) that you can use to implement the necessary checks. Note: if you choose the price feed account integration (see below), you can use an account address check to validate the price feed id.

### Write Frontend Code <a href="#write-frontend-code" id="write-frontend-code"></a>

There are two different paths to the frontend integration of Pyth prices on Solana. Developers can choose to use two different types of accounts:

* **Price feed accounts** hold a sequence of prices for a specific price feed id that always moves forward in time. These accounts have a fixed address that your program can depend on. The Pyth Data Association maintains a set of price feed accounts that are continuously updated. Such accounts are a good fit for applications that always want to consume the most recent price.
* **Price update accounts** are ephemeral accounts that anyone can create, overwrite, and close. These accounts are a good fit for applications that want to consume prices for a specific timestamp.

Both price feed accounts and price update accounts work identically from the perspective of the on-chain program. However, the frontend integration differs slightly between the two. Both options are explained in the sections below, and developers should pick the one that is best suited for their use case.

#### Price Feed Accounts <a href="#price-feed-accounts" id="price-feed-accounts"></a>

If you are using price feed accounts, your frontend code simply needs to pass the relevant price feed account address to the transaction. Price feed accounts are program-derived addresses and thus the account ID for any price feed can be derived automatically. The `PythSolanaReceiver` class provides a method for deriving this information:

{% code overflow="wrap" %}

```rust
import { PythSolanaReceiver } from "@pythnetwork/pyth-solana-receiver";
 
// You will need a Connection from @solana/web3.js and an AnchorWallet to create
// the receiver.
const connection: Connection;
const wallet: AnchorWallet;
const pythSolanaReceiver = new PythSolanaReceiver({ connection, wallet });
 
// There are up to 2^16 different accounts for any given price feed id.
// The 0 value below is the shard id that indicates which of these accounts you would like to use.
// However, you may choose to use a different shard to prevent Solana congestion on another app from affecting your app.
const solUsdPriceFeedAccount = pythSolanaReceiver
  .getPriceFeedAccountAddress(0, SOL_PRICE_FEED_ID)
  .toBase58();
```

{% endcode %}

The price feed account integration assumes that an off-chain process is continuously updating each price feed. The Pyth Data Association sponsors price updates for a subset of commonly-used price feeds on shard 0. Please see [Sponsored Feeds](https://docs.pyth.network/price-feeds/sponsored-feeds) for a list of sponsored feeds and their account addresses. However, updating a price feed is a permissionless operation, and anyone can run this process. Please see [Using Scheduler](https://docs.pyth.network/price-feeds/schedule-price-updates/using-scheduler) for more information. Running the scheduler can help with reliability and to update feed/shard pairs that are not part of the default schedule.

#### Price Update Accounts <a href="#price-update-accounts" id="price-update-accounts"></a>

If you are using price update accounts, your frontend code needs to perform two different tasks:

1. Fetch price updates from Hermes
2. Post the price updates to Solana and invoke your application logic

**Fetch price updates**

Use `PriceServiceConnection` from `@pythnetwork/price-service-client` to fetch Pyth price updates from Hermes:

{% code overflow="wrap" %}

```rust
import { PriceServiceConnection } from "@pythnetwork/price-service-client";
 
// The URL below is a public Hermes instance operated by the Pyth Data Association.
// Hermes is also available from several third party providers listed here:
// https://docs.pyth.network/price-feeds/api-instances-and-providers/hermes
const priceServiceConnection = new PriceServiceConnection(
  "https://hermes.pyth.network/",
  { priceFeedRequestConfig: { binary: true } }
);
 
// Hermes provides other methods for retrieving price updates. See
// https://hermes.pyth.network/docs for more information.
const priceUpdateData: string[] = await priceServiceConnection.getLatestVaas([
  "0xe62df6c8b4a85fe1a67db44dc12de5db330f7ac66b72dc658afedf0f4a415b43",
]);
 
// Price updates are strings of base64-encoded binary data. Example:
// ["UE5BVQEAAAADuAEAAAADDQJoIZzihVp30/71MXDexqiJDjGpEUEcHj/D06pRiYTPPlRPZKKiVFaZdqiGZ7vvGBj1kK69fKRncCKHXlGyS0LcAQPREzVlm7AcY+X0/hCupv8M5KMhEgOCxq5LxCCKQjL/xwm4jTCJrwkHn/PBaoirnlbHMjxAlwJaFF4RGeE1KRDeAASQIFjfbbobiq2OcSRnK3Ny1NY2Zd012ahIhoWpqxbv4UqDZXLh+bPm4Q14SfO/llRTOmqG6O4v+nfjZa7WNjgxAAZFANqAEooKvijK+476YBITKono+vJ4bSQHUiXOaiGs/zcI6WYGRM0xc6ov2mfCaTuH7mx3ElaLyPGvRX4D9DyHAAf+dPg+NEepwMJI1qPLRcTy0xoz2Yq0k2MuL87gCBsYVlS31atGsQcrXfHr4xcTKKyEUh1tIaOfRbPdX1cvs4D6AAj2/vuKpAgYWhd2gtqHsQLV1vMgq8SKH8wiOmhaMZ06GAQSM1pYLpHZRhYaUQbrUJAeqEeX+qMMqQFMPSSUnEKNAAmCE98NUYbHuEoxJGMDybTGCyDEXCmaNM0q6GT0qrbSmT6NF50yz9CE30WWHNOZzFtK2rCyBYFH2aAp6lQ1JKfmAQpW/wUaOhSdwGiEPWvpY3FWL077i0c4auXQjSQNaDD0cBnmvJTS5R3KxK5aunuUvVAT1mHTnpKHIzNKyu7ICM2zAQvrIFfWRFjVE0zRCvoAcvMpmpS7atWu8VgvklpZh9Qt9xYSO2Yq/asgNsMSQaowXiU0MfjggS+UJ8yWaOpUg18vAAxAMuUlOjNzFj6oPES850YNu2k7PM7AGL8Gb/8+HshkfjG0GsNR8H8/vB8v/iEcaScxQFXwtLT0OSgjWMa0ByknAA7PScKUEP8N7iJKYv6lmEs26DZnxzdpGVZRGqbbC0mxyjY0HqsT0rv2wNvy3MbAtABDMsLumII00cRCKBsZXGlKARCC0NzsKnduLsgGfqxYL4yuf910DKrRp5j+fKLmF2QiB2yVT90ja0782/u6BZZUGRMoA/AWl1qvswBtnlSkHcWEABIp74UFLiiA+MBBvBzhLBxSTKXldiLJ75+U/eqK/ej6qT+I+6S1pzT/ntXdpD25jmQhjtsYEqs/rmgs5U2p4AVRAGYULPcAAAAAABrhAfrtrFhR4yubI7X5QRqMK6xKrj7U3XuBHdGnLqSqcQAAAAAC8IR2AUFVV1YAAAAAAAf6dUkAACcQMZv+5jfvAe6sflX1cL7xu9WWQ9UBAFUA5i32yLSoX+GmfbRNwS3l2zMPesZrctxliv7fD0pBW0MAAAaBiqrXwAAAAADYu55y////+AAAAABmFCz3AAAAAGYULPYAAAaFH6MbAAAAAADcBIdMCre0t06ngCnw+N4IkFpZVqOz9YuwKL+UFdt13ZBtay0YZnkw7QGoaTDCLlsNK1tk1F/qgMyOcYozjOTj41XriIpEPeG2HPYl+u0CKolGlCsz1IDu4w2lyh6LWVaMkEybGz7ih4H2RqCj6BVu182ZqsZgJx9ghzKImAo4cIlWzRTwpm4daAqHa4JEyimFDpFt6UeqvS5TNu2F8W+X+edeiph20EulTI7sx38jwhq5Yc0Mf2ElvFgToGQ806Vs2HynuLwh9OIuTTZh"]
console.log(priceUpdateData);
```

{% endcode %}

**Post price updates**

Finally, post the price update to the Pyth program on Solana. This step will create the price update account that your application reads from. Applications typically combine posting the price update and invoking their application into a sequence of transactions. The `PythSolanaReceiver` class in `@pythnetwork/pyth-solana-receiver` provides a convenient transaction builder to help with this process:

{% code overflow="wrap" %}

```rust
import { PythSolanaReceiver } from "@pythnetwork/pyth-solana-receiver";
 
// You will need a Connection from @solana/web3.js and an AnchorWallet to create
// the receiver.
const connection: Connection;
const wallet: AnchorWallet;
const pythSolanaReceiver = new PythSolanaReceiver({ connection, wallet });
 
// Set closeUpdateAccounts: true if you want to delete the price update account at
// the end of the transaction to reclaim rent.
const transactionBuilder = pythSolanaReceiver.newTransactionBuilder({
  closeUpdateAccounts: false,
});
await transactionBuilder.addPostPriceUpdates(priceUpdateData);
 
// Use this function to add your application-specific instructions to the builder
await transactionBuilder.addPriceConsumerInstructions(
  async (
    getPriceUpdateAccount: (priceFeedId: string) => PublicKey
  ): Promise<InstructionWithEphemeralSigners[]> => {
    // Generate instructions here that use the price updates posted above.
    // getPriceUpdateAccount(<price feed id>) will give you the account for each price update.
    return [];
  }
);
 
// Send the instructions in the builder in 1 or more transactions.
// The builder will pack the instructions into transactions automatically.
await pythSolanaReceiver.provider.sendAll(
  await transactionBuilder.buildVersionedTransactions({
    computeUnitPriceMicroLamports: 50000,
  }),
  { skipPreflight: true }
);
```

{% endcode %}

The [SDK documentation(opens in a new tab)](https://github.com/pyth-network/pyth-crosschain/tree/main/target_chains/solana/sdk/js/pyth_solana_receiver) contains more information about interacting with the Pyth solana receiver contract, including working examples.


# Quick Start: User Guide - Testnet

How to get started:

1. Get Sepolia ETH from a faucet.
2. Set up your Eclipse wallet.
3. Bridge your Sepolia ETH to Eclipse.

Optional:

4. View your transactions in the Eclipse Block Explorer.

## 1. **Getting Sepolia ETH Tokens from a Faucet**

As a user, you can use Sepolia ETH to explore the Eclipse testnet and dApps deployed on the network. Sepolia ETH is not meant to be traded, and is only used to test applications. Sepolia ETH can be claimed from a number of faucets: Alchemy, QuickNode, and Infura.&#x20;

Here are instructions on how to claim Sepolia ETH on [Alchemy Sepolia ETH Faucet](https://sepoliafaucet.com/).&#x20;

1. Create an Alchemy account to request Sepolia ETH.
2. Visit the Alchemy Sepolia faucet and log in with your Alchemy account.
3. Enter your wallet in the provided box, complete the CAPTCHA verification, and click "Send Me ETH".

{% hint style="warning" %}
To prevent bots and abuse, the Alchemy Sepolia ETH faucet requires a minimum mainnet balance of 0.001 ETH in the wallet address being used.
{% endhint %}

## 2. Setting Up Your Eclipse Wallet

Follow the linked instructions below to set up your Eclipse wallet:

{% content-ref url="/pages/0HmkCI2dm0Rr9PSVuzUl" %}
[Wallet](/developers/wallet)
{% endcontent-ref %}

## 3. Bridging ETH to Eclipse

Follow the linked instructions below to deposit Sepolia ETH to Eclipse Testnet:

{% content-ref url="/pages/imeq2NCBZMIPm0Sc9QFZ" %}
[Bridges](/developers/bridges)
{% endcontent-ref %}

## 4. Viewing Your Transactions in the Eclipse Block Explorer

You can view your transactions with any block explorer compatible with Eclipse. The Modular Cloud team previously built CelestiaScan, and they are supporting Eclipse Mainnet with a dedicated block explorer: [Eclipse Explorer](https://explorer.modular.cloud/eclipse-testnet).

The Modular Cloud block explorer will eventually include visibility into Celestia DA blobs and the Ethereum validating bridge.

There are other block explorers which also support Eclipse: [RPC & Block Explorers](/developers/rpc-and-block-explorers)

***

## FAQs

### What is Eclipse Testnet?

Eclipse Testnet is a realistic simulation of the rollup client that will run for Eclipse Mainnet. This includes posting blobs to Celestia, a canonical bridge contract on the Ethereum Sepolia testnet, and all related relayers. The tooling and user experience of the Eclipse Testnet will reflect Eclipse Mainnet Beta, except we have not deployed frontends for certain functionality such as the canonical bridge. This means that developers and power users will have to follow instructions in these docs to interact with the Eclipse Testnet.

### How does Eclipse Testnet differ from Eclipse Devnet?

Eclipse Devnet is a Solana VM environment that mimics the developer experience in deploying SVM programs. It is a single node Solana cluster, but does not include surrounding infrastructure.

### How does Eclipse Testnet differ from Eclipse Mainnet?

The Eclipse Testnet differs from Eclipse Mainnet Beta because Testnet must not be used to support real economic value. Eclipse Testnet is still undergoing multiple audits and a bug bounty program. It should not be used in production under any circumstances. It is intended to give developers a realistic environment to try out code they intend to migrate to Mainnet.

Read more on Eclipse Mainnet below:

{% content-ref url="/pages/aGp2vYWtSIqPxowzHs9E" %}
[What is Eclipse Mainnet?](/developers/eclipse-architecture/what-is-eclipse-mainnet)
{% endcontent-ref %}


# cNFTs on Eclipse

### Overview <a href="#summary" id="summary"></a>

Compressed NFTs (cNFTs) on Eclipse utilize **State Compression** to drastically reduce the cost and storage requirements of minting and managing NFTs. This process involves hashing NFT metadata and storing the hash on-chain in an account backed by a **concurrent Merkle tree**. While the hash doesn’t reveal the NFT data directly, it can verify the accuracy of external data. Supporting RPC providers index this metadata off-chain during minting, allowing developers to access it using a **Read API**.

To simplify the process, abstraction layers (similar to Metaplex Bubblegum) can sit atop State Compression, enabling easier creation, minting, and management of cNFT collections.

### Lesson  <a href="#lesson" id="lesson"></a>

Compressed NFTs (cNFTs) are exactly what their name suggests: NFTs whose structure takes up less account storage than traditional NFTs. Compressed NFTs leverage a concept called **State Compression** to store data in a way that drastically reduces costs.

Eclipse's transaction costs are so cheap that most users never think about how expensive minting NFTs can be at scale. The cost to set up and mint 1 million traditional NFTs using the Token Metadata Program is approximately 24,000 SOL. By comparison, cNFTs can be structured to where the same setup and mint costs 10 SOL or less. That means anyone using NFTs at scale could cut costs by more than 1000x by using cNFTs over traditional NFTs.

However, cNFTs can be tricky to work with. Eventually, the tooling required to work with them will be sufficiently abstracted from the underlying technology that the developer experience between traditional NFTs and cNFTs will be negligible. But for now, you'll still need to understand the low level puzzle pieces, so let's dig in!\
\
[Source](https://solana.com/developers/courses/state-compression/compressed-nfts#summary)


# Create 1 Million NFTs on Eclipse

Create compressed NFT (cNFT) using Javascript

### Prerequisite <a href="#prerequisite" id="prerequisite"></a>

* Code Editor of your choice (recommended Visual Studio Code).
* Node 18.x.x or above.
* Basic knowledge of Javascript and running scripts.

### Initial Setup <a href="#initial-setup" id="initial-setup"></a>

This guide will run through creation of a compressed NFT (cNFT) Asset with Javascript based on a single file script. You may need to modify and move functions around to suit your needs.

#### Initializing <a href="#initializing" id="initializing"></a>

Start by initializing a new project (optional) with the package manager of your choice (npm, yarn, pnpm, bun) and fill in required details when prompted.

```
npm init
```

#### Required Packages <a href="#required-packages" id="required-packages"></a>

Install the required packages for this guide.

```
npm i @metaplex-foundation/umi
```

```
npm i @metaplex-foundation/umi-bundle-defaults
```

```
npm i @metaplex-foundation/mpl-bubblegum
```

```
npm i @metaplex-foundation/mpl-token-metadata
```

```
npm i @metaplex-foundation/umi-uploader-irys
```

#### Imports and Wrapper Function <a href="#imports-and-wrapper-function" id="imports-and-wrapper-function"></a>

Here we will define all needed imports for this particular guide and create a wrapper function where all our code will execute.

```
import {
  createTree,
  findLeafAssetIdPda,
  getAssetWithProof,
  mintV1,
  mplBubblegum,
  parseLeafFromMintV1Transaction,
  verifyCollection,
} from '@metaplex-foundation/mpl-bubblegum'
import {
  createNft,
  mplTokenMetadata,
} from '@metaplex-foundation/mpl-token-metadata'
import {
  createGenericFile,
  generateSigner,
  percentAmount,
  publicKey,
  sol,
} from '@metaplex-foundation/umi'
import { Network, Wallet, umiInstance } from '../scripts/umi'

import fs from 'fs'
import { irysUploader } from '@metaplex-foundation/umi-uploader-irys'

// Create the wrapper function
const createCnft = async () => {
  ///
  ///
  ///  all our code will go in here
  ///
  ///
}

// run the wrapper function
createCnft()
```

### Setting up Umi <a href="#setting-up-umi" id="setting-up-umi"></a>

This example is going to run through setting up Umi with a `generatedSigner()`. If you wish to try this example with React you'll need to setup Umi via the `React - Umi w/ Wallet Adapter` guide. Apart from the wallet setup this guide will use fileStorage keys and wallet adapter.

#### Generating a New Wallet <a href="#generating-a-new-wallet" id="generating-a-new-wallet"></a>

```
const umi = createUmi('https://staging-rpc.dev2.eclipsenetwork.xyz')
  .use(mplBubblegum())
  .use(mplTokenMetadata())
  .use(
    irysUploader({
      // mainnet address: "https://node1.irys.xyz"
      // devnet address: "https://devnet.irys.xyz"
      address: 'https://devnet.irys.xyz',
    })
  )

const signer = generateSigner(umi)

umi.use(signerIdentity(signer))

// This will airdrop SOL on devnet only for testing.
console.log('Airdropping 1 SOL to identity')
await umi.rpc.airdrop(umi.identity.publickey, sol(5))
```

#### Use an Existing Wallet Locally <a href="#use-an-existing-wallet-locally" id="use-an-existing-wallet-locally"></a>

```
const umi = createUmi('https://staging-rpc.dev2.eclipsenetwork.xyz')
  .use(mplBubblegum())
  .use(mplTokenMetadata())
  .use(
    irysUploader({
      // mainnet address: "https://node1.irys.xyz"
      // devnet address: "https://devnet.irys.xyz"
      address: 'https://devnet.irys.xyz',
    })
  )

// Generate a new keypair signer.
const signer = generateSigner(umi)

// You will need to us fs and navigate the filesystem to
// load the wallet you wish to use via relative pathing.
const walletFile = fs.readFileSync('./keypair.json')

// Convert your walletFile onto a keypair.
let keypair = umi.eddsa.createKeypairFromSecretKey(new Uint8Array(walletFile))

// Load the keypair into umi.
umi.use(keypairIdentity(keypair))
```

### Creating an cNFT <a href="#creating-an-c-nft" id="creating-an-c-nft"></a>

Creating a cNFT on Eclipse is fairly simple and requires a few items to get ready before we can actually perform the minting and reading operations.

* A Merkle tree to store our cNFT data to.
* A DAS ready RPC to be able to read the data from an indexer that is storing our data during creation.

**Merkle Tree**

A Merkle Tree for the most park can be thought of as a "database" of cNFT data. A Merkle Tree is created and cNFTs can be added to it until it's full.

**DAS RPCs**

Due to the nature of a Merkle Tree cNFT data isn't stored in Eclipse accounts and instead is stored in the ledger state. To be able to read the data back effectively we need to use an indexer which indexes all the cNFT data as its created/mutated. DAS enabled RPCs are RPCs that are running the DAS indexer service and allow us to query the RPC provider for this data on demand.

For a full list of RPC provides that support DAS you can visit the [RPC Providers Page](https://developers.metaplex.com/rpc-providers#rp-cs-with-das-support)

You can pick up a free account for running this guide from any of these providers. Once signed up you will want to replace your RPC instance during the previous `umi` creation.

```
// Replace address located below.
const umi = createUmi('https://rpcAddress.com')
```

### Creating a Tree

{% hint style="warning" %}
**Tree Cost**

We are creating a Merkle Tree that holds 1,000,000 cNFTs in this guide which requires the cost of roughly 7.7 SOL. Until you are ready, please try this example on devnet only, as Merkle Trees can not be closed or refunded. You will need at least 7.7 devnet SOL in order to run this code. This may require multiple airdrops.
{% endhint %}

To store Compressed NFTs (cNFTs) on the Eclipse blockchain you need to create a **Merkle Tree** in which to store the data. The size and cost of the merkle tree is determined by the merkle tree creator and all cNFTs storage on chain is paid for in advanced which differs from Token Metadata's approach of **lazy minting** where normally the payer would pay for the necessary storage space and account creation on the Eclipse blockchain at the time of minting the NFT itself, with bubblegum all data space needed is determined and paid for at tree creation by the tree creator.

There are some unique features regarding a **merkle tree** compared to Token Metadata that people can take advantage of:

* You can mint cNFTs to multiple collections within a Merkle Tree.

A Merkle Tree **isn't** a collection!

The Merkle Tree can house cNFTs from many collections making it incredibly powerful for projects that know they will have expanded growth in the future. If your Merkle Tree holds 1,000,000 cNFTs and you decide to release and mint a 10k project to said Merkle Tree you will still have 990,000 spaces in the tree to write and release additional cNFTs in the future.

```
//
// ** Create a Merkle Tree **
//

const merkleTree = generateSigner(umi)

console.log(
  'Merkle Tree Public Key:',
  merkleTree.publicKey,
  '\nStore this address as you will need it later.'
)

//   Create a tree with the following parameters.
//   This tree will cost approximately 7.7 SOL to create with a maximum
//   capacity of 1,000,000 leaves/nfts. You may have to airdrop some SOL
//   to the umi identity account before running this script.

const createTreeTx = await createTree(umi, {
  merkleTree,
  maxDepth: 20,
  maxBufferSize: 64,
  canopyDepth: 14,
})

await createTreeTx.sendAndConfirm(umi)
```

#### Create a Collection NFT (Optional) <a href="#create-a-collection-nft-optional" id="create-a-collection-nft-optional"></a>

Collections for cNFTs are still maintained and manged by Token Metadata and the original Collection NFTs minted from Token Metadata. If you wish to create a collection for your cNFTs and mint them to it you will need to create a Token Metadata Collection NFT.

```
//
// ** Create Token Metadata Collection NFT (Optional) **
//

//
// If you wish to mint a NFT to a collection you must first create a collection NFT.
// This step is optional and you can skip it if you do not wish to mint a NFT to a collection
// or have previously created a collection NFT.
//

const collectionId = generateSigner(umi)

// Path to image file
const collectionImageFile = fs.readFileSync('./collection.png')

const genericCollectionImageFile = createGenericFile(
  collectionImageFile,
  'collection.png'
)

const collectionImageUri = await umi.uploader.upload([
  genericCollectionImageFile,
])

const collectionMetadata = {
  name: 'My cNFT Collection',
  image: collectionImageUri[0],
  externalUrl: 'https://www.example.com',
  properties: {
    files: [
      {
        uri: collectionImageUri[0],
        type: 'image/png',
      },
    ],
  },
}

const collectionMetadataUri = await umi.uploader.uploadJson(collectionMetadata)

await createNft(umi, {
  mint: collectionId,
  name: 'My cNFT Collection',
  uri: 'https://www.example.com/collection.json',
  isCollection: true,
  sellerFeeBasisPoints: percentAmount(0),
}).sendAndConfirm(umi)
```

#### Upload Image and Metadata for cNFT (Optional) <a href="#upload-image-and-metadata-for-c-nft-optional" id="upload-image-and-metadata-for-c-nft-optional"></a>

Our cNFT needs data and an image. This code block shows us how to upload both an image and then add that image to a `metadata` object and final upload that object as a json file to Arweave via Irys for use to use with our cNFT.

```
//
//   ** Upload Image and Metadata used for the NFT (Optional) **
//

//   If you already have an image and metadata file uploaded, you can skip this step
//   and use the uri of the uploaded files in the mintV1 call.

//   Path to image file
const nftImageFile = fs.readFileSync('./nft.png')

const genericNftImageFile = createGenericFile(nftImageFile, 'nft.png')

const nftImageUri = await umi.uploader.upload([genericNftImageFile])

const nftMetadata = {
  name: 'My cNFT',
  image: nftImageUri[0],
  externalUrl: 'https://www.example.com',
  attributes: [
    {
      trait_type: 'trait1',
      value: 'value1',
    },
    {
      trait_type: 'trait2',
      value: 'value2',
    },
  ],
  properties: {
    files: [
      {
        uri: nftImageUri[0],
        type: 'image/png',
      },
    ],
  },
}

const nftMetadataUri = await umi.uploader.uploadJson(nftMetadata)
```

#### Mint cNFT to the Merkle Tree <a href="#mint-c-nft-to-the-merkle-tree" id="mint-c-nft-to-the-merkle-tree"></a>

Minting a cNFT to a tree does not cost any additional account/storage costs on the Eclipse blockchain as the tree has already been created with enough room for all our cNFT data to be stored (1,000,000 cNFTs in fact). The only additional cost here is just the basic Eclipse transaction fee making cNFTs incredible efficient to mint in mass.b

```
//
// ** Mint a Compressed NFT to the Merkle Tree **
//

//
// If you do not wish to mint a NFT to a collection you can set the collection
// field to `none()`.
//

// The owner of the cNFT being minted.
const newOwner = publicKey('111111111111111111111111111111')

console.log('Minting Compressed NFT to Merkle Tree...')

const { signature } = await mintV1(umi, {
  leafOwner: newOwner.publicKey,
  merkleTree: merkleTree.publicKey,
  metadata: {
    name: 'My cNFT',
    uri: nftMetadataUri, // Either use `nftMetadataUri` or a previously uploaded uri.
    sellerFeeBasisPoints: 500, // 5%
    collection: { key: collectionId.publicKey, verified: false },
    creators: [{ address: umi.identity.publicKey, verified: true, share: 100 }],
  },
}).sendAndConfirm(umi, { send: { commitment: 'finalized' } })
```

#### Fetch the Newly Minted cNFT <a href="#fetch-the-newly-minted-c-nft" id="fetch-the-newly-minted-c-nft"></a>

```
//
// ** Fetching Asset **
//

//
// Here we find the asset ID of the compressed NFT using the leaf index of the mint transaction
// and then log the asset information.
//

console.log('Finding Asset ID...')
const leaf = await parseLeafFromMintV1Transaction(umi, signature)
const assetId = findLeafAssetIdPda(umi, {
  merkleTree: merkleTree.publicKey,
  leafIndex: leaf.nonce,
})

console.log('Compressed NFT Asset ID:', assetId.toString())

// Fetch the asset using umi rpc with DAS.
const asset = await umi.rpc.getAsset(assetId[0])

console.log({ asset })
```

#### Verifying the Collection <a href="#verifying-the-collection" id="verifying-the-collection"></a>

NFTs from Token Metadata and cNFTs from Bubblegum both mint assets into collections as unverified. Due to this an additional instruction is needed to verify the asset to the collection by the function of `verifyCollection()` from `mpl-bubblegum`.

To achieve the verification we need to pass some additional details from the asset which can be found by called `getAssetWithProof()` from the `assetId` we previously worked out.

Once we have the `assetWithProof` result we can spread that out into the `verifyCollection` object argument using `...assetWithProof`. This takes all the fields from `assetWithProof` and adds them to the object. Finally we just need to pass in the `collectionMint` address and the `collectionAuthority` and send off the transaction.

```
//
// ** Verify cNFT to Collection **
//

const assetWithProof = await getAssetWithProof(umi, assetId[0])
await verifyCollection(umi, {
  ...assetWithProof,
  collectionMint: collectionId.publicKey,
  collectionAuthority: umi.identity,
}).sendAndConfirm(umi)
```

#### Minting 1,000,000 cNFTs <a href="#minting-1-000-000-c-nfts" id="minting-1-000-000-c-nfts"></a>

Now that we understand how to make a Merkle Tree that holds 1,000,000 cNFTs and can mint an NFT to that tree you can now take all the previous steps and start adjusting the code to make some loops to upload the needed data to Arweave and then mint the cNFT to a tree.

As the Merkle Tree has space for 1,000,000 cNFts you can freely loop and fill up the tree as desired for your projects needs.

Below is an example of minting cNFTs to an array of addresses that increment the data stored on the cNFT based on the loop index. This is a rough simple example/concept and would be need to be modified for production use.

```
  const addresses = [
    "11111111111111111111111111111111",
    "22222222222222222222222222222222",
    "33333333333333333333333333333333",
    ...
  ];

  let index = 0;

  for await (const address in addresses) {
    const newOwner = publicKey(address);

    console.log("Minting Compressed NFT to Merkle Tree...");

    const { signature } = await mintV1(umi, {
      leafOwner: newOwner,
      merkleTree: merkleTree.publicKey,
      metadata: {
        name: `My Compressed NFT #${index}`,
        uri: `https://example.com/${index}.json`, //either use metadataUri or the uri of the uploaded metadata file
        sellerFeeBasisPoints: 500, // 5%
        collection: { key: collectionId.publicKey, verified: false },
        creators: [
          { address: umi.identity.publicKey, verified: true, share: 100 },
        ],
      },
    }).sendAndConfirm(umi, { send: { commitment: "finalized" } });

    index++;
  }
```

### Full Code Example <a href="#full-code-example" id="full-code-example"></a>

```
import {
  createTree,
  findLeafAssetIdPda,
  getAssetWithProof,
  mintV1,
  mplBubblegum,
  parseLeafFromMintV1Transaction,
  verifyCollection,
} from "@metaplex-foundation/mpl-bubblegum";
import {
  createNft,
  mplTokenMetadata,
} from "@metaplex-foundation/mpl-token-metadata";
import {
  createGenericFile,
  generateSigner,
  keypairIdentity,
  percentAmount,
  publicKey,
  sol,
} from "@metaplex-foundation/umi";
import { createUmi } from "@metaplex-foundation/umi-bundle-defaults";
import { irysUploader } from "@metaplex-foundation/umi-uploader-irys";
import fs from "fs";

// Create the wrapper function
const createCnft = async () => {
  //
  // ** Set Up Umi **
  //

  // In this instance we are using a locally stored wallet. This can be replaced
  // with the code from 'generating a new wallet' if need be but make sure you
  // airdrop/send at least 7.7 SOL to the new wallet.

  const umi = createUmi('https://staging-rpc.dev2.eclipsenetwork.xyz')
    .use(mplBubblegum())
    .use(mplTokenMetadata())
    .use(
      irysUploader({
        // mainnet address: "https://node1.irys.xyz"
        // devnet address: "https://devnet.irys.xyz"
        address: 'https://devnet.irys.xyz',
      })
    )

  // Generate a new keypair signer.
  const signer = generateSigner(umi)

  // You will need to us fs and navigate the filesystem to
  // load the wallet you wish to use via relative pathing.
  const walletFile = fs.readFileSync('./keypair.json')

  // Convert your walletFile onto a keypair.
  let keypair = umi.eddsa.createKeypairFromSecretKey(new Uint8Array(walletFile))

  // Load the keypair into umi.
  umi.use(keypairIdentity(keypair))

  //
  // ** Create a Merkle Tree **
  //

  const merkleTree = generateSigner(umi)

  console.log(
    'Merkle Tree Public Key:',
    merkleTree.publicKey,
    '\nStore this address as you will need it later.'
  )

  //   Create a tree with the following parameters.
  //   This tree will cost approximately 7.7 SOL to create with a maximum
  //   capacity of 1,000,000 leaves/nfts. You may have to airdrop some SOL
  //   to the umi identity account before running this script.

  console.log('Creating Merkle Tree...')
  const createTreeTx = await createTree(umi, {
    merkleTree,
    maxDepth: 20,
    maxBufferSize: 64,
    canopyDepth: 14,
  })

  await createTreeTx.sendAndConfirm(umi)

  //
  // ** Create Token Metadata Collection NFT (Optional) **
  //

  //
  // If you wish to mint a NFT to a collection you must first create a collection NFT.
  // This step is optional and you can skip it if you do not wish to mint a NFT to a collection
  // or have previously created a collection NFT.
  //

  const collectionId = generateSigner(umi)

  // Path to image file
  const collectionImageFile = fs.readFileSync('./collection.png')

  const genericCollectionImageFile = createGenericFile(
    collectionImageFile,
    'collection.png'
  )

  const collectionImageUri = await umi.uploader.upload([
    genericCollectionImageFile,
  ])

  const collectionMetadata = {
    name: 'My cNFT Collection',
    image: collectionImageUri[0],
    externalUrl: 'https://www.example.com',
    properties: {
      files: [
        {
          uri: collectionImageUri[0],
          type: 'image/png',
        },
      ],
    },
  }

  console.log('Uploading Collection Metadata...')
  const collectionMetadataUri = await umi.uploader.uploadJson(
    collectionMetadata
  )

  console.log('Creating Collection NFT...')
  await createNft(umi, {
    mint: collectionId,
    name: 'My cNFT Collection',
    uri: 'https://www.example.com/collection.json',
    isCollection: true,
    sellerFeeBasisPoints: percentAmount(0),
  }).sendAndConfirm(umi)

  //
  //   ** Upload Image and Metadata used for the NFT (Optional) **
  //

  //   If you already have an image and metadata file uploaded, you can skip this step
  //   and use the uri of the uploaded files in the mintV1 call.

  //   Path to image file
  const nftImageFile = fs.readFileSync('./nft.png')

  const genericNftImageFile = createGenericFile(nftImageFile, 'nft.png')

  const nftImageUri = await umi.uploader.upload([genericNftImageFile])

  const nftMetadata = {
    name: 'My cNFT',
    image: nftImageUri[0],
    externalUrl: 'https://www.example.com',
    attributes: [
      {
        trait_type: 'trait1',
        value: 'value1',
      },
      {
        trait_type: 'trait2',
        value: 'value2',
      },
    ],
    properties: {
      files: [
        {
          uri: nftImageUri[0],
          type: 'image/png',
        },
      ],
    },
  }

  console.log('Uploading cNFT metadata...')
  const nftMetadataUri = await umi.uploader.uploadJson(nftMetadata)

  //
  // ** Mint a Compressed NFT to the Merkle Tree **
  //

  //
  // If you do not wish to mint a NFT to a collection you can set the collection
  // field to `none()`.
  //

  // The owner of the cNFT being minted.
  const newOwner = publicKey('111111111111111111111111111111')

  console.log('Minting Compressed NFT to Merkle Tree...')

  const { signature } = await mintV1(umi, {
    leafOwner: newOwner,
    merkleTree: merkleTree.publicKey,
    metadata: {
      name: 'My cNFT',
      uri: nftMetadataUri, // Either use `nftMetadataUri` or a previously uploaded uri.
      sellerFeeBasisPoints: 500, // 5%
      collection: { key: collectionId.publicKey, verified: false },
      creators: [
        { address: umi.identity.publicKey, verified: true, share: 100 },
      ],
    },
  }).sendAndConfirm(umi, { send: { commitment: 'finalized' } })

  //
  // ** Fetching Asset **
  //

  //
  // Here we find the asset ID of the compressed NFT using the leaf index of the mint transaction
  // and then log the asset information.
  //

  console.log('Finding Asset ID...')
  const leaf = await parseLeafFromMintV1Transaction(umi, signature)
  const assetId = findLeafAssetIdPda(umi, {
    merkleTree: merkleTree.publicKey,
    leafIndex: leaf.nonce,
  })

  console.log('Compressed NFT Asset ID:', assetId.toString())

  // Fetch the asset using umi rpc with DAS.
  const asset = await umi.rpc.getAsset(assetId[0])

  console.log({ asset })

  //
  // ** Verify cNFT to Collection **
  //

  console.log('verifying Collection')
  const assetWithProof = await getAssetWithProof(umi, assetId[0])
  await verifyCollection(umi, {
    ...assetWithProof,
    collectionMint: collectionId.publicKey,
    collectionAuthority: umi.identity,
  }).sendAndConfirm(umi)
}

// run the wrapper function
createCnft()
```


# How to Interact with cNFTs

### Overview <a href="#overview" id="overview"></a>

This guide details the specific requirements for interacting with compressed NFT (cNFT) assets using JavaScript on Eclipse's devnet and mainnet. For a more comprehensive overview of creating cNFTs, see the Create 1,000,000 NFTs on Eclipse with Bubblegum guide.

#### Required Package <a href="#required-package" id="required-package"></a>

This guide makes use of a specific beta npm package for `@metaplex-foundation/mpl-bubblegum`. Install using:

```
npm -i @metaplex-foundation/mpl-bubblegum@4.3.1-beta.0
```

#### Connecting to Eclipse <a href="#connecting-to-the-svm" id="connecting-to-the-svm"></a>

Note you will need to create your umi instance using the endpoint.

```
import { createUmi } from "@metaplex-foundation/umi-bundle-defaults";

const umi = createUmi('<RPC endpoint for the Eclipse devnet/mainnet>')
  .use(mplBubblegum())
  .use(mplTokenMetadata())
  ...
```

[List of RPCs for Eclipse devnet/mainnet](/developers/rpc-and-block-explorers)&#x20;

#### Creating a Tree <a href="#creating-a-tree" id="creating-a-tree"></a>

{% hint style="warning" %}

#### Tree Cost

We are creating a Merkle Tree that with a real up-front SOL cost that will vary depending on the tree size and the specific network you are using. Until you are ready, please try this example on devnet only, as Merkle Trees can not be closed or refunded.
{% endhint %}

Creating a tree can be done using the same `createTree` function that is used on Eclipse devnet/mainnet. However, we must override the default `logWrapper` and `compressionProgram` values. This could be accomplished as simply as:

```
import {
  createTree,
  MPL_ACCOUNT_COMPRESSION_PROGRAM_ID,
  MPL_NOOP_PROGRAM_ID,
} from '@metaplex-foundation/mpl-bubblegum'
import {
  generateSigner,
  publicKey,
} from '@metaplex-foundation/umi';

// Create a Merkle tree specifying the correct `logWrapper` and
// `compressionProgram` for Eclipse.
const merkleTree = generateSigner(umi);
const createTreeTx = await createTree(umi, {
  merkleTree,
  maxDepth: 3,
  maxBufferSize: 8,
  canopyDepth: 0,
  logWrapper: MPL_NOOP_PROGRAM_ID,
  compressionProgram: MPL_ACCOUNT_COMPRESSION_PROGRAM_ID,
});

await createTreeTx.sendAndConfirm(umi);
```

However, a helper function has been provided to automatically resolve these program IDs, and this is the recommended approach as it will work on Eclipse devnet/mainnet to which Bubblegum has been deployed:

```
import {
  getCompressionPrograms,
  createTree,
} from '@metaplex-foundation/mpl-bubblegum'
import {
  generateSigner,
  publicKey,
} from '@metaplex-foundation/umi';

// Create a Merkle tree using the `getCompressionPrograms` helper function.
const merkleTree = generateSigner(umi);
const createTreeTx = await createTree(umi, {
  merkleTree,
  maxDepth: 3,
  maxBufferSize: 8,
  canopyDepth: 0,
  ...(await getCompressionPrograms(umi)),
});

await createTreeTx.sendAndConfirm(umi);
```

#### Mint and Transfer a cNFT <a href="#mint-and-transfer-a-c-nft" id="mint-and-transfer-a-c-nft"></a>

Similarly to creating the Merkle tree on Eclipse, other SDK functions such as `mintV1` and `transfer` will also require specifying the compression programs. Again we use the `getCompressionPrograms` helper.

```
import {
  fetchMerkleTree,
  getCurrentRoot,
  hashMetadataCreators,
  hashMetadataData,
  transfer,
  getCompressionPrograms,
  createTree,
  MetadataArgsArgs,
  mintV1,
} from '@metaplex-foundation/mpl-bubblegum'
import {
  generateSigner,
  none,
} from '@metaplex-foundation/umi';

// Get leaf index before minting.
const leafIndex = Number(
  (await fetchMerkleTree(umi, merkleTree.publicKey)).tree.activeIndex
);

// Define Metadata.
const metadata: MetadataArgsArgs = {
  name: 'My NFT',
  uri: 'https://example.com/my-nft.json',
  sellerFeeBasisPoints: 500, // 5%
  collection: none(),
  creators: [],
};

// Mint a cNFT.
const originalOwner = generateSigner(umi);
const mintTxn = await mintV1(umi, {
  leafOwner: originalOwner.publicKey,
  merkleTree: merkleTree.publicKey,
  metadata,
  ...(await getCompressionPrograms(umi)),
}).sendAndConfirm(umi);

// Transfer the cNFT to a new owner.
const newOwner = generateSigner(umi);
const merkleTreeAccount = await fetchMerkleTree(umi, merkleTree.publicKey);
const transferTxn = await transfer(umi, {
  leafOwner: originalOwner,
  newLeafOwner: newOwner.publicKey,
  merkleTree: merkleTree.publicKey,
  root: getCurrentRoot(merkleTreeAccount.tree),
  dataHash: hashMetadataData(metadata),
  creatorHash: hashMetadataCreators(metadata.creators),
  nonce: leafIndex,
  index: leafIndex,
  proof: [],
  ...(await getCompressionPrograms(umi)),
}).sendAndConfirm(umi);
```

<br>


# What is Eclipse Mainnet?

Eclipse Mainnet is Ethereum's first Solana Virtual Machine (SVM) L2. Eclipse Mainnet combines the best pieces of the modular stack:

* **Settlement: Ethereum** - Eclipse will settle to Ethereum (i.e., the enshrined validating bridge will be on Ethereum) and use ETH as its gas token.
* **Execution: Solana Virtual Machine (SVM)** - Eclipse will run the highly performant SVM as its execution environment.
* **Data Availability: Celestia** - Eclipse will post its data to Celestia for scalable data availability (DA).
* **Proving: RISC Zero** - Eclipse will use RISC Zero for ZK proofs of fraud (without intermediate state serialization!).

<figure><img src="/files/Hw66UAahnuRh61kNuqpZ" alt=""><figcaption></figcaption></figure>


# Settlement - Ethereum

As with today’s major rollups, Eclipse Mainnet will settle to Ethereum.

## **Eclipse Mainnet: Key Features and Security Benefits**

### **Validating Bridge Integration**:

Eclipse Mainnet includes a validating bridge built directly into its infrastructure. This bridge plays a critical role in establishing the "canonical chain," which is respected by all Eclipse nodes.

### **Concurrent Ethereum Full Nodes**:

To ensure accurate transaction sequencing, Eclipse nodes must run a full Ethereum node alongside the Eclipse node. This integration brings Ethereum’s security benefits to the Eclipse network.

### **Security Features**:

* The validating bridge authenticates all transactions, preventing invalid states from being submitted to the Eclipse network.
* Guarantees "eventual liveness," ensuring the network continues to function even if the sequencer fails or attempts censorship.
* Offers **censorship resistance**, allowing users to force their transactions through the bridge even if Layer 2 censorship occurs.

### **Ethereum L2 Classification**:

* Eclipse Mainnet is classified as part of Ethereum Layer 2 networks, similar to validiums and optimums.

### **Ethereum as the Preferred Currency**:

* Given the importance of Ethereum-native assets in DeFi and NFT markets, **Ethereum (ETH)** is the chosen decentralized currency for Eclipse Mainnet.
* ETH will also be used as the gas token for transactions on the network.

### **Future Fee Flexibility**:

* **Fee abstraction** is planned, allowing users to pay gas fees with tokens like USDC.
* There are currently no plans to introduce a proprietary token for Eclipse Mainnet.


# Execution - Solana Virtual Machine (SVM)

## Virtual Machine (VM) Basics

At the most basic level, a VM in the blockchain context is the software that executes machine instructions to process transactions. When a transaction reaches a blockchain, it is processed by the virtual machine. Every language, whether Solidity, Rust, or Move, is ultimately converted (compiled) to bytecode which is executed by a blockchain’s virtual machine.

Different languages support compilation to different bytecodes. For example, Solidity is typically compiled to Ethereum Virtual Machine (EVM) bytecode, but the [Solang compiler](https://www.quicknode.com/guides/solana-development/solidity/solang-get-started) enables you to compile Solidity to other bytecodes such as WebAssembly (wasm) or Berkeley Packet Filter (BPF).

### Comparing Virtual Machines

There are many virtual machines. How should you decide which is best for you?

* **Performance**: Some virtual machines are designed to enable greater parallelism across transactions, such as the Solana Virtual Machine (SVM) which Eclipse uses. Others such as the EVM typically have been single-threaded.
* **Security**: Some languages such as Rust can more easily protect against many bugs that Solidity does not. For example, Ethereum smart contracts are vulnerable to so-called reentrancy attacks.
* **Community**: Popular blockchains like Ethereum and Solana have fostered thriving developer communities around the EVM and SVM respectively. This means better tooling and developer support compared to newer virtual machines like the Move VM or Fuel VM.
* **Ease-of-use**: Languages such as Solidity are easier to code in, and not all bytecodes support compilation from Solidity.

Eclipse Mainnet runs the **Solana Virtual Machine (SVM)**. You can even use existing tooling for the SVM such as the Solana CLI or Seahorse Lang.

## **Optimized Parallel Execution**

[The SVM](https://squads.so/blog/solana-svm-sealevel-virtual-machine) and its Sealevel runtime famously enable parallel transaction execution. Transactions which don’t touch overlapping state can be executed in parallel rather than sequentially.

This allows the SVM to directly scale with hardware as processors continue to add more cores at lower cost. [Single-threaded runtimes (such as today’s EVM) fundamentally do not benefit from reducing the cost per core](https://x.com/aeyakovenko/status/1686916794962079744?s=20). For over a decade now, single-threaded performance speedups have been continually diminishing. Nearly all improvements continue to come from increasing the number of cores, so it’s critical to take advantage of [this trend](https://github.com/karlrupp/microprocessor-trend-data) [by parallelizing workloads](https://www.karlrupp.net/2018/02/42-years-of-microprocessor-trend-data/):

<figure><img src="https://lh3.googleusercontent.com/2SOSpeG_ceWMt-DtuSZvnviiyKc5p8a6wQuHHjQgHaCkgvCiJ40wqU2k4UNV2PpCc-t35d9fn5xpLCXB7hefEGJY8ehRoLIhtTxRtxBQSehKytDenh5iS6Cx_D0O4W0uF_ag9_4GbyUI4tm1lGFAmH4" alt=""><figcaption></figcaption></figure>

There are some very early unproven attempts to [parallelize the EVM](https://writings.flashbots.net/speeding-up-evm-part-1), but adding this on while maintaining compatibility brings fundamental tradeoffs including suboptimal performance without addressing other bottlenecks (e.g., state growth). Contracts declaring state dependencies upfront (as in the SVM) allows for optimal parallelization.

## **Local Fee Markets**

Most fee markets today are global, meaning that one hot application increases fees for all users of the chain. [One NFT mint shouldn't render the chain useless for everything else](https://x.com/yugalabs/status/1520612362986078208?s=20). Solana's amazing work on [local fee markets](https://twitter.com/solana/status/1615571640372580352?lang=en) [solves](https://x.com/time_composer/status/1649776724777762817?s=20) this cross-app state contention. In its current implementation, the scheduler prioritizes transactions without conflicts, allowing conflict-free transactions to go through with lower fees. Longer term, local fee markets will be implemented at a protocol level. This ensures that fee spikes for a single app don't impact the rest of the chain.

<figure><img src="/files/whhBkazYercZCpqet9gF" alt=""><figcaption></figcaption></figure>

Local fee markets are possible thanks to Solana’s uniquely parallelized runtime. Trying to implement local fee markets for state hotspots in the EVM using heuristics (i.e., without declaring state access upfront) would present inefficiencies and likely attack vectors.

There's also [early research underway](https://github.com/solana-foundation/solana-improvement-documents/pull/16) that would allow applications to easily internalize the local value attributable to them, which today generally requires [more creative app-level design](https://blog.uniswap.org/uniswap-v4).

## State Growth Management

Before the EVM even bumps up against sequential execution as a bottleneck, state growth is its far more pressing bottleneck.

Because there is no global Merkle tree for state, Solana doesn't incur the overhead of updating a Merkle tree for each state update. Instead, after each epoch (\~2.5 days), the entire state is merklized. This is much [cheaper than real-time merklization](https://x.com/toghrulmaharram/status/1699466187166335176?s=20) (as in the EVM).

More importantly, the EVM has [dynamic account access](https://x.com/aeyakovenko/status/1699465524231692384?s=20) (i.e., transactions can touch any state on-demand). That dynamic state lookup means that state cannot be loaded into memory prior to execution. In the SVM, each transaction specifies all the state that’s needed for execution.

As a result, [state size doesn't impact SVM execution](https://x.com/aeyakovenko/status/1699460999697555512?s=20). The network could safely double the snapshot size every 2 years without running into major issues assuming validators upgrade their storage disks every 2 years.

Furthermore, teams like [Helius](https://www.helius.dev/) are actively improving the accessibility of historical data and reducing state size with [compression](https://docs.helius.dev/compression-and-das-api/what-is-compression-on-solana).

## MetaMask Snaps

Onboarding EVM users to non-EVM chains has historically been a major hurdle, but the recently unveiled [Metamask Snaps](https://www.coindesk.com/tech/2023/09/12/ethereum-developer-consensys-unveils-snaps-add-ons-for-metamask-browser/) are set to break down that barrier. EVM users can continue to use [MetaMask](https://snaps.metamask.io/snap/npm/solflare-wallet/solana-snap/) without needing to switch wallets. The UX is comparable to interacting with any EVM chain, thanks to [Drift](https://www.drift.trade/)'s open-source contributions building out a great MetaMask Snap implementation. Eclipse Mainnet users will be able to interact with apps natively in MetaMask or use a Solana-native wallet like [Salmon](https://salmonwallet.io/).

[Here's a sneak peek of the UX from Drift](https://x.com/DriftProtocol/status/1700135022454276414?s=20):

<figure><img src="https://lh4.googleusercontent.com/RJ7_S3i2IBlCuv0zCB8BNd0c22MsQF9VeEm744117kw_f40c65DRL5MkVVQoNLX_IkfU-UOHVagTdIQxpxSEDnaS4eJbIzyR4g-WtvK1rGbCGiUxqOsvrfYGJehLNvQwPcGISuZuDVck7i28Lb5SO4A" alt=""><figcaption></figcaption></figure>

## Firedancer

[Firedancer](https://jumpcrypto.com/firedancer/) is the highly anticipated Solana client being developed by Jump to drastically increase the network's throughput, resilience, and efficiency. At launch we will stick as closely as possible to the Solana core client, but we plan to adopt Firedancer once the code is live and stable.

## Safety

Solana's runtime has a greatly reduced attack surface area which prevents the [infamous reentrancy exploits](https://blog.chain.link/reentrancy-attacks-and-the-dao-hack/) we’ve seen far too often. Specifically, the Solana runtime only allows programs to self-recurse, rather than allowing arbitrary reentrant cross program invocations. Moreover, separating state and code results in stateless code, which is typically easier to test effectively.

## Easier Proving

The SVM is register-based and has a much smaller instruction set vs. the EVM, making SVM execution easier to prove in ZK. For optimistic rollups, the register-based design allows for easier checkpointing.\\


# Data Availability - Celestia

For background, [data availabilty](https://celestia.org/glossary/data-availability/) can be defined as the following:

Data availability answers the question, has this data been published? Specifically, a node will verify data availability when it receives a new block that is getting added to the chain. The node will attempt to download all the transaction data for the new block to verify availability. If the node can download all the transaction data, then it successfully verified data availability, proving that the block data was actually published to the network.

### Eclipse Mainnet Will Use Celestia for Data Availability

Eclipse Mainnet's target throughput and fees are unfortunately not supported by Ethereum's current bandwidth. This will remain so even after [EIP-4844](https://eips.ethereum.org/EIPS/eip-4844) (a.k.a. "Proto-danksharding"), which provides an average of \~0.375 MB [blobspace](https://domothy.com/blobspace/) per block (with a limit of \~0.75 MB per block).&#x20;

* For ERC-20 transfers with basic compression ([\~154 bytes per transaction](https://twitter.com/vitalikbuterin/status/1554983955182809088)), this translates to \~213 TPS across all rollups combined.&#x20;
* For swaps with compression [(\~400 bytes per transaction)](https://x.com/gluk64/status/1693716324042621241?s=20), this translates to \~82 TPS across all rollups combined.

In comparison, Celestia will launch with 2 MB blocks later this year. Blobspace is expected to increase to 8 MB shortly after launch, once enough [data availability sampling (DAS)](https://celestia.org/glossary/data-availability-sampling/) light nodes come online and the network proves stable. DAS light nodes serve two critical functions:

* Enable users to verify for themselves that Eclipse block data has been made available&#x20;
* Contribute to securely scaling the entire network, as DA layers can safely increase their throughput as more DAS light nodes come online

Celestia is expected to be the first DA layer to launch with DAS in production. This contrasts with traditional Data Availability Committees (DACs), which reintroduce committee [honesty assumptions without user verification](https://x.com/donnoh_eth/status/1699911540051173858?s=20) (akin to existing monolithic blockchains).

There's an [inherent security assumption](https://x.com/sreeramkannan/status/1517420373163323392?s=20) for users who bridge their funds from Ethereum Mainnet to any chain that uses offchain DA. In particular, it is technically possible for Celestia validators to withhold transaction data but claim to the Ethereum bridge that the data is available. In practice, Celestia's proof-of-stake consensus means data withholding on Celestia itself is slashable, making this risk unrealistic in our view.

Overall, Celestia's DAS light node support from day one, crypto-economic security properties, and highly scalable DA throughput make it the clear choice for Eclipse Mainnet today.

Note that [some view onchain Ethereum DA as a requirement to be a true "L2" here](https://x.com/dankrad/status/1689634128101310464?s=20) for the reasons described above. We're going by the more common L2 terminology cited earlier, and we want to be clear on the security considerations.&#x20;

We also intend to monitor Ethereum's progress on DA scaling after EIP-4844. [Exciting new research continues to come out](https://x.com/dannyryan/status/1698733448175727072?s=20), potentially offering high throughput DA sooner than previous ideas (which use more advanced distributed hash tables). If Ethereum offers greater scale for Eclipse to the benefit of our users, we would assess the possibility of migrating to Ethereum DA.


# Proving - RISC Zero

## Introduction to SVM Fraud Proofs and State Serialization

Our proving strategy draws inspiration from Anatoly's SVM fraud proofs SIMD and builds upon John Adler's insight regarding the costly nature of state serialization. Adler identified that it's feasible to bypass this expense, a concept integral to our approach.

## Avoiding Merkle Trees in SVM

In our initial experiments with the SVM, we integrated a Sparse Merkle Tree. However, updating the Merkle tree after each transaction led to significant performance setbacks. To enhance efficiency, we decided against reintroducing a Merkle tree into the SVM. This decision moves us away from traditional generalist rollup frameworks like the OP Stack and necessitates a more innovative fault proof architecture.

## Fault Proof Requirements

Fault proof in our framework requires:

1. **Commitment to Transaction Inputs**: Ensuring all inputs for a transaction are committed before execution.
2. **Transaction Execution**: The transaction itself, as executed.
3. **Output Verification**: Proof that re-executing the transaction yields a different outcome than what was recorded on the blockchain.

Instead of using a Merkle root for input commitments, our executor will post a detailed list of inputs and outputs for each transaction. This includes account hashes and relevant global state details, along with indices tracking the origin of each input. Transactions are recorded on Celestia, allowing any full node to verify the inputs and outputs by referencing their own state data to ensure the commitment on Ethereum is accurate.

## Identifying and Addressing Major Faults

There are two primary types of faults we anticipate:

1. **Incorrect Outputs**: If incorrect outputs are detected, the verifier will submit a Zero-Knowledge (ZK) proof directly on the blockchain, demonstrating the correct outputs. We utilize RISC Zero to generate these ZK proofs based on SVM execution, extending our previous efforts in proving BPF bytecode execution. This approach enables our settlement contract to verify correctness without executing the transactions on-chain.
2. **Incorrect Inputs**: In cases where the inputs are misrepresented, the verifier will reference historical data on-chain to prove the discrepancy. Utilizing Celestia's Quantum Gravity Bridge, our settlement contract can then verify that this historical data substantiates a fraud claim.

## Methodology

This methodology enhances the security and efficiency of SVM rollups by eliminating the need for expensive state serialization and reducing the dependency on traditional rollup frameworks. Our approach ensures that even without running transactions directly on the blockchain, the integrity and correctness of each transaction can be effectively verified, fostering a robust and scalable rollup solution.


# Why Eclipse, Why Ethereum, Why Now

## Introduction to Rollup Technologies and Their Impact on Ethereum

Rollups have significantly advanced the state of research within the cryptocurrency industry, providing Ethereum users with cost-efficient alternatives compared to Layer 1 solutions. However, these technologies have yet to fully leverage the latest advancements necessary for mass adoption.

## Evolution and Limitations of Early Rollups

Initially, early rollups focused primarily on EVM compatibility and optimizing Zero-Knowledge (ZK) proofs. While effective at the outset, these early solutions now lag behind due to recent technological developments, including:

* **High-performance, Parallelized Virtual Machines**: Such as SVM.
* **Data Availability Scaling**: Supported by DAS light node technologies like Celestia.
* **Advancements in Proof Infrastructure**: Making practical applications widespread, as seen with RISC Zero.
* **Increased Code and User Portability**: With tools like Neon, Solang, and user portability solutions such as MetaMask Snaps.

## Strategic Insights from Eclipse

Eclipse has capitalized on historical insights, identifying and integrating the most effective technological solutions to scale efficiently and sustainably. Despite discussions around the potential for a million app-specific rollups, practical applications for such extensive customization are limited. Most new rollups are merely standard EVM forks, which do not sufficiently address the fragmentation of user experience across multiple chains.

## The Vision of Unified Chains

The infrastructure necessary to support numerous application-specific chains with a competitive user experience is likely several years away. Current initiatives like Optimism's Superchain, zkSync's Hyperchains, and Arbitrum's Orbit chains aim to enhance user experience within their ecosystems but fall short of competing with a unified shared state or addressing cross-ecosystem interoperability.

## Solana's Influence and the Misconceptions of Compatibility

Eclipse appreciates Solana's straightforward approach—a single, optimized shared state machine designed to handle the majority of significant use cases. This model, often perceived as incompatible with a rollup-centric roadmap, aligns well with Eclipse's goals to synthesize the best attributes of both strategies.

## Current Rollups and the Need for Innovation

Current rollups often rely on a basic, single-threaded EVM to capitalize on early network effects, which proves inadequate for specific applications like high-demand NFT mints that can disrupt pricing across an entire chain. Instead of creating separate chains for each application, Eclipse advocates for using a parallelized VM with localized fee markets, exemplified by the SVM.

## The Future of Eclipse Mainnet

Eclipse Mainnet merges Solana's performance with the security, verifiability, and network effects of a rollup-centric approach, embodying Ethereum's ethos of thriving on innovation. This integration allows Layer 2 solutions to utilize Ethereum's network benefits while exploring innovative execution environments. Eclipse Mainnet is positioned as a comprehensive solution, ready to adopt future advancements and maintain its status as a competitive Ethereum Layer 2 platform.


---

[Next Page](/llms-full.txt/1)